Setting Up Your FHIR Server
You get a free FHIR sandbox as part of this challenge. Here’s how to set it up.
Create your account
Head over to app.medblocks.com and create an account. You can use the same email you used to sign up for the challenge. Once you sign up, you’ll get an email verification. Click the link in your inbox to continue. After verifying, you’ll be asked for an organisation name. This can be your own name, or your organisation’s name if you have one.
Load patient data
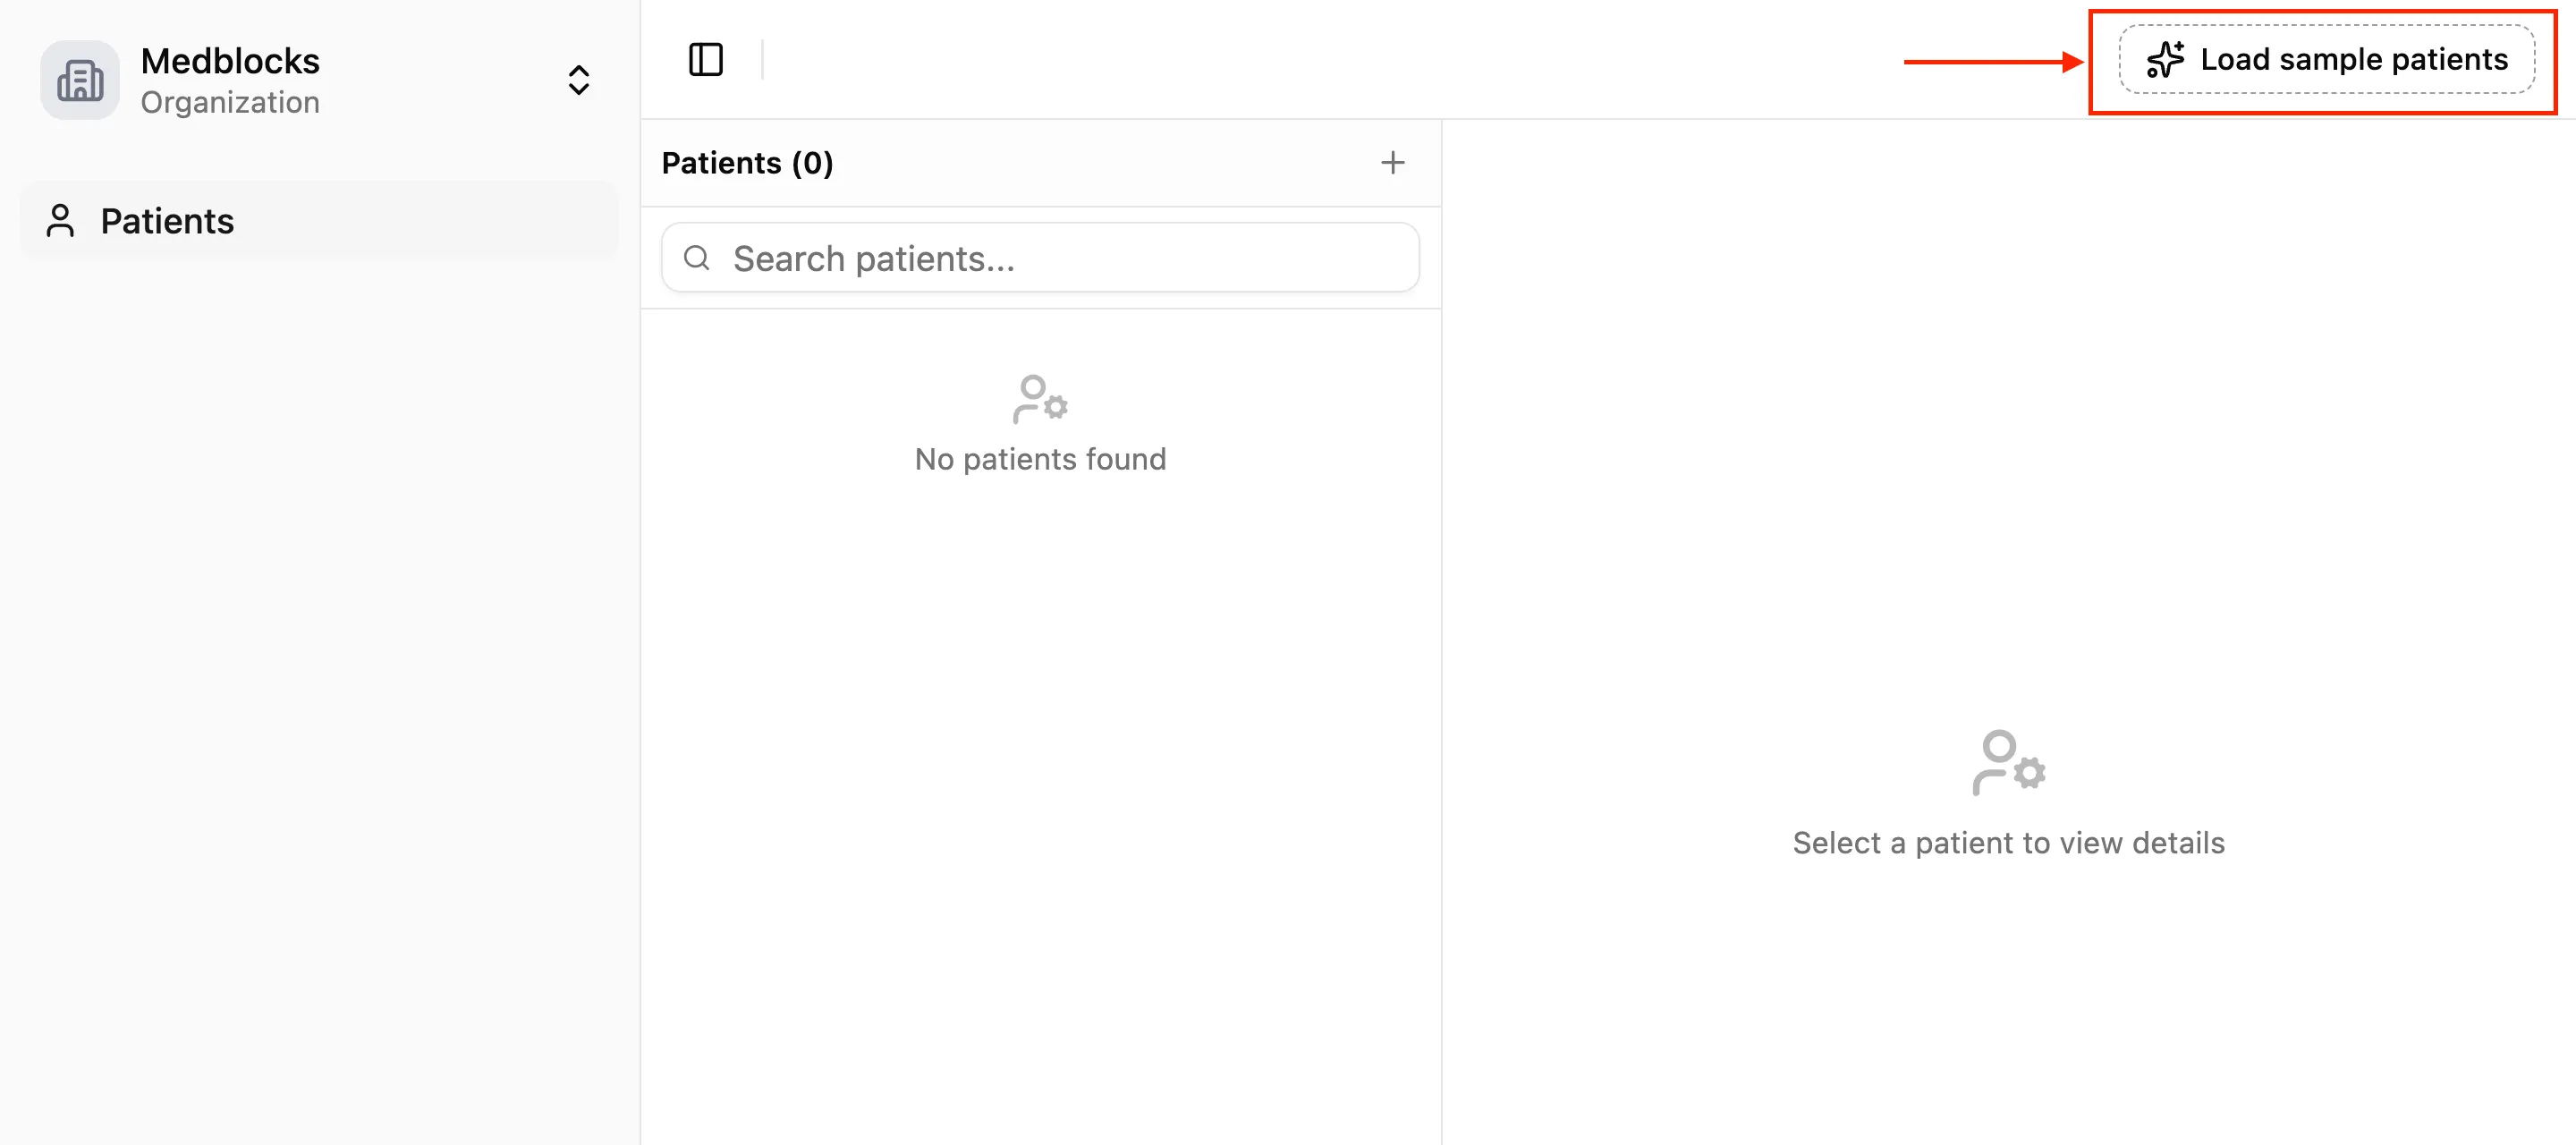
Once your account is set up, your server will be empty. Click on “Load sample patients” to populate it with 10 realistic patients you can work with right away.
Get your FHIR URL and bearer token
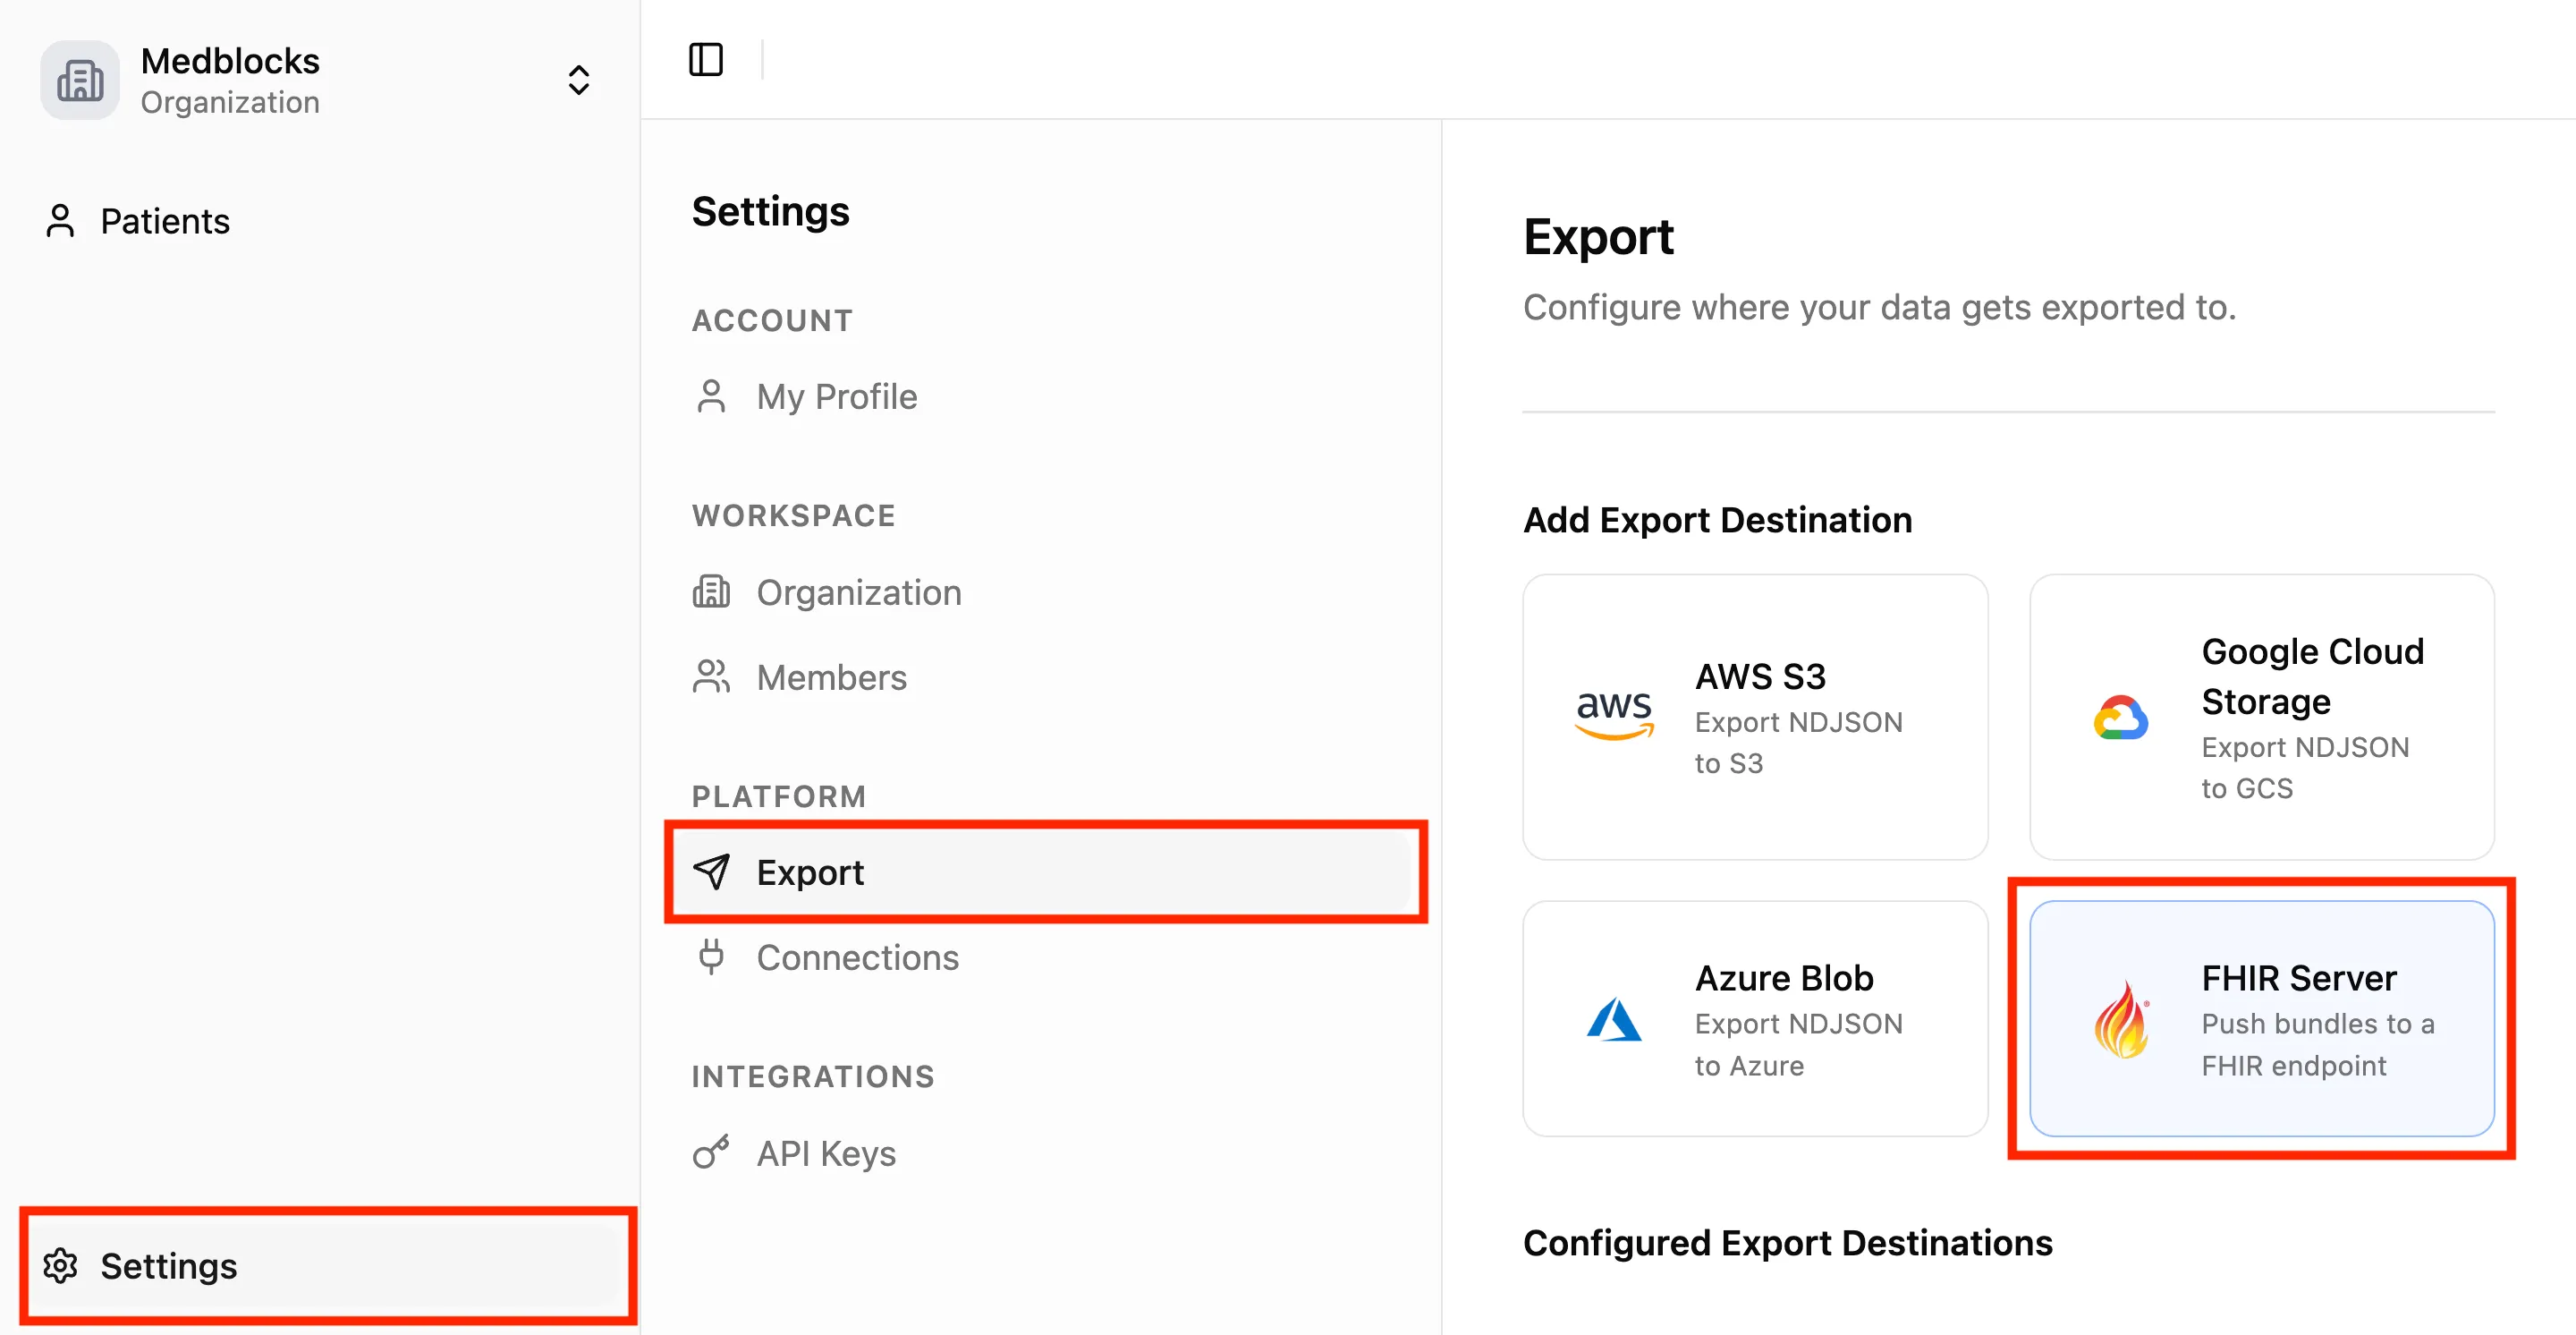
In the Settings (bottom-left), under the section Platform, you will find options for Export. Select the FHIR server option.
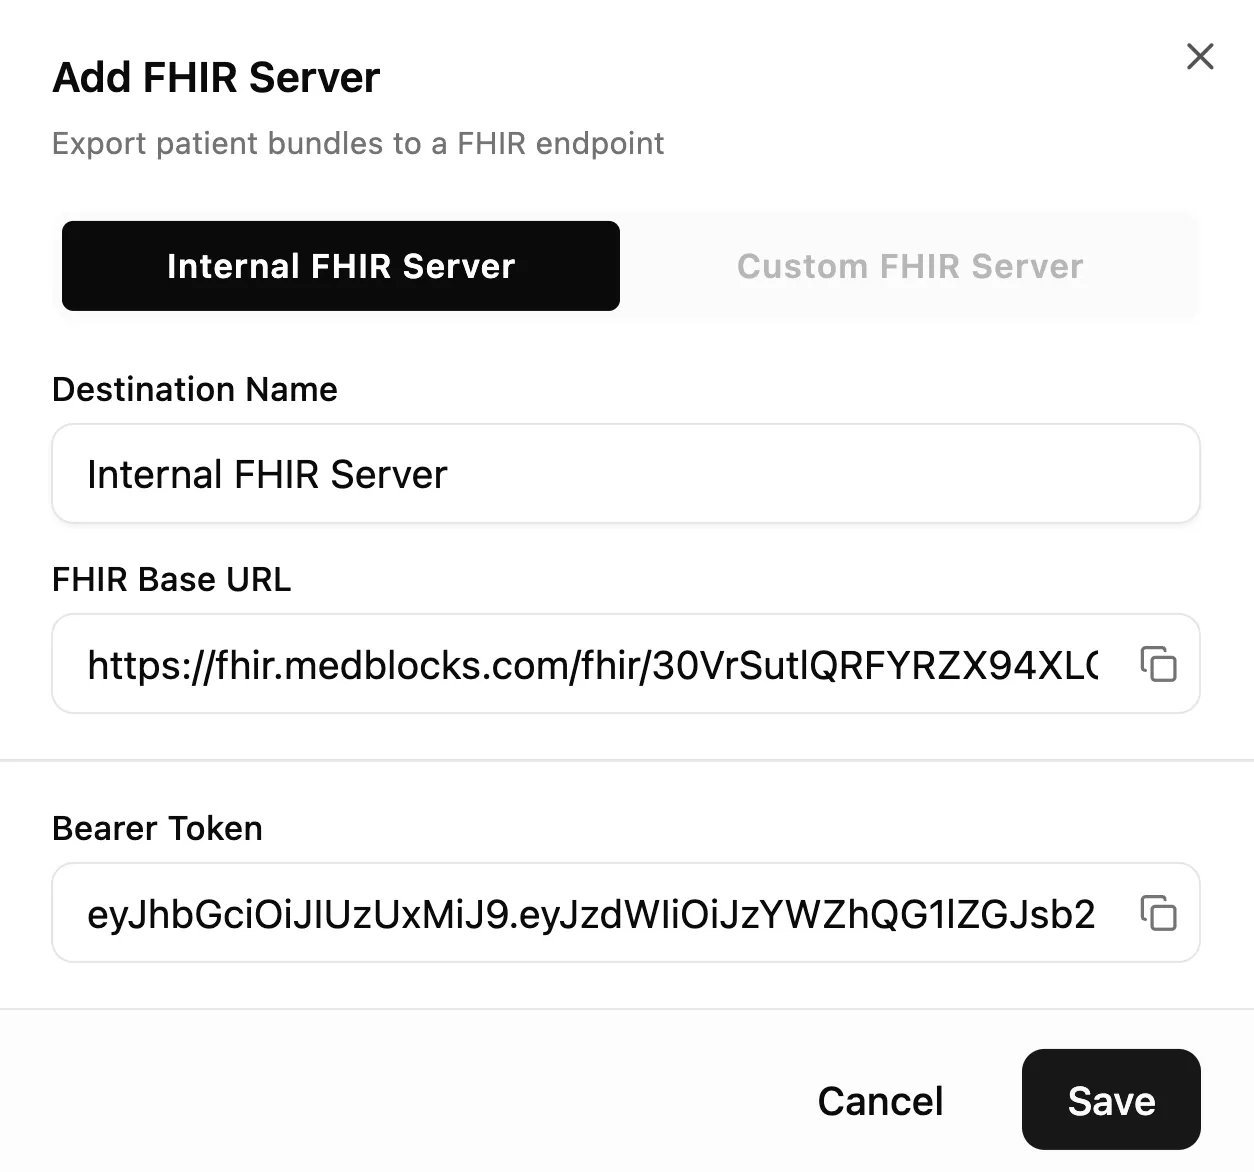
By default, it will select the internal FHIR server. This server is specific to you. Copy the FHIR base URL and the bearer token. This is what your app will use to connect to the server.
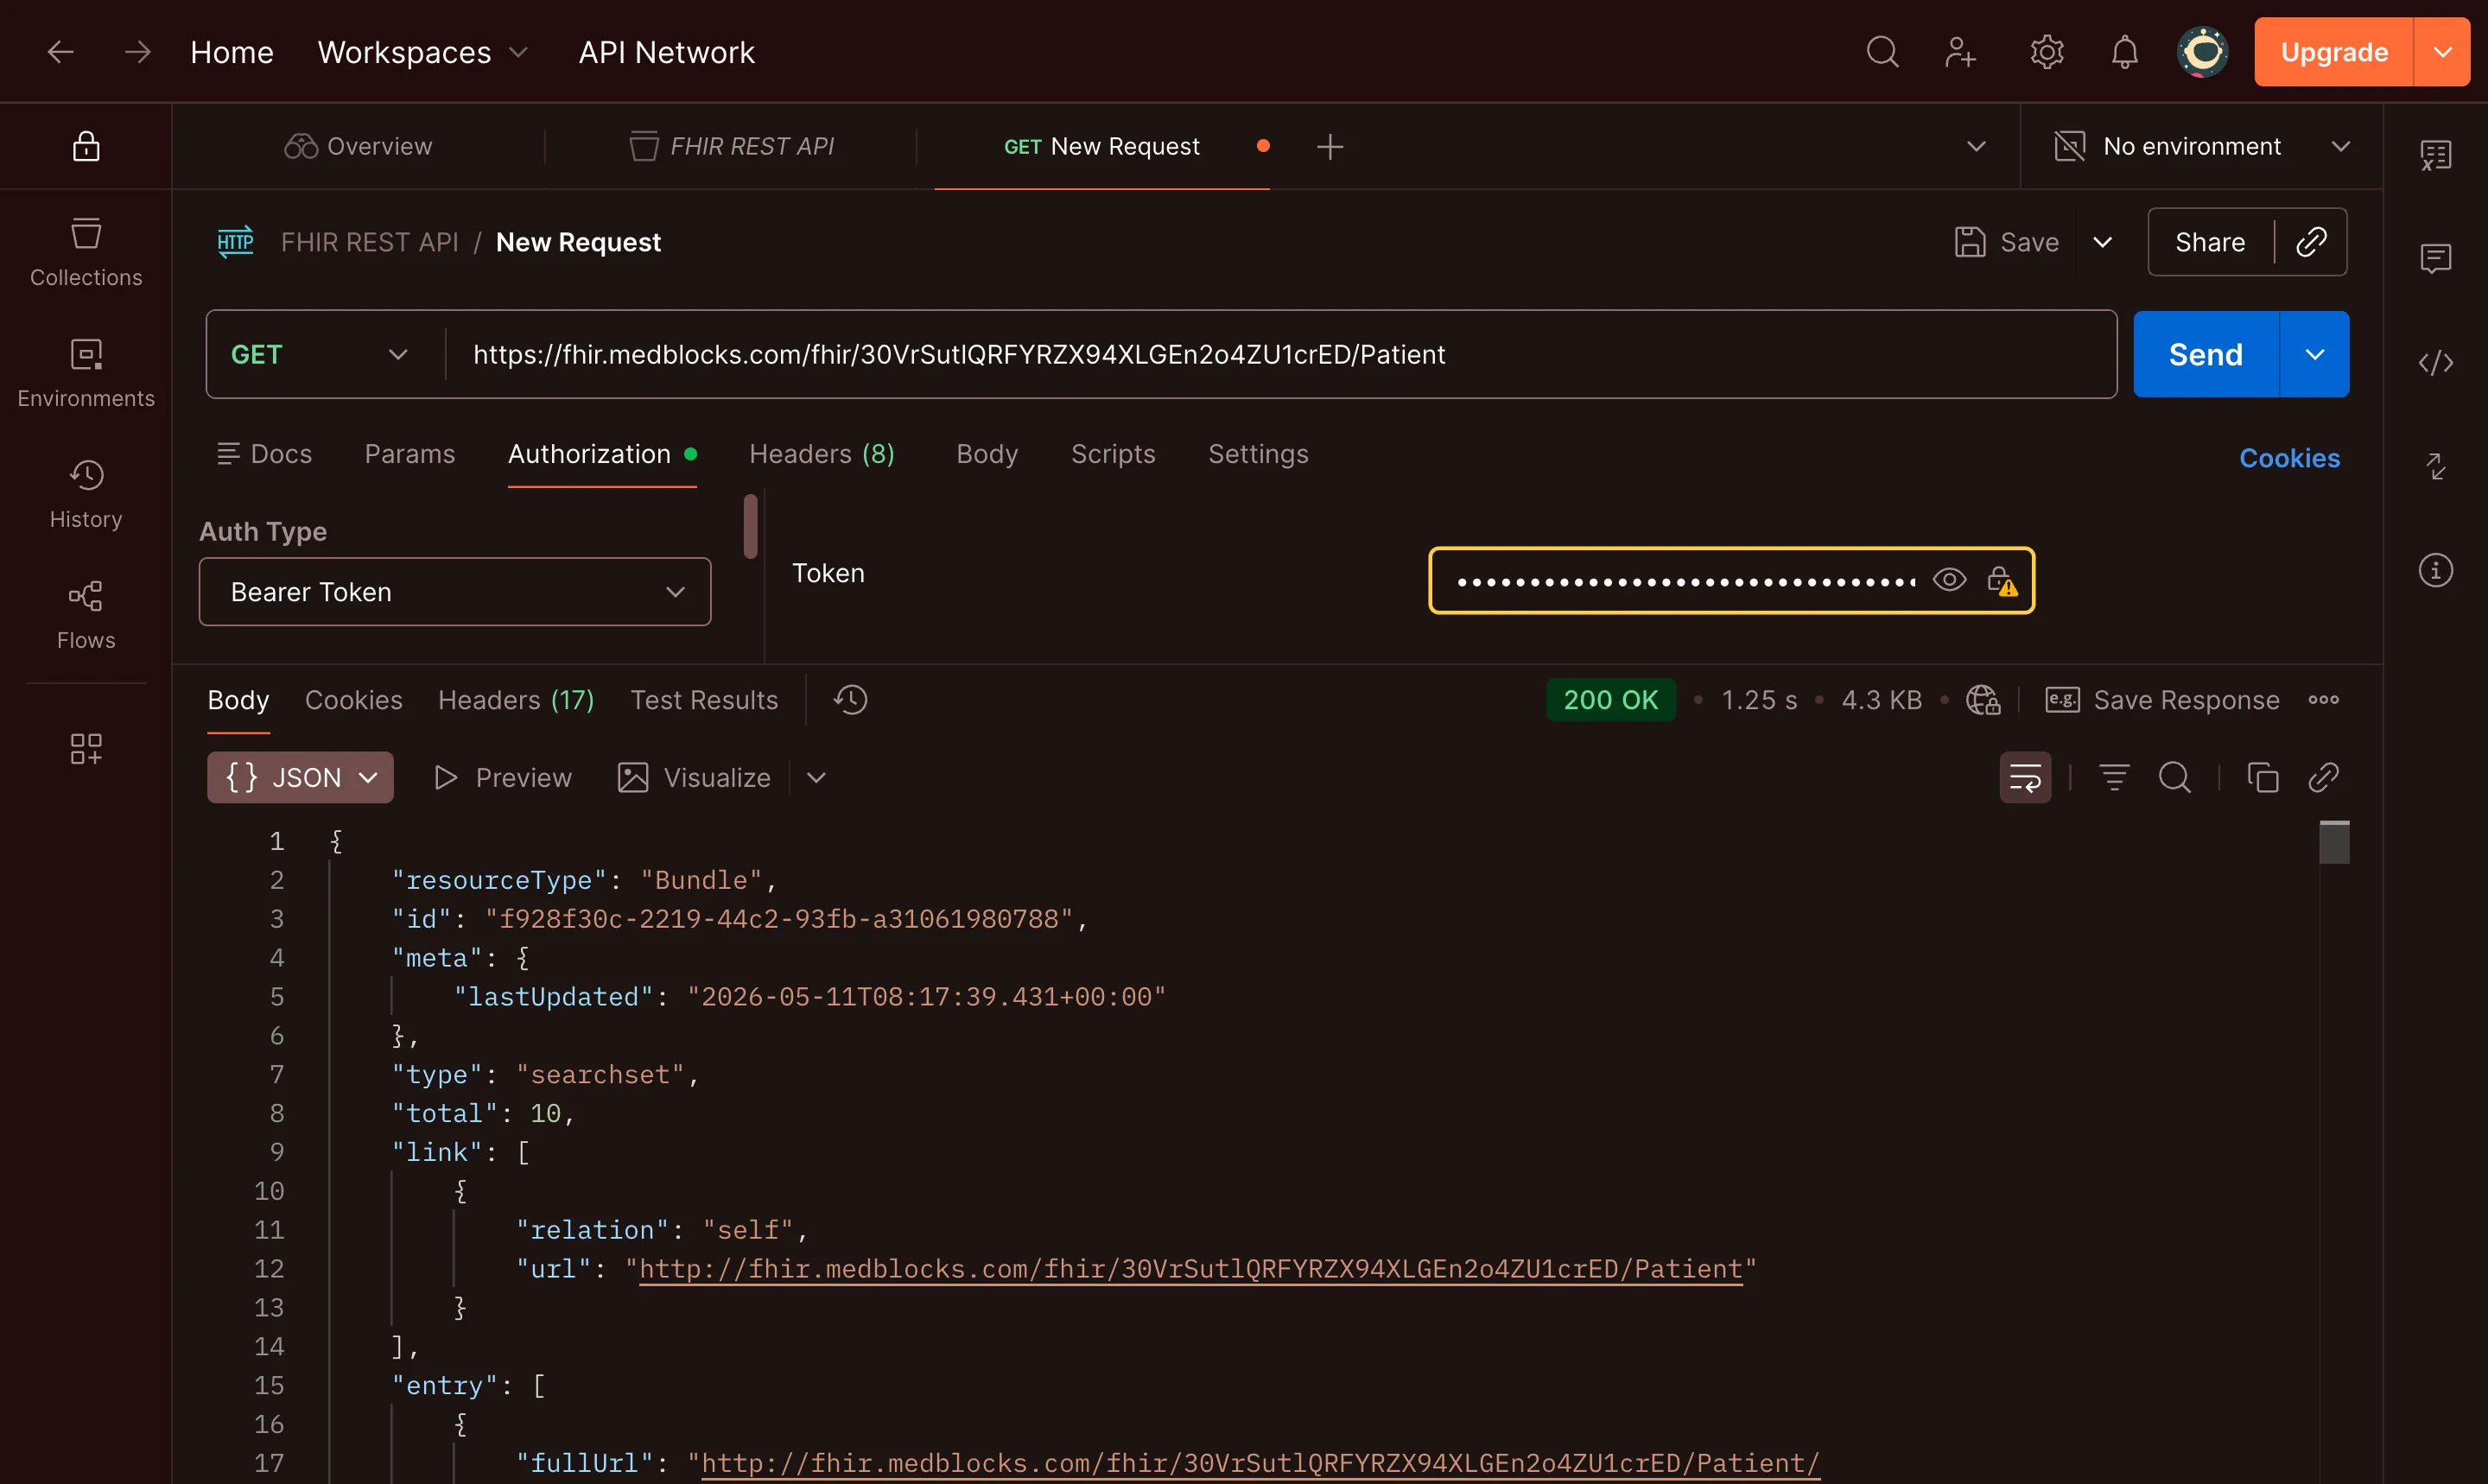
To verify everything is working, you can paste the base URL into Postman, add /Patient to the end, set the authorization type to Bearer Token, paste your token, and send the request. You should see your patients come back in the response.
You’re ready to build
You now have everything you need to start building the app. In the next lesson, we’ll look at how to connect to a real EHR, by importing your own Epic MyChart data into your workspace.