EPIC Integration Guide
Epic’s globally recognized EHR system facilitates coordinated care delivery and improved patient outcomes across diverse healthcare settings, thanks to its comprehensive capabilities and seamless interoperability. Integrate with Epic to enhance healthcare delivery.
This is a step-by-step guide to registering a patient-facing FHIR app on Epic’s open platform and taking it all the way to production. If you’ve selected USCDI v3 for automatic client distribution, Epic will push your app to all qualifying customer organizations automatically. But there are still a few steps you need to get right.
Setup Guide
Prerequisites
If you’re serious about serving US patients and customers, having a US company will help
with onboarding across the board. Stripe Atlas and StartFleet can get you a registered US entity with a real address in minutes.
For a US phone number, Tello gives you a virtual SIM with a real number. Grab a domain on Namecheap and set up a business email with Google Workspace.
Since you’ll be serving US customers, you’ll need US infrastructure anyway. Set up a VM in a US
cloud region, install Tailscale, and use it as your exit node. This gives you a clean, stable US IP for development and testing much more reliable than a VPN, which often gets blacklisted.
Step 1: Create an Account on Epic on FHIR
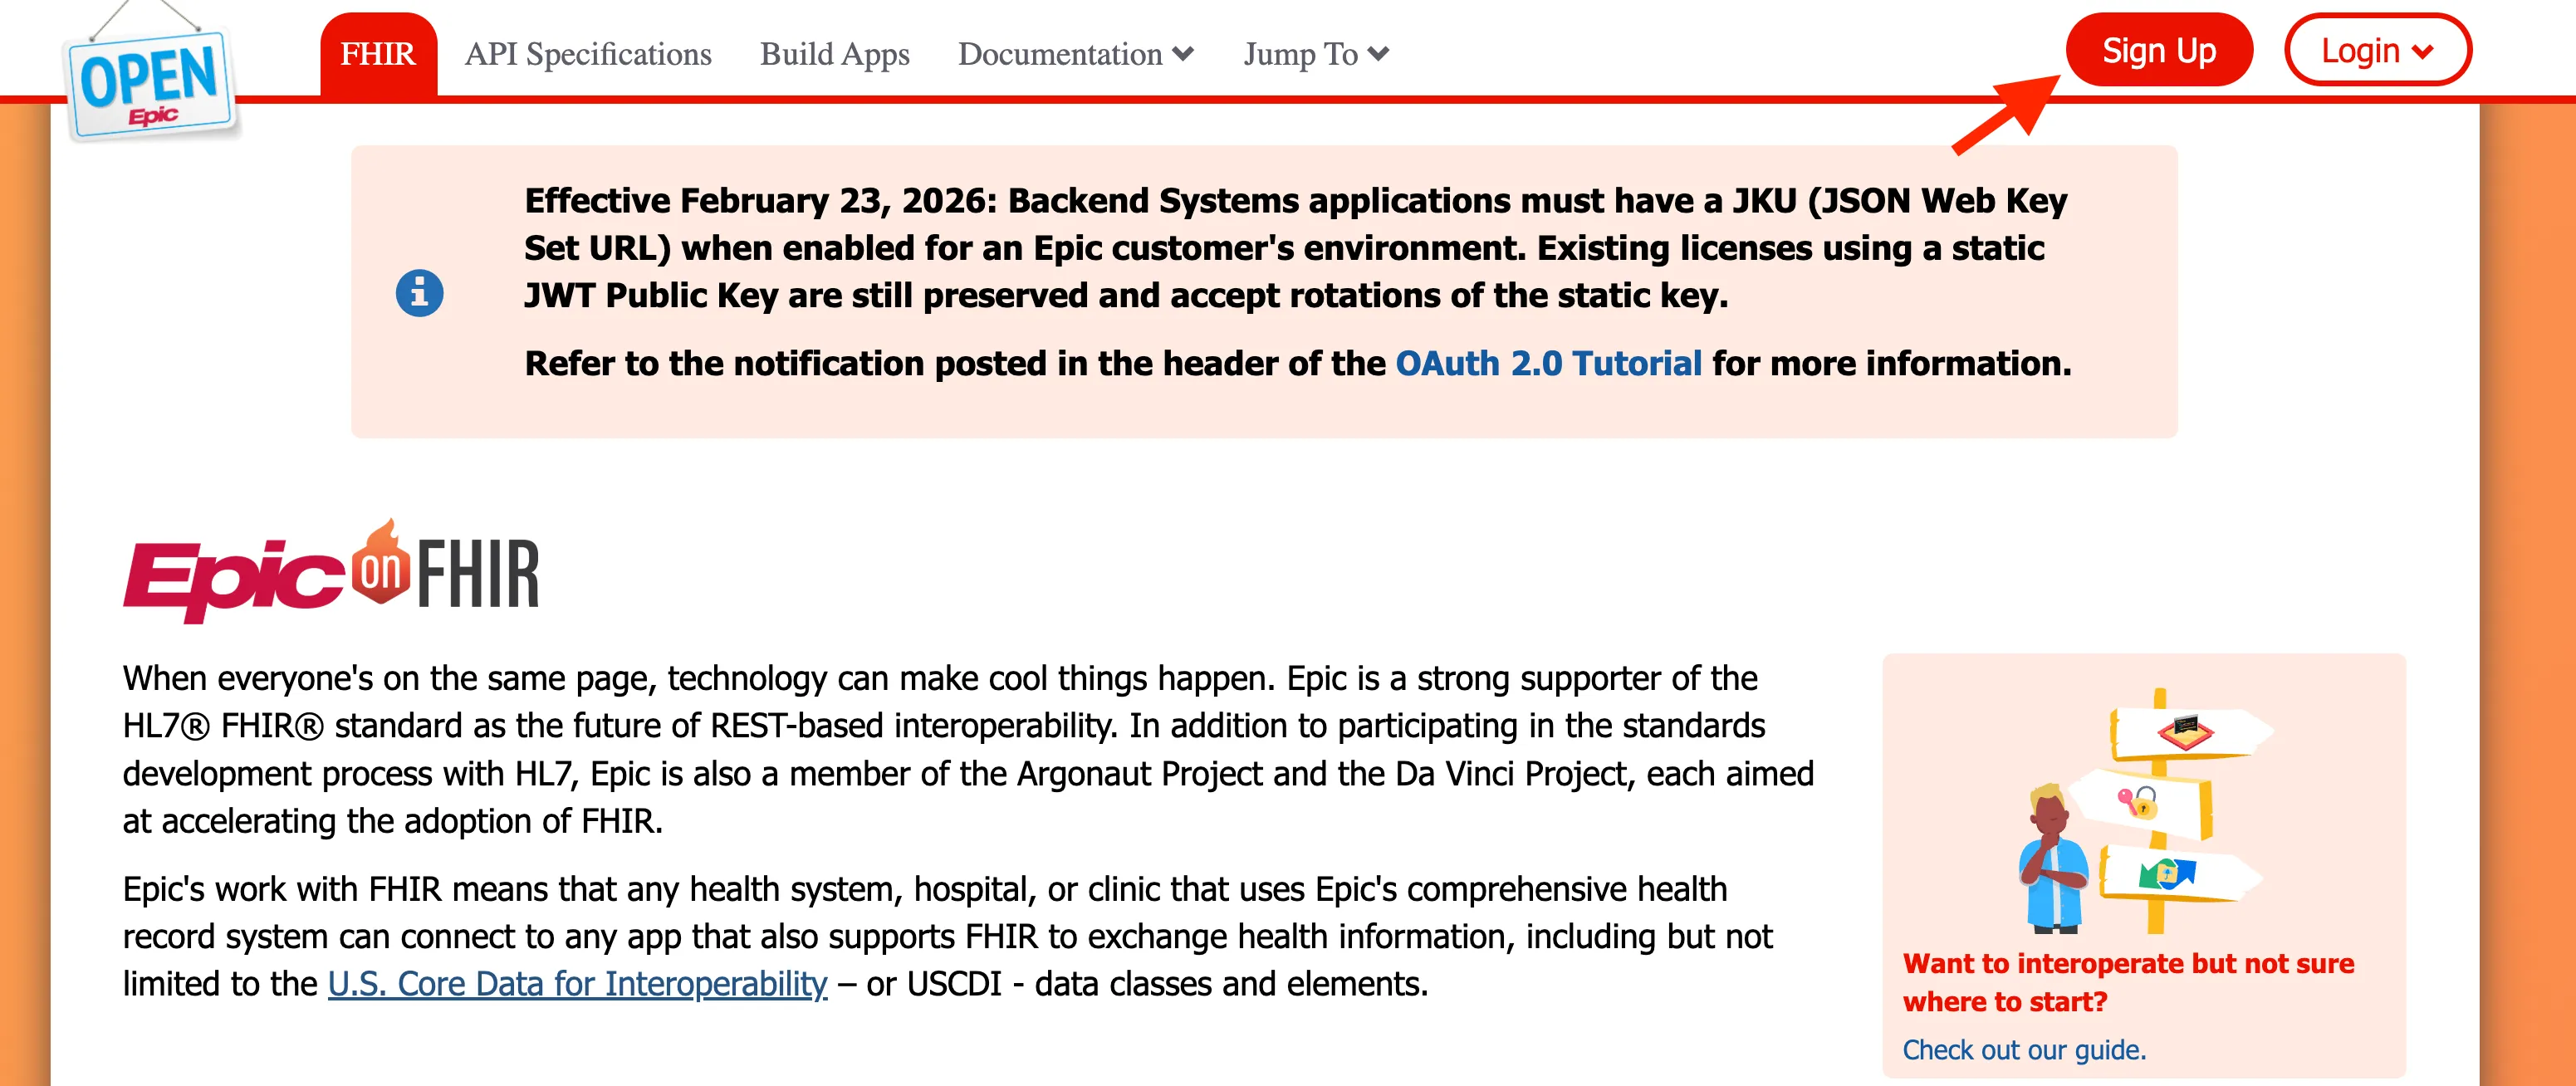
- Go to the Epic on FHIR website and click Sign Up in the top right corner.
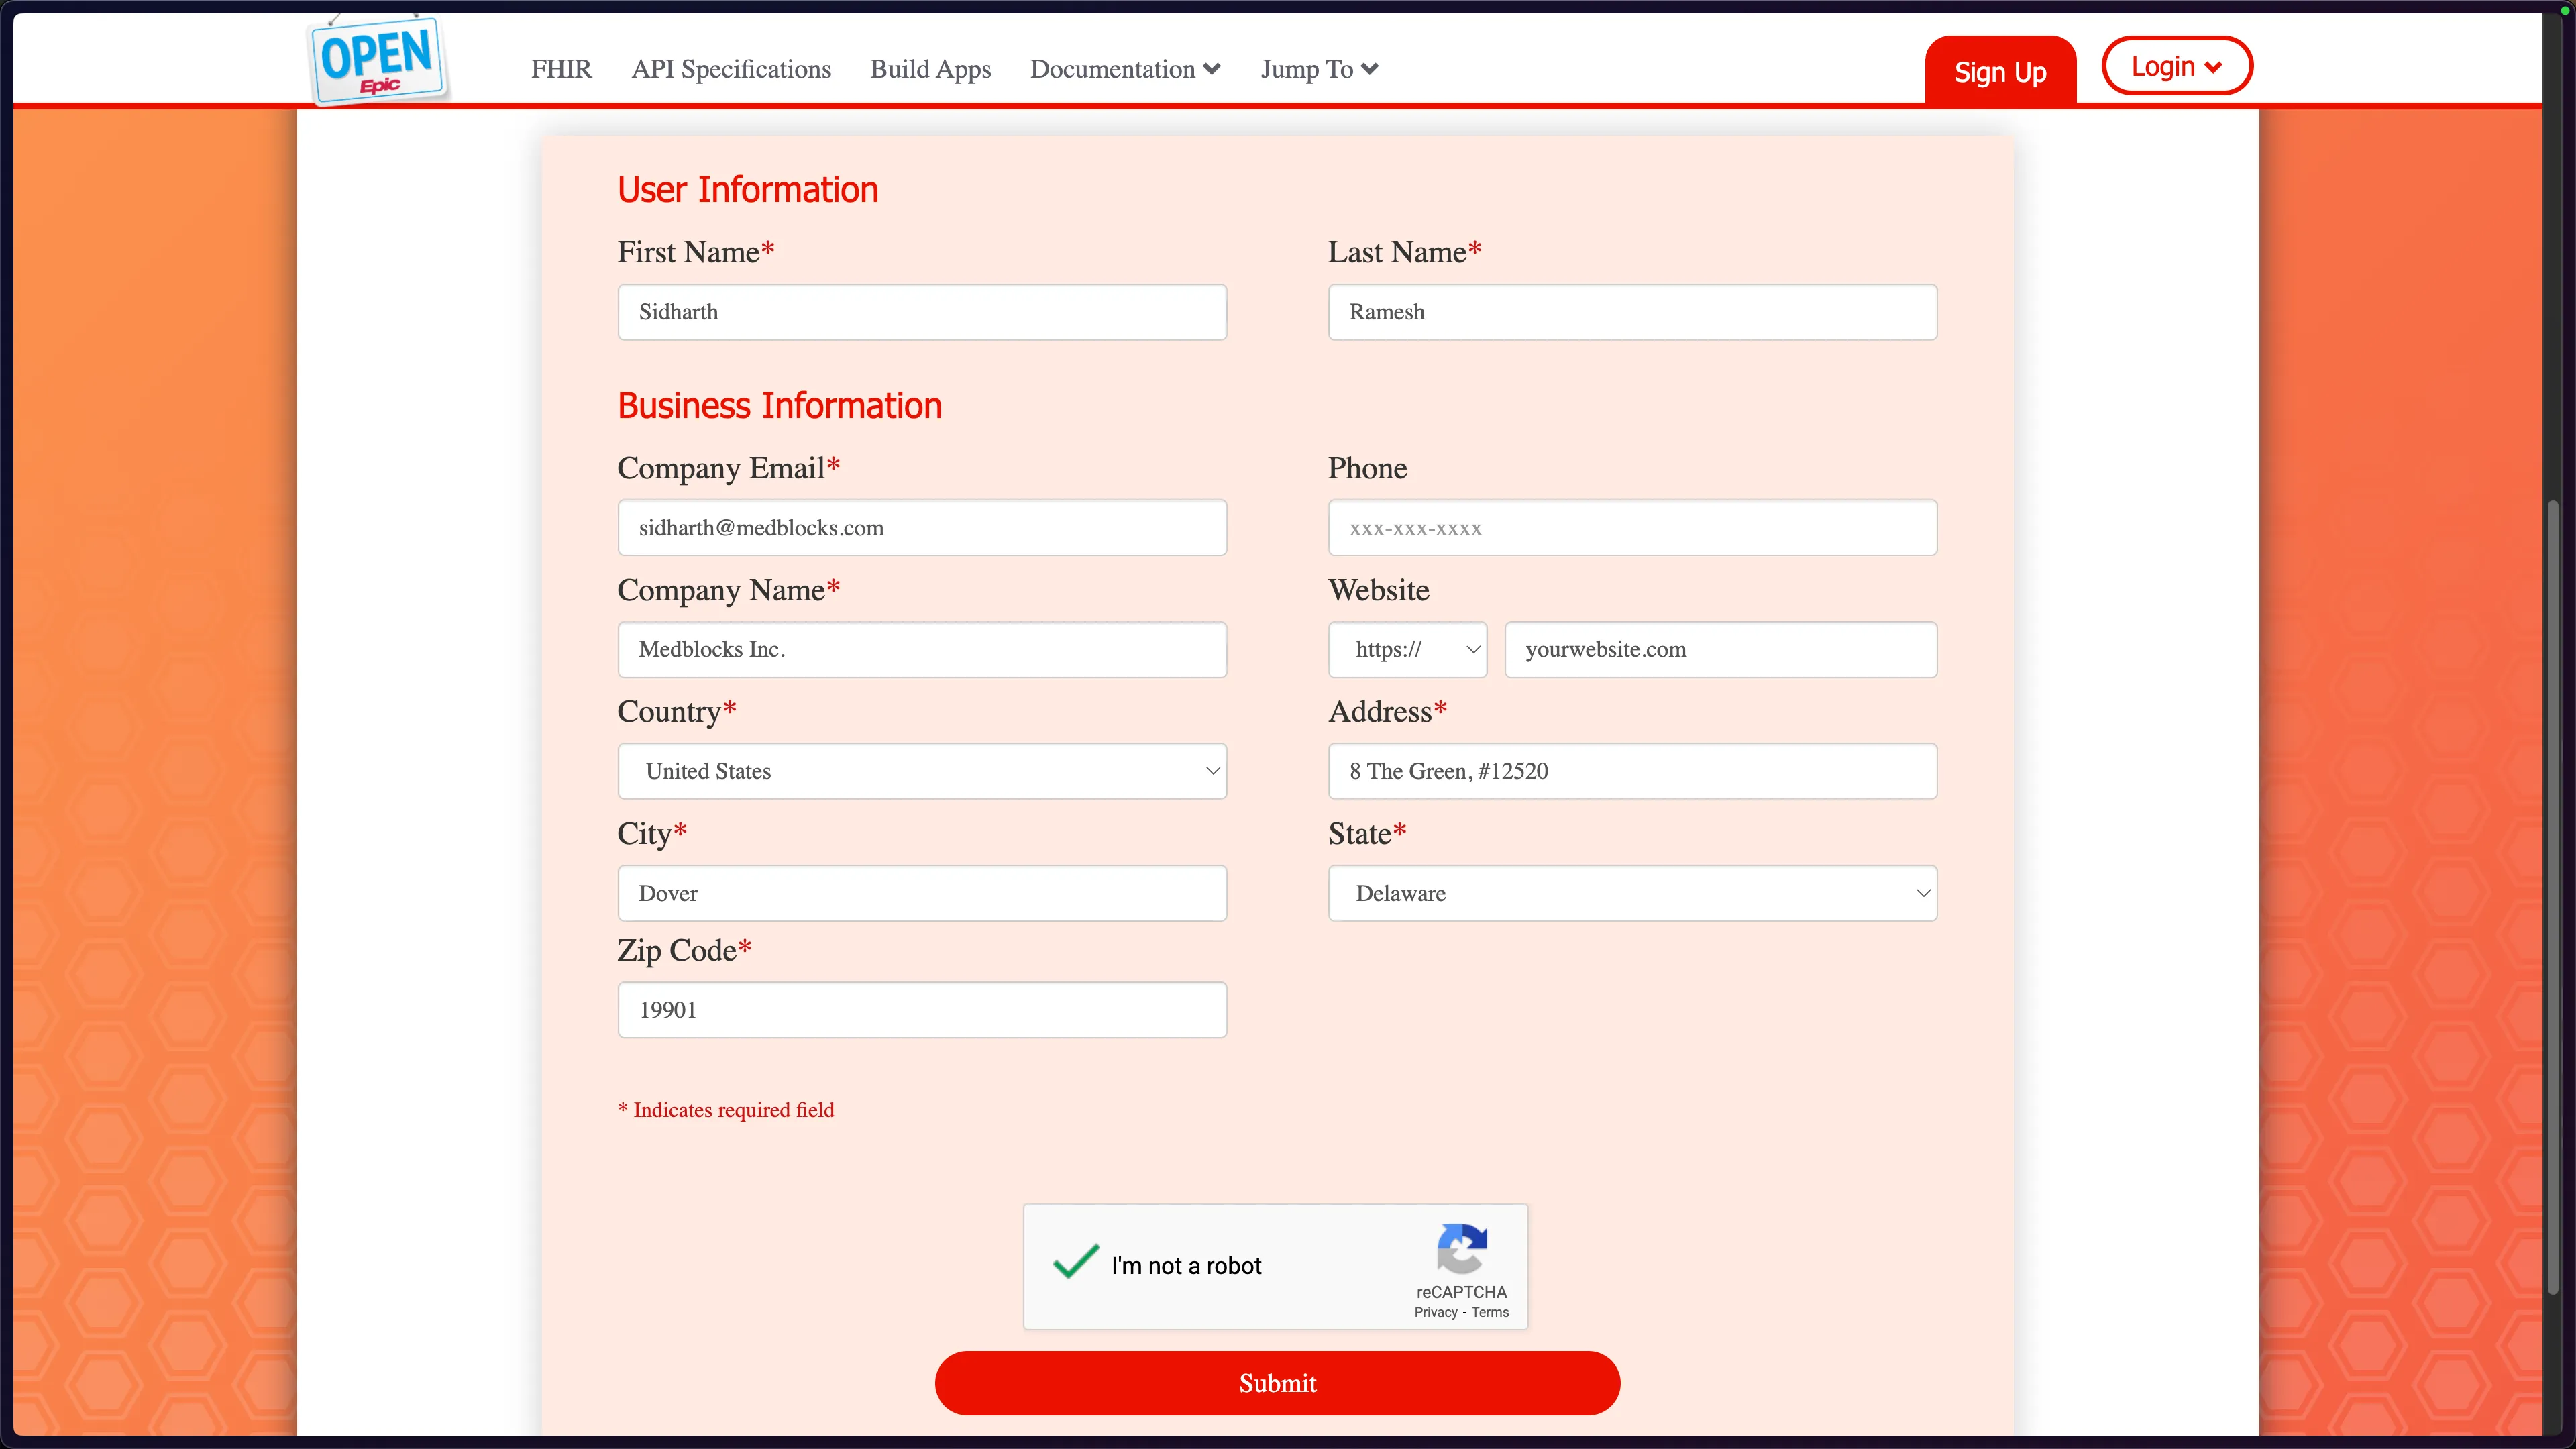
- Fill out the registration form with your user and business information. You’ll need your company name, email, address, and website. Hit Submit when done.
- Once your account is approved, sign in with your credentials.

Step 2: Create your Application
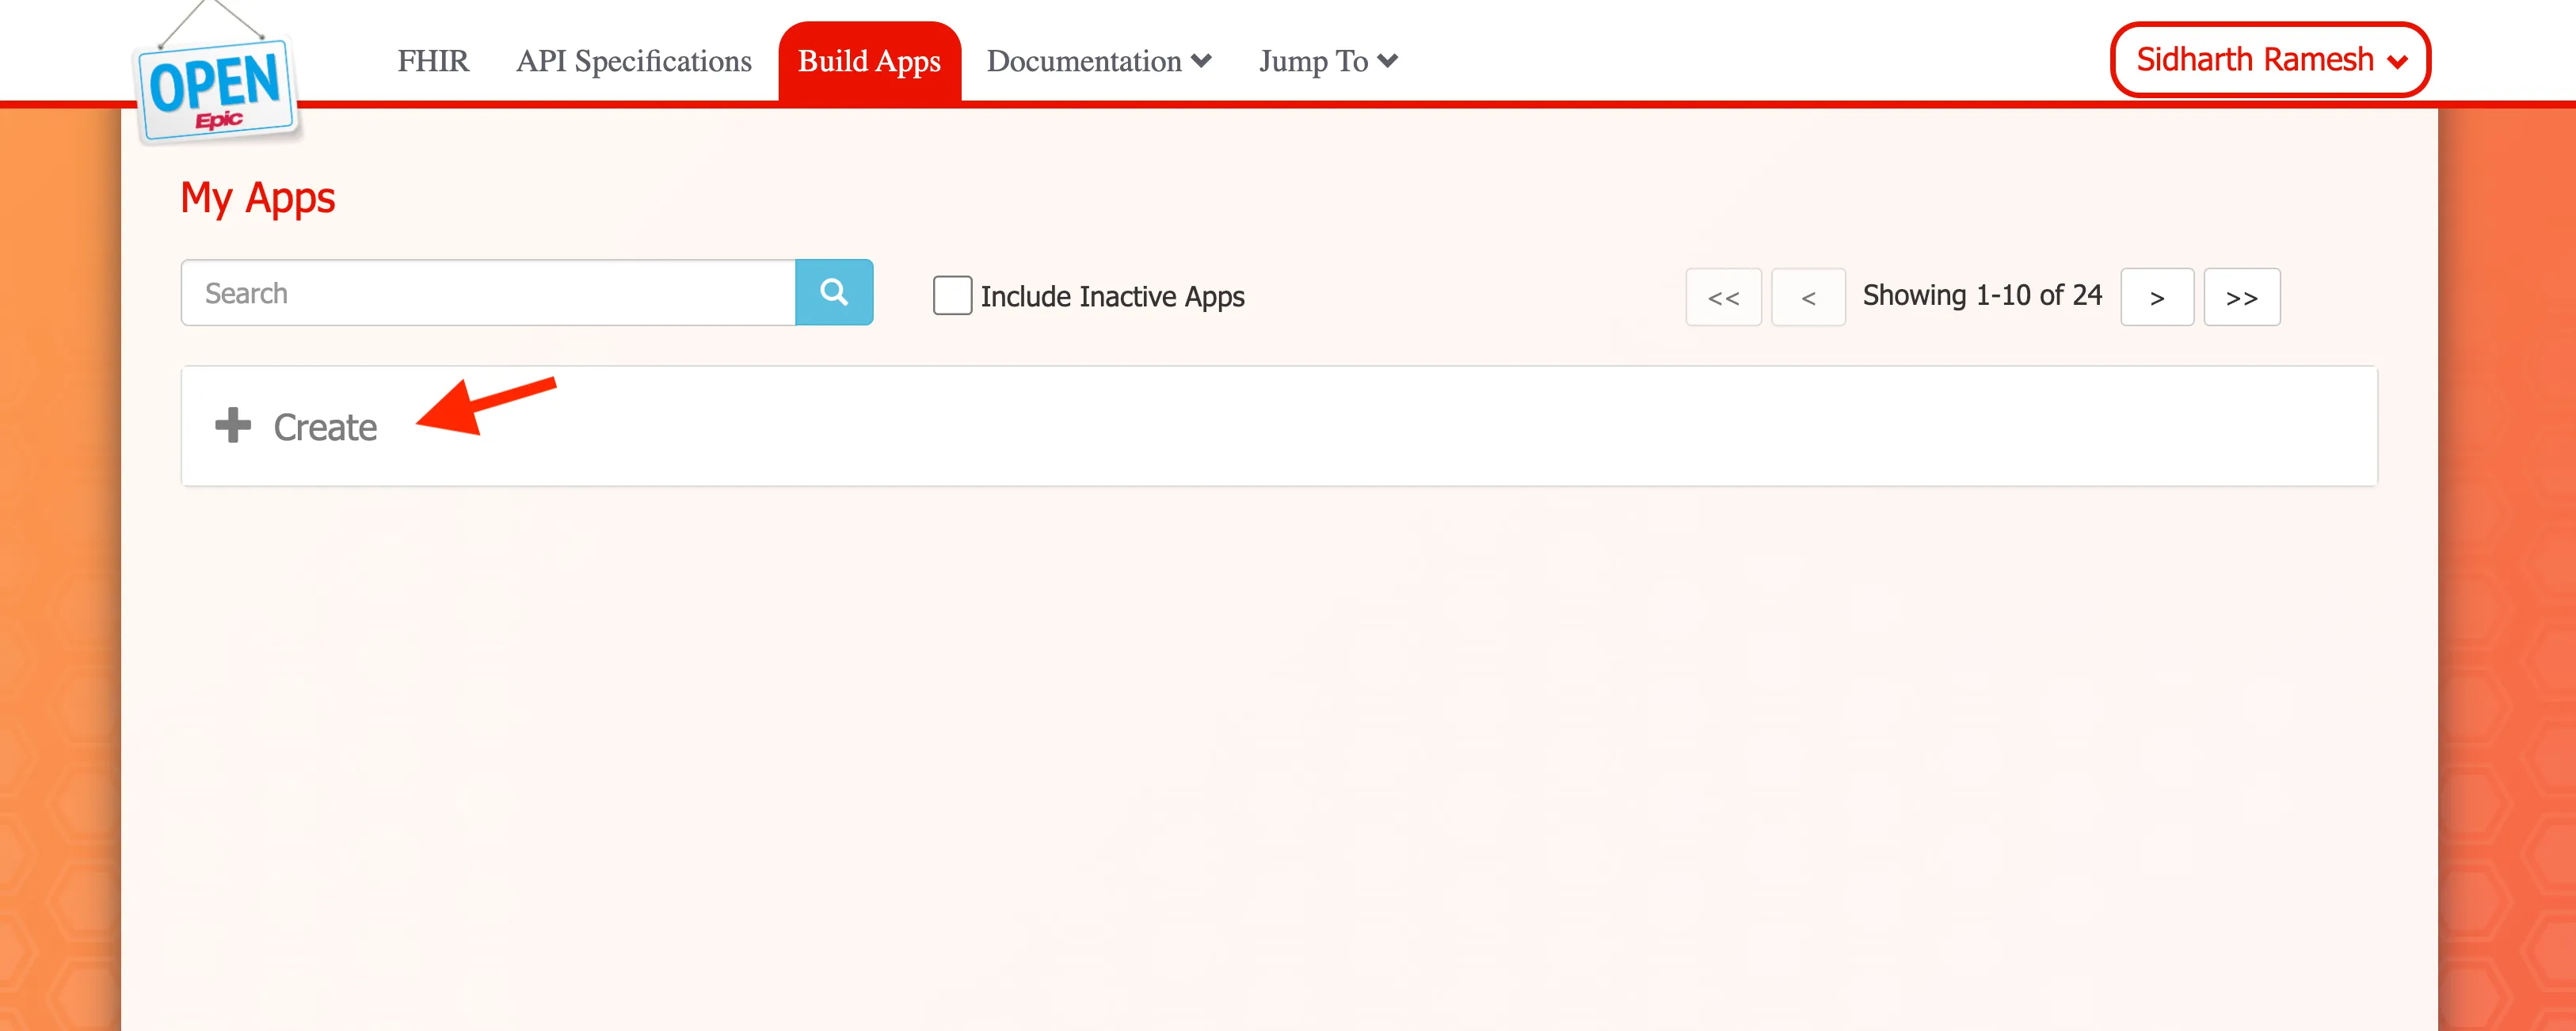
- Navigate to Build Apps in the top navigation. You’ll land on the “My Apps” page.
- Click ”+ Create” to create a new app.
- Fill you application details
- Give your app a name. E.g. Medblocks Platform
- set your “Application Audience” to Patients.
- set “Automatic Client Distribution” to USCDI v3 — it means your app will be automatically pushed to all qualifying Epic customers once you mark it ready for production.

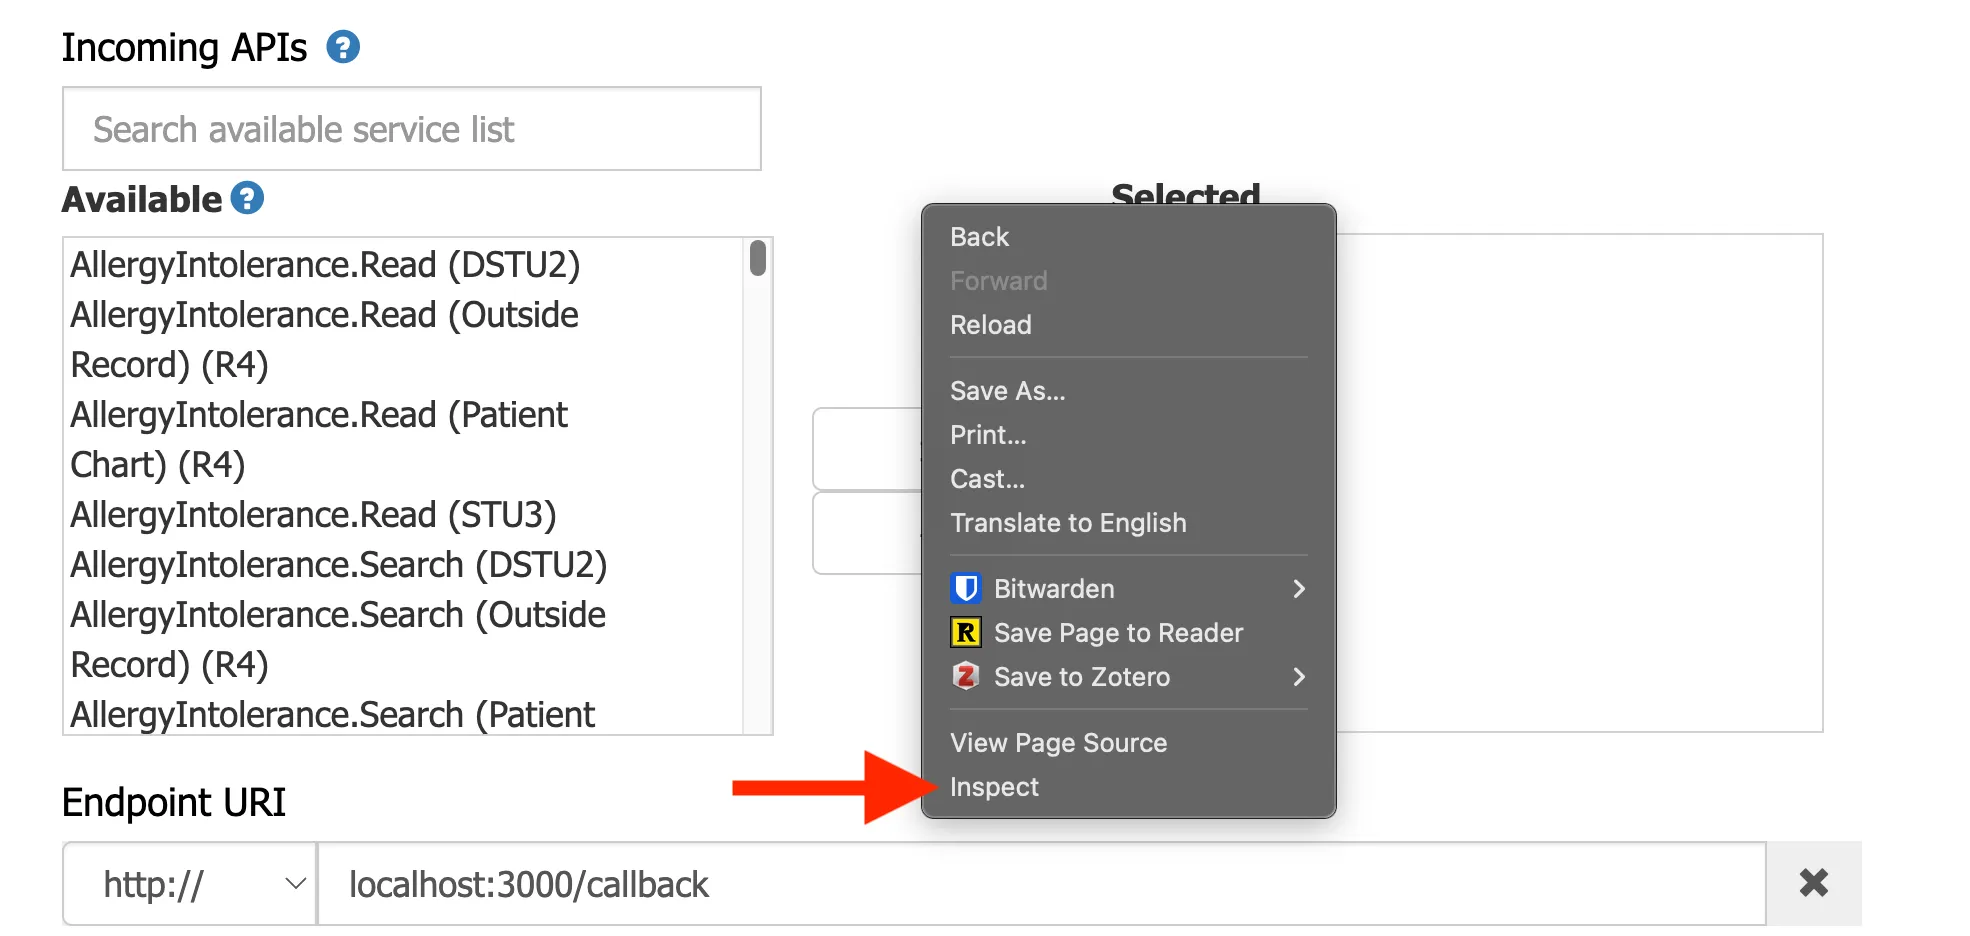
Step 3: Configure Endpoint URIs
- Add your redirect/callback URIs. You’ll typically want at least three:
http://localhost:3000/callbackfor local development- Similarly, you can set another URI for your production application.
- If you are using Medblocks platform use,
https://app.medblocks.com/api/auth/smart/callbackfor production
- Click Add Another URI if you need more.

Step 4: Setup Authentication
- Check the following options:
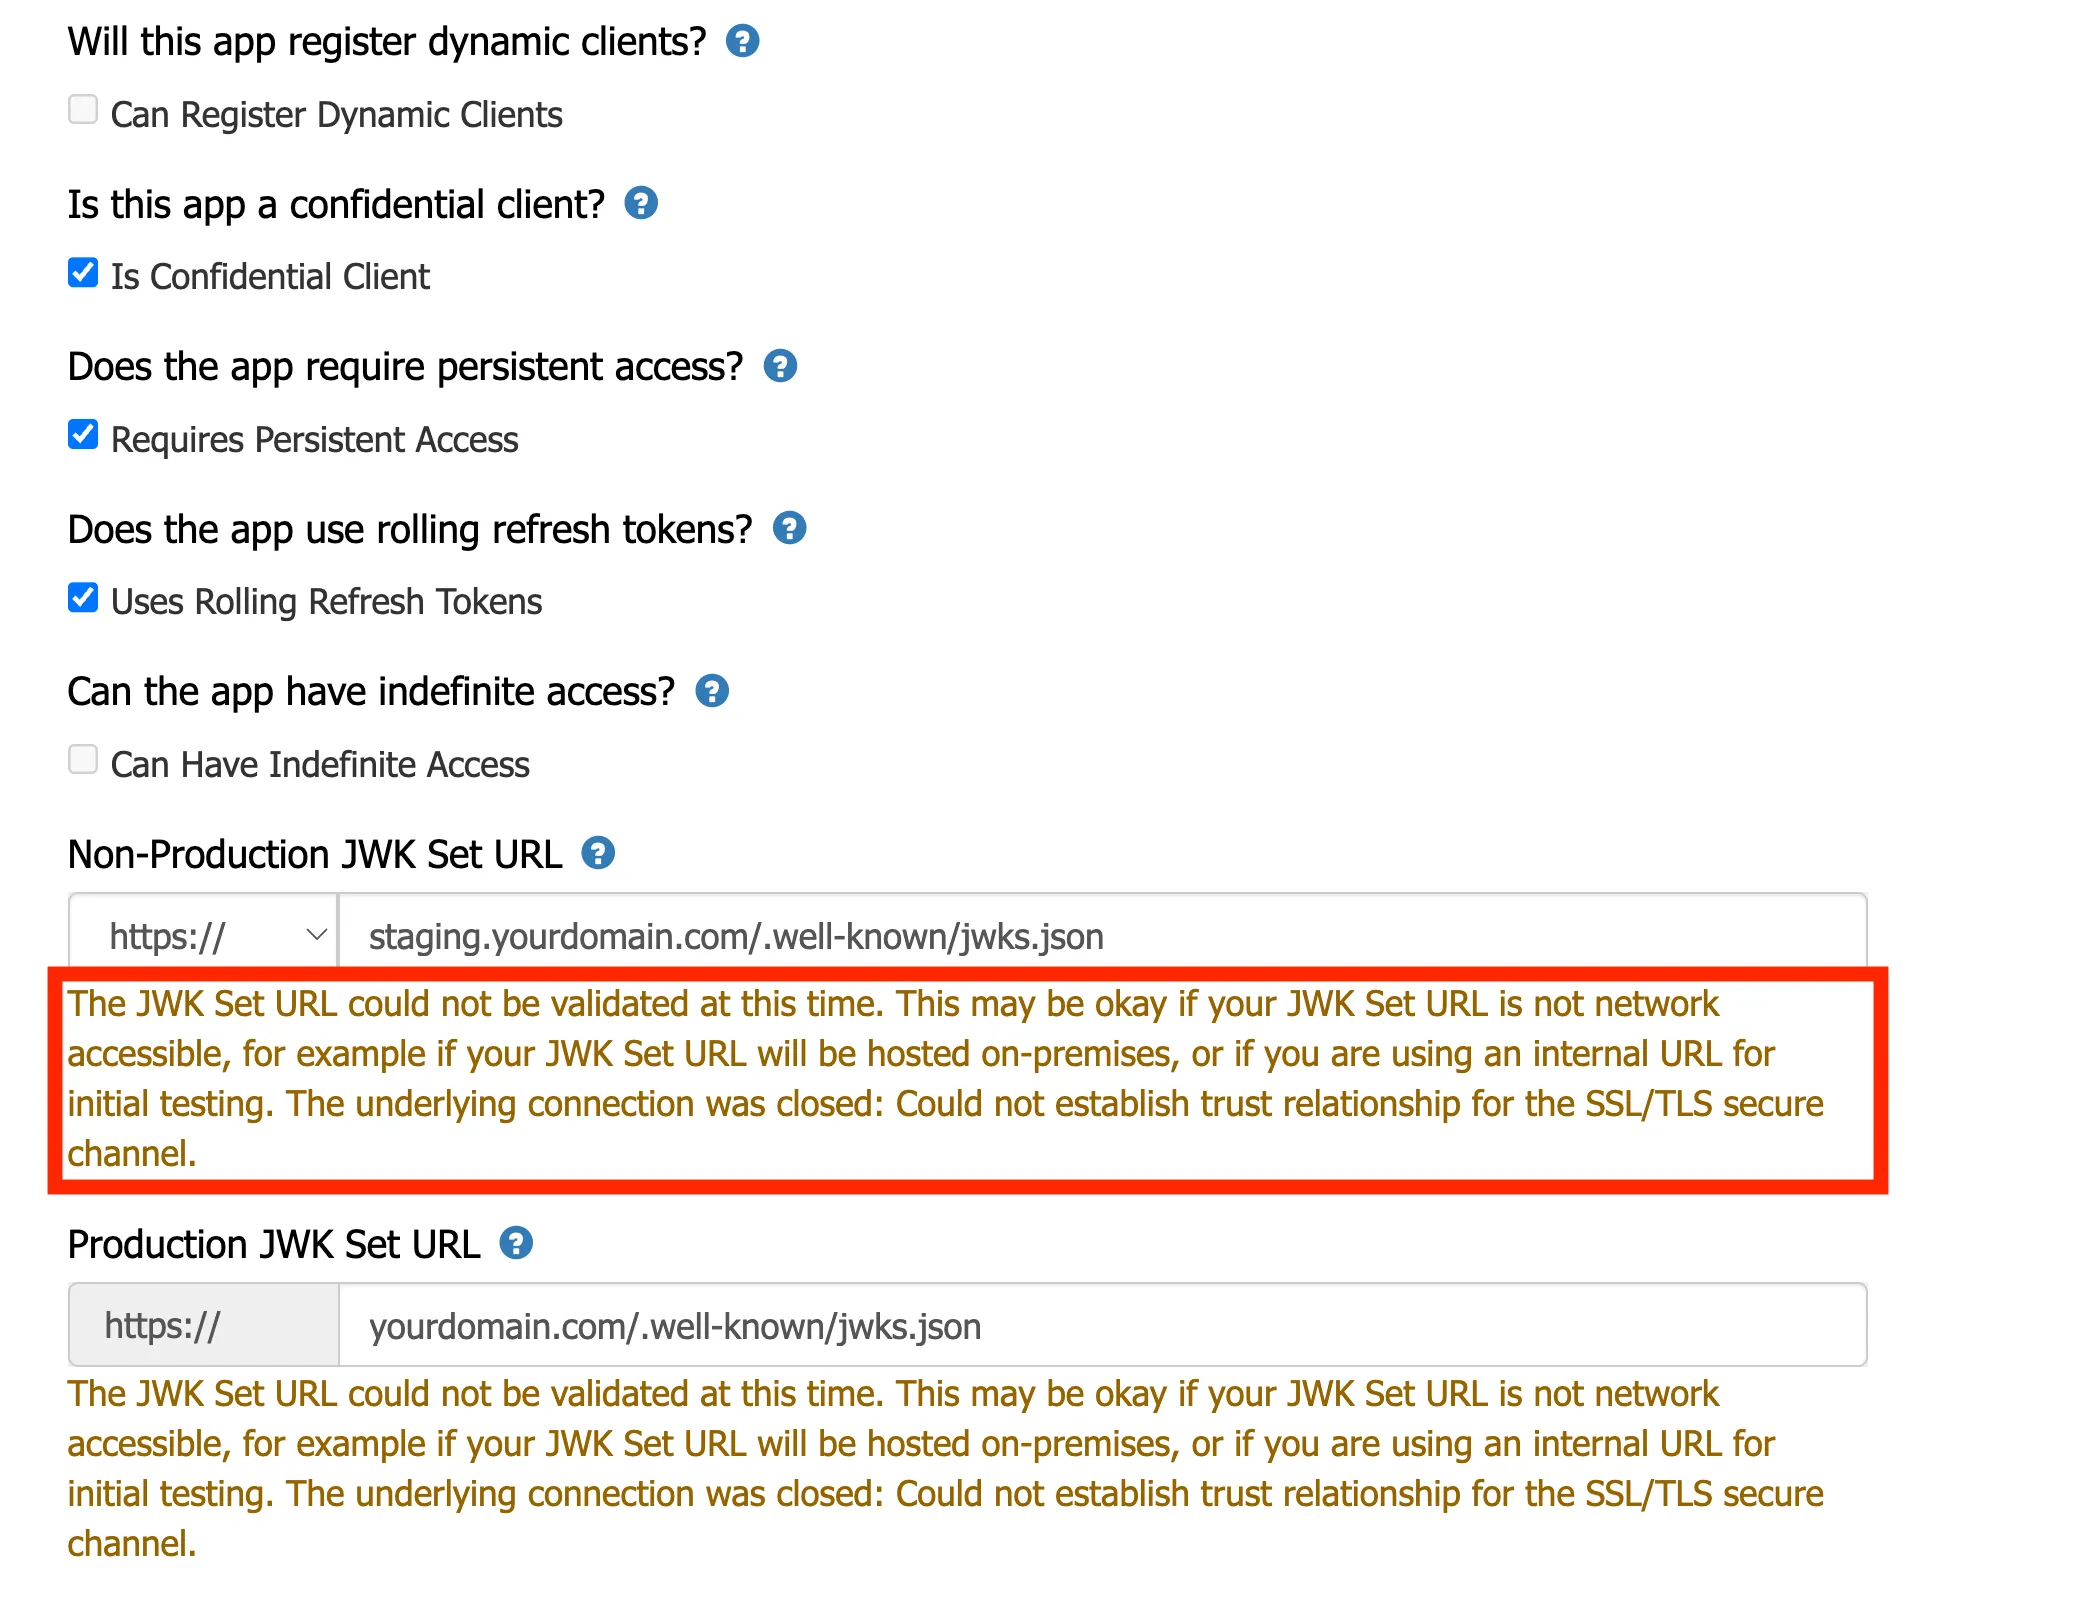
- Is Confidential Client — patient-facing apps with a backend server should be confidential.
- Requires Persistent Access — needed to get refresh tokens.
- Uses Rolling Refresh Tokens — so each refresh gives you a new token.

Generate Your Private Key
- Generate an RSA key pair locally with OpenSSL:
openssl genrsa -out privatekey.pem 2048Do NOT use any online “generate JWK” websites for this. Your private key is what signs your authentication tokens. If anyone else has a copy of it, they can impersonate your app. Generate it on your machine, store it securely (environment variable or secrets manager), and never commit it to git.
- Your app needs to read this private key and serve the public portion as a JWKS at the
/.well-known/jwks.jsonroute. Here’s a minimal example with Node.js using thejoselibrary:
import { createPrivateKey } from "crypto";
import { exportJWK, calculateJwkThumbprint } from "jose";
import { readFileSync } from "fs";
import express from "express";

const app = express();
const privateKeyPem = readFileSync("privatekey.pem", "utf-8");
const privateKey = createPrivateKey(privateKeyPem);

// Derive the public JWK from the private key
const publicJwk = await exportJWK(privateKey.export({ type: "spki", format: "pem" }));
publicJwk.alg = "RS384";
publicJwk.use = "sig";
publicJwk.kid = await calculateJwkThumbprint(publicJwk, "sha256");

app.get("/.well-known/jwks.json", (req, res) => {
  res.json({ keys: [publicJwk] });
});

app.listen(3000, () => console.log("Listening on port 3000"));- Enter your JWKS endpoints for both environments, If you are integrating using the Medblocks Platform just enter the below endpoints.
- Non-Production:
https://app.medblocks.com/.well-known/jwks.json - Production:
https://app.medblocks.com/.well-known/jwks.json
You might see a validation warning about the JWK Set URL not being reachable. That’s fine if your URL isn’t publicly accessible yet.
- When you sign JWTs for the Epic OAuth flow, use the same private key and set the
kidheader to match. Epic will fetch your/.well-known/jwks.json, find the matching key, and verify the signature. Once your app is live and the JWKS URL is publicly reachable, the warning goes away and it should look like this:

Step 5: Select Scopes (use the console script)
Epic’s “Incoming APIs” list is long, and you need to select all the USCDI v3 / USCDI read-only R4 scopes. Instead of clicking through hundreds of items, use a script.
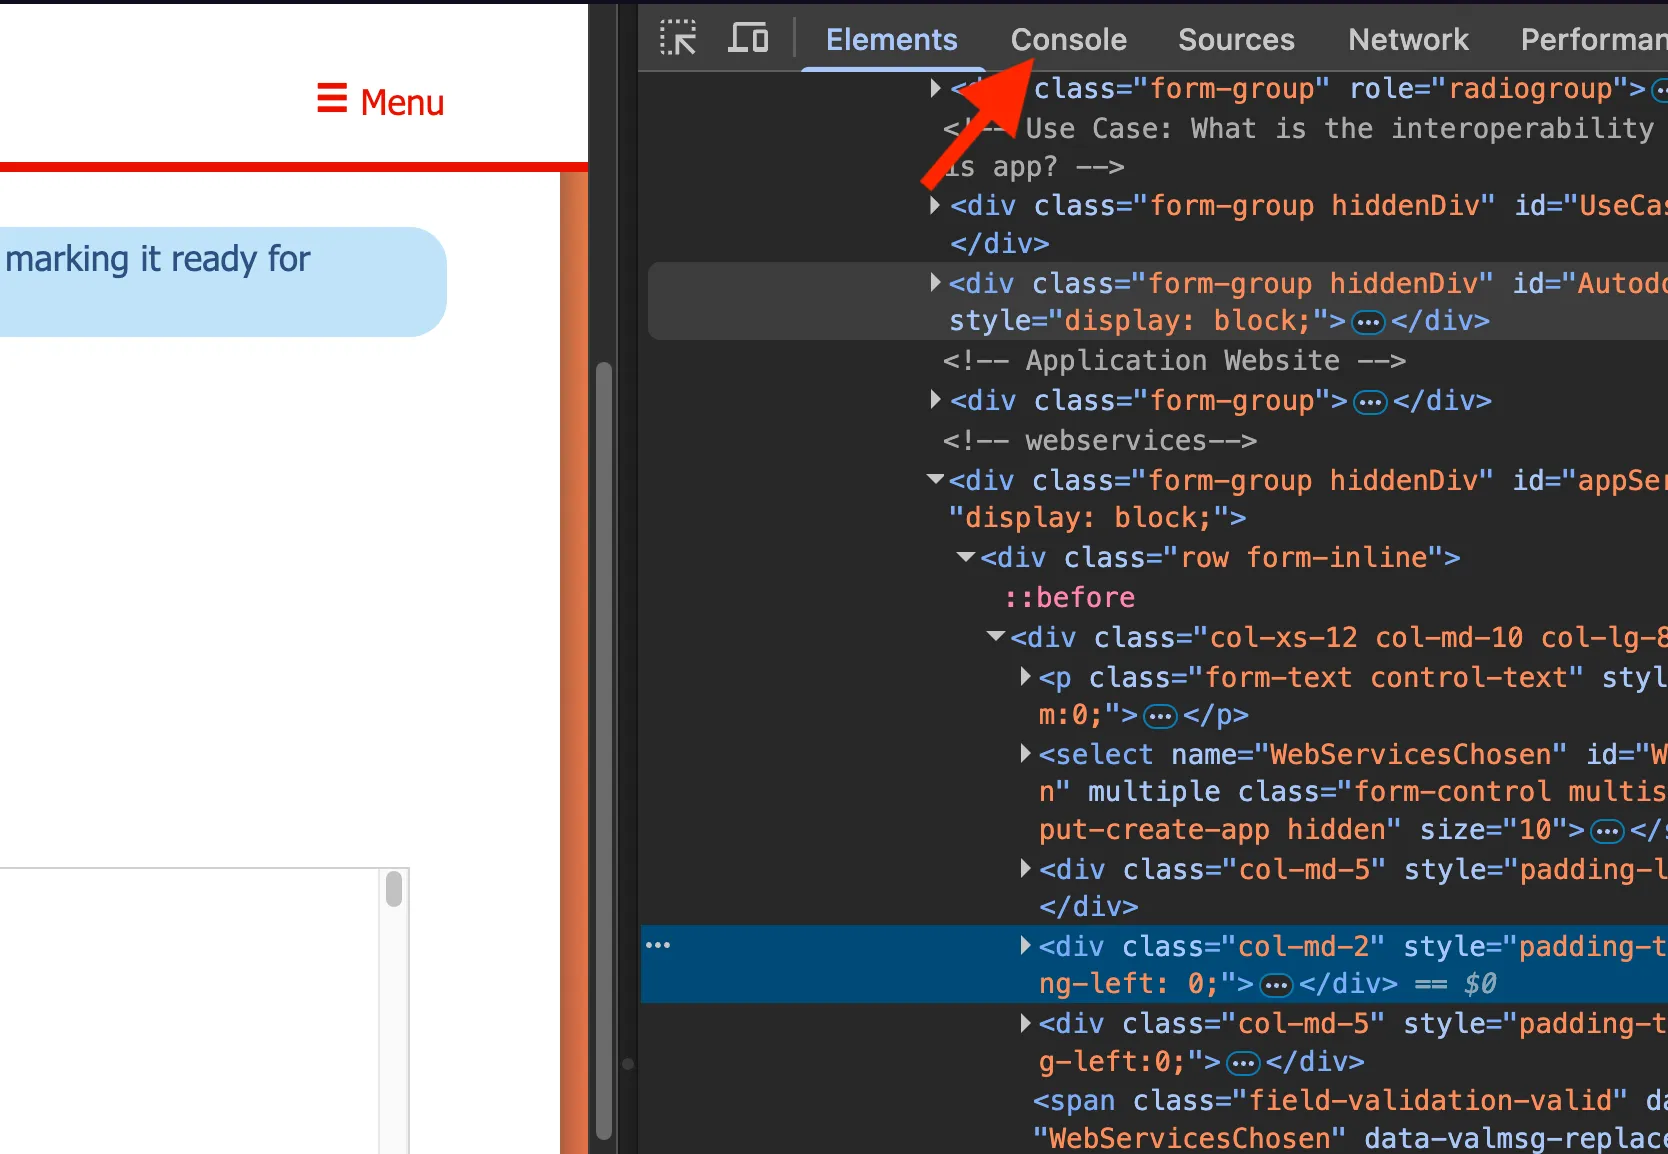
Steps to Run the console script in your browser
- Right-click anywhere on the page and select Inspect to open DevTools.
- Switch to the Console tab.
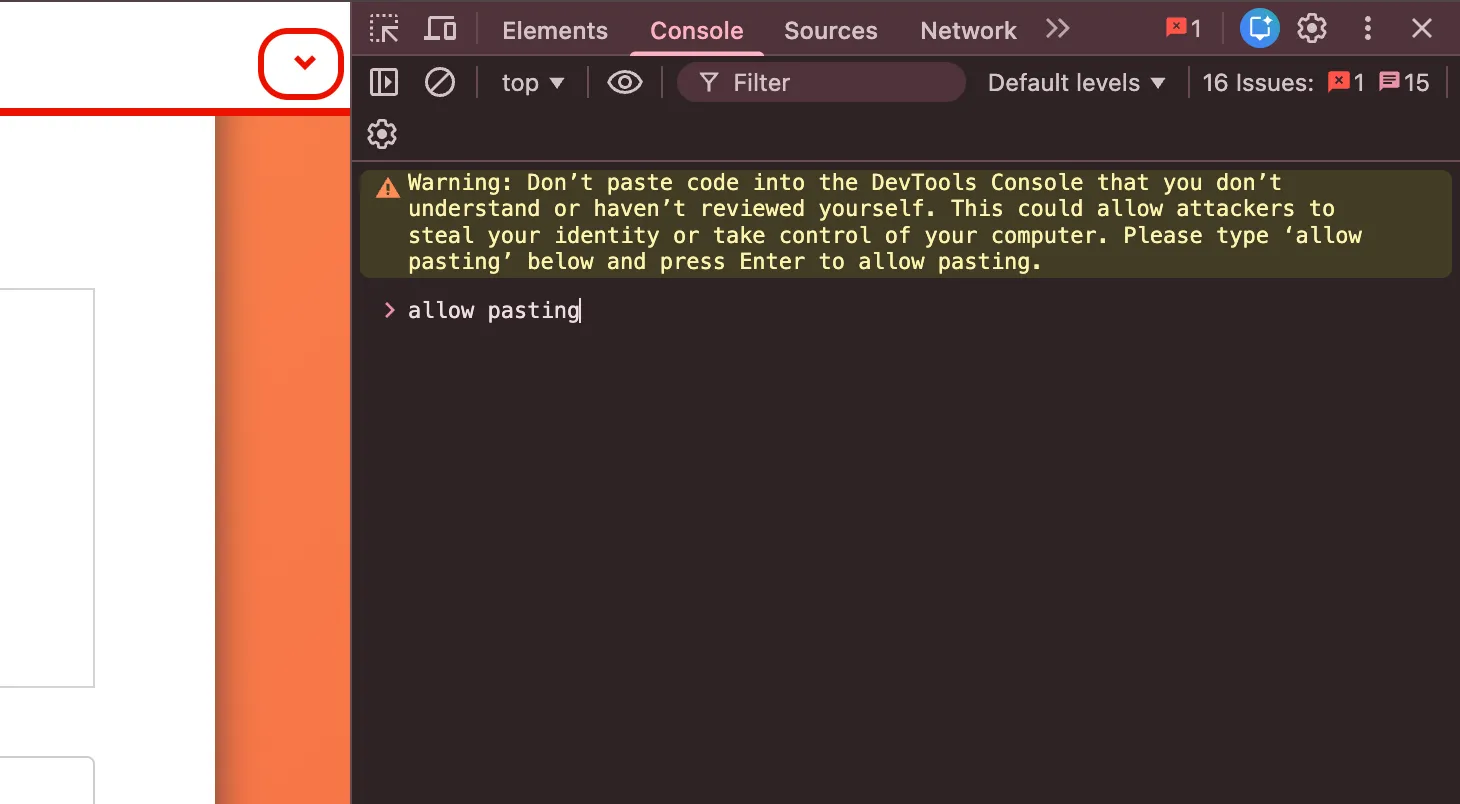
- If the browser warns you about pasting, type
allow pastingand press Enter.
- Paste the following script into the console. It automatically selects all USCDI v3 and USCDI read-only R4 scopes from the available list:
(async function () {
  const sleep = ms => new Promise(r => setTimeout(r, ms));
  const appIdMatch = location.search.match(/appId=(\d+)/i);
  if (!appIdMatch) {
    console.error('[Epic Scopes] Could not find appId in URL.');
    return;
  }
  const APP_ID = appIdMatch[1];
  console.log(`%c[Epic Scopes] App ID: ${APP_ID}`, 'color: blue; font-weight: bold');
  const labels = [
    ...document.querySelectorAll('option[data-uscdi-readonly="True"]'),
    ...document.querySelectorAll('option[data-uscdi-v3="True"]')
  ]
    .map(o => o.label)
    .filter(l => l.includes("(R4)"))
    .sort((a, b) => a.localeCompare(b));
  const uniqueLabels = [...new Set(labels)];
  console.log(`[Epic Scopes] Target scopes: ${uniqueLabels.length}`);
  const listContainer =
    document.querySelector("ul.apiList") ||
    document.querySelector(".apiList");
  const clickAddButton = () => {
    const btn = [...document.querySelectorAll("button, input")]
      .find(el => el.innerText?.trim() === ">>");
    btn?.click();
    return !!btn;
  };
  let added = 0;
  let skipped = 0;
  const notFound = [];
  for (const label of uniqueLabels) {
    if (listContainer) listContainer.scrollTop = 0;
    await sleep(50);
    let found = false;
    for (let attempts = 0; attempts < 50; attempts++) {
      const li = [...document.querySelectorAll("li.apiListItem")]
        .find(el => el.innerText?.trim() === label);
      if (li) {
        const alreadySelected =
          li.getAttribute("onclick")?.includes("SelectedWebServicesClicked");
        if (!alreadySelected) {
          li.scrollIntoView({ block: "center" });
          li.click();
          await sleep(100);
          clickAddButton();
          await sleep(200);
          added++;
        } else {
          skipped++;
        }
        found = true;
        break;
      }
      if (listContainer) {
        listContainer.scrollTop += 500;
      }
      await sleep(100);
    }
    if (!found) {
      notFound.push(label);
    }
  }
  if (notFound.length) {
    console.warn('[Epic Scopes] Could not find:', notFound);
  }
  console.log(`%c[Epic Scopes] Done! Added ${added}, already selected ${skipped}, ${notFound.length} not found.`, 'color: green; font-weight: bold');
})();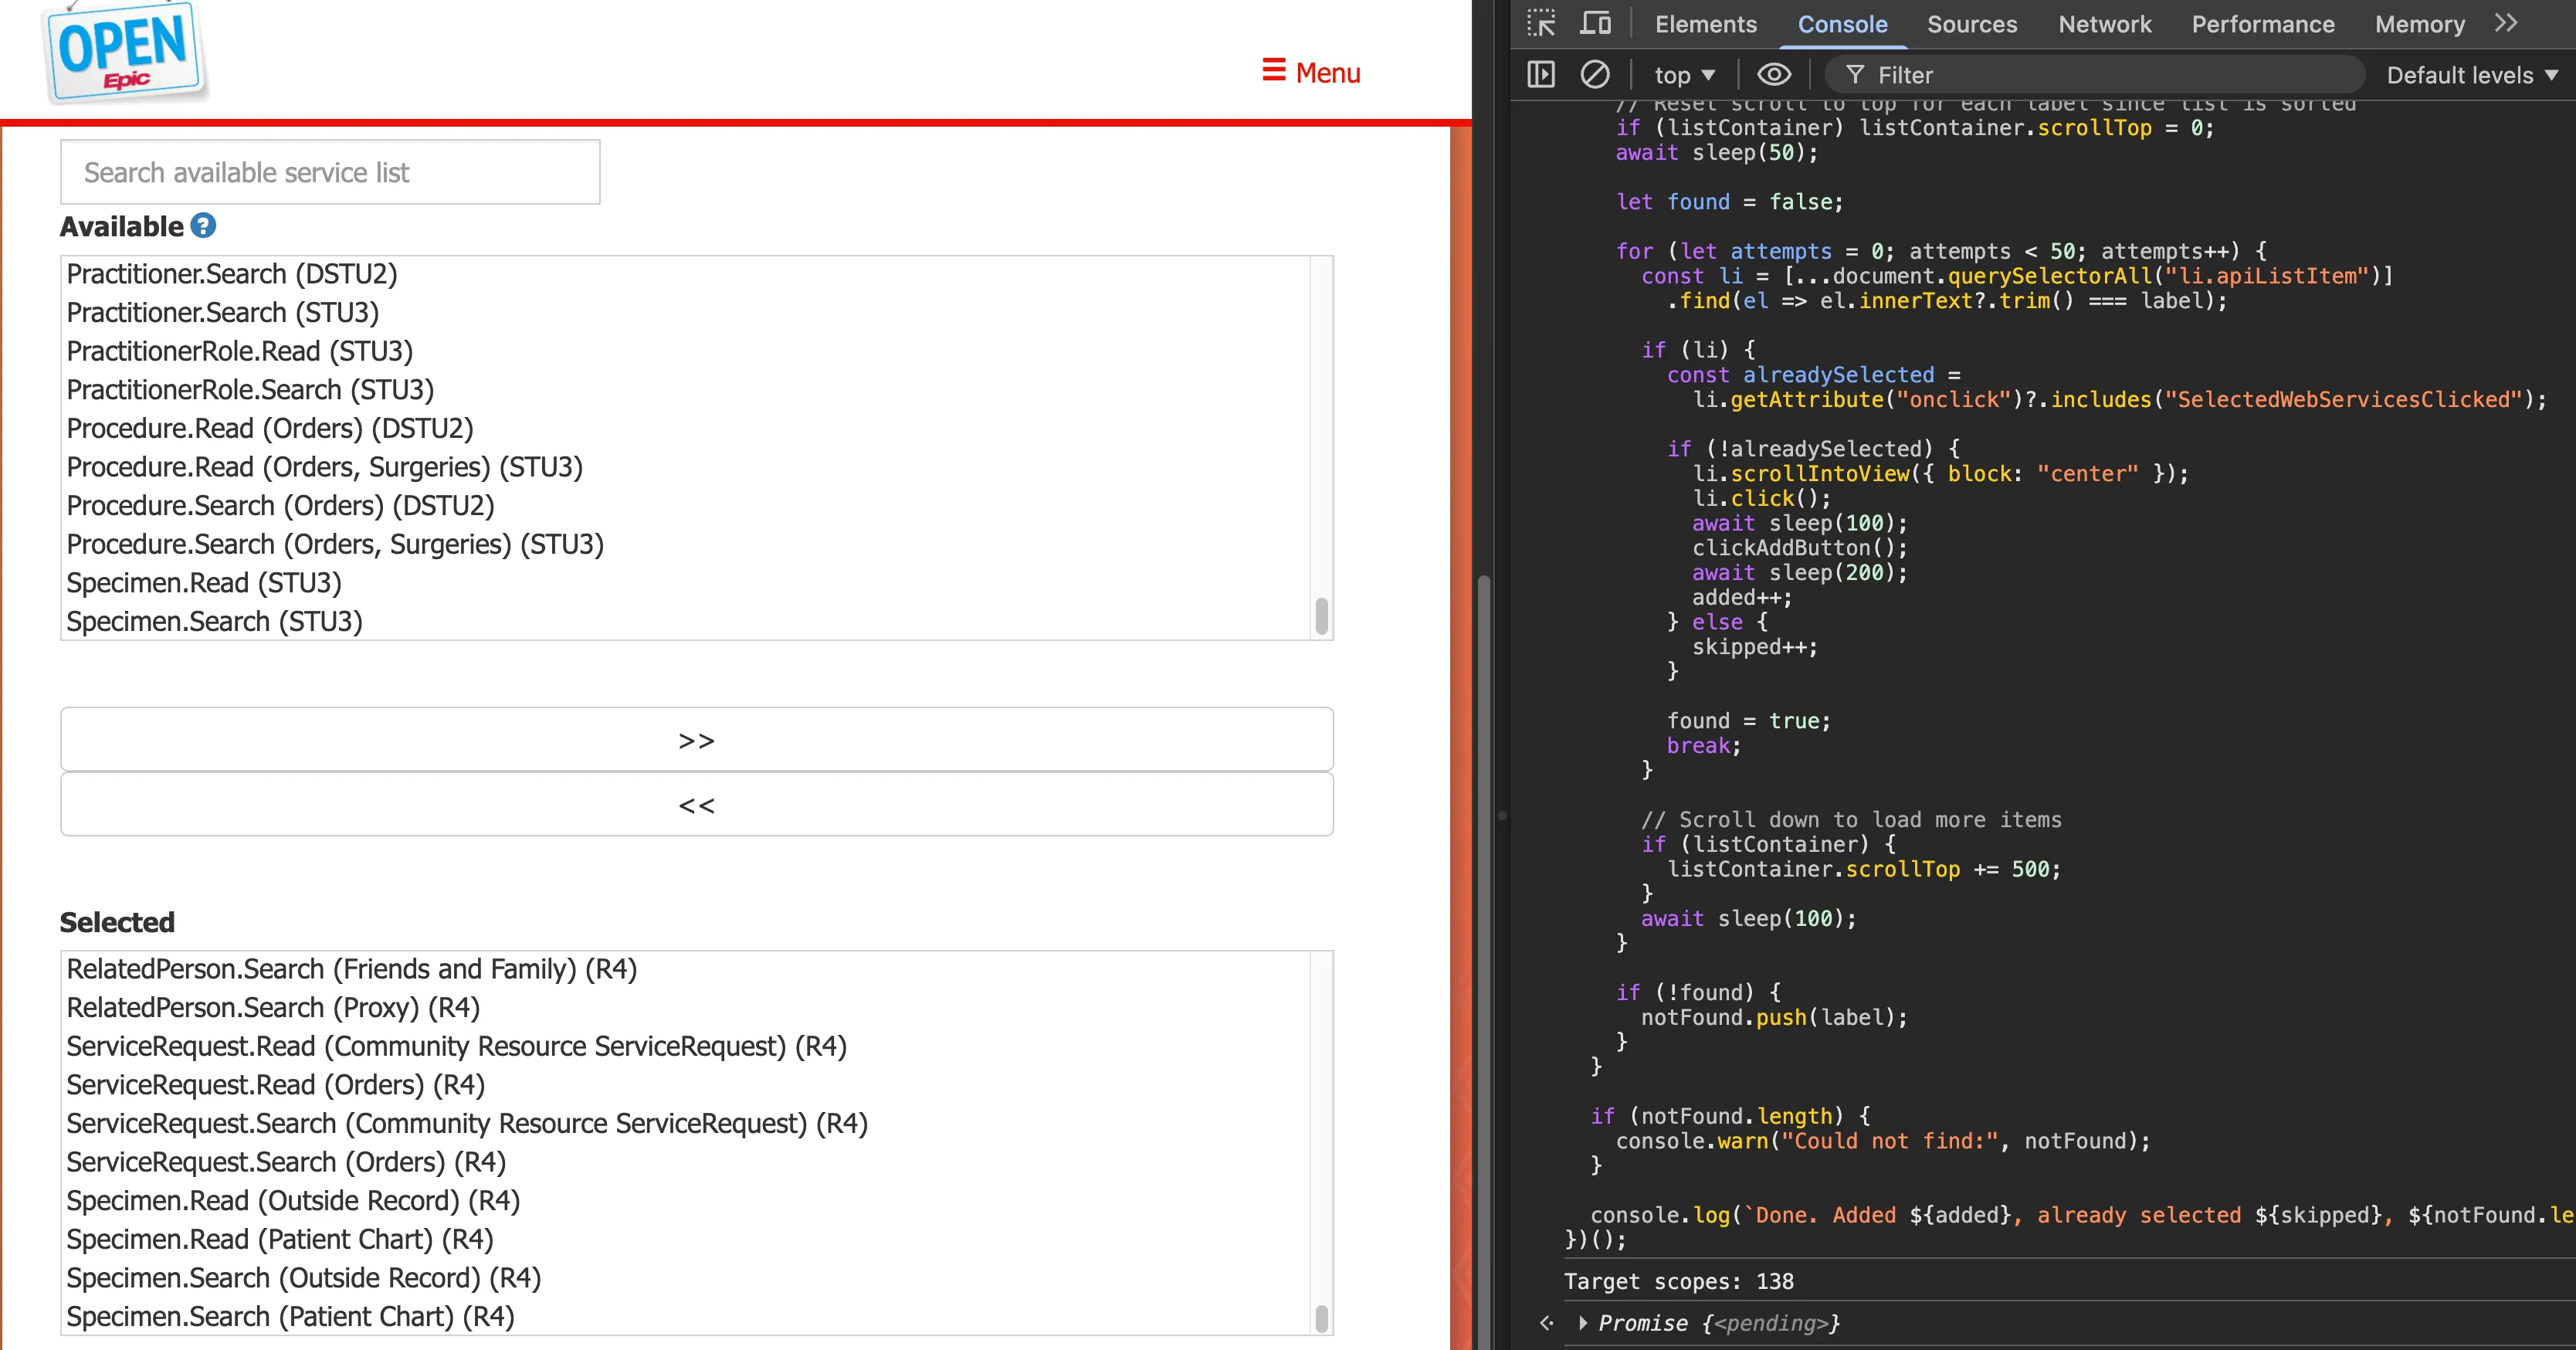
-
The script scrolls through the available API list, finds each matching scope, and clicks the
>>button to add it to the selected list. You’ll see it working in real time. -
Once the script finishes, scroll down and click Save.
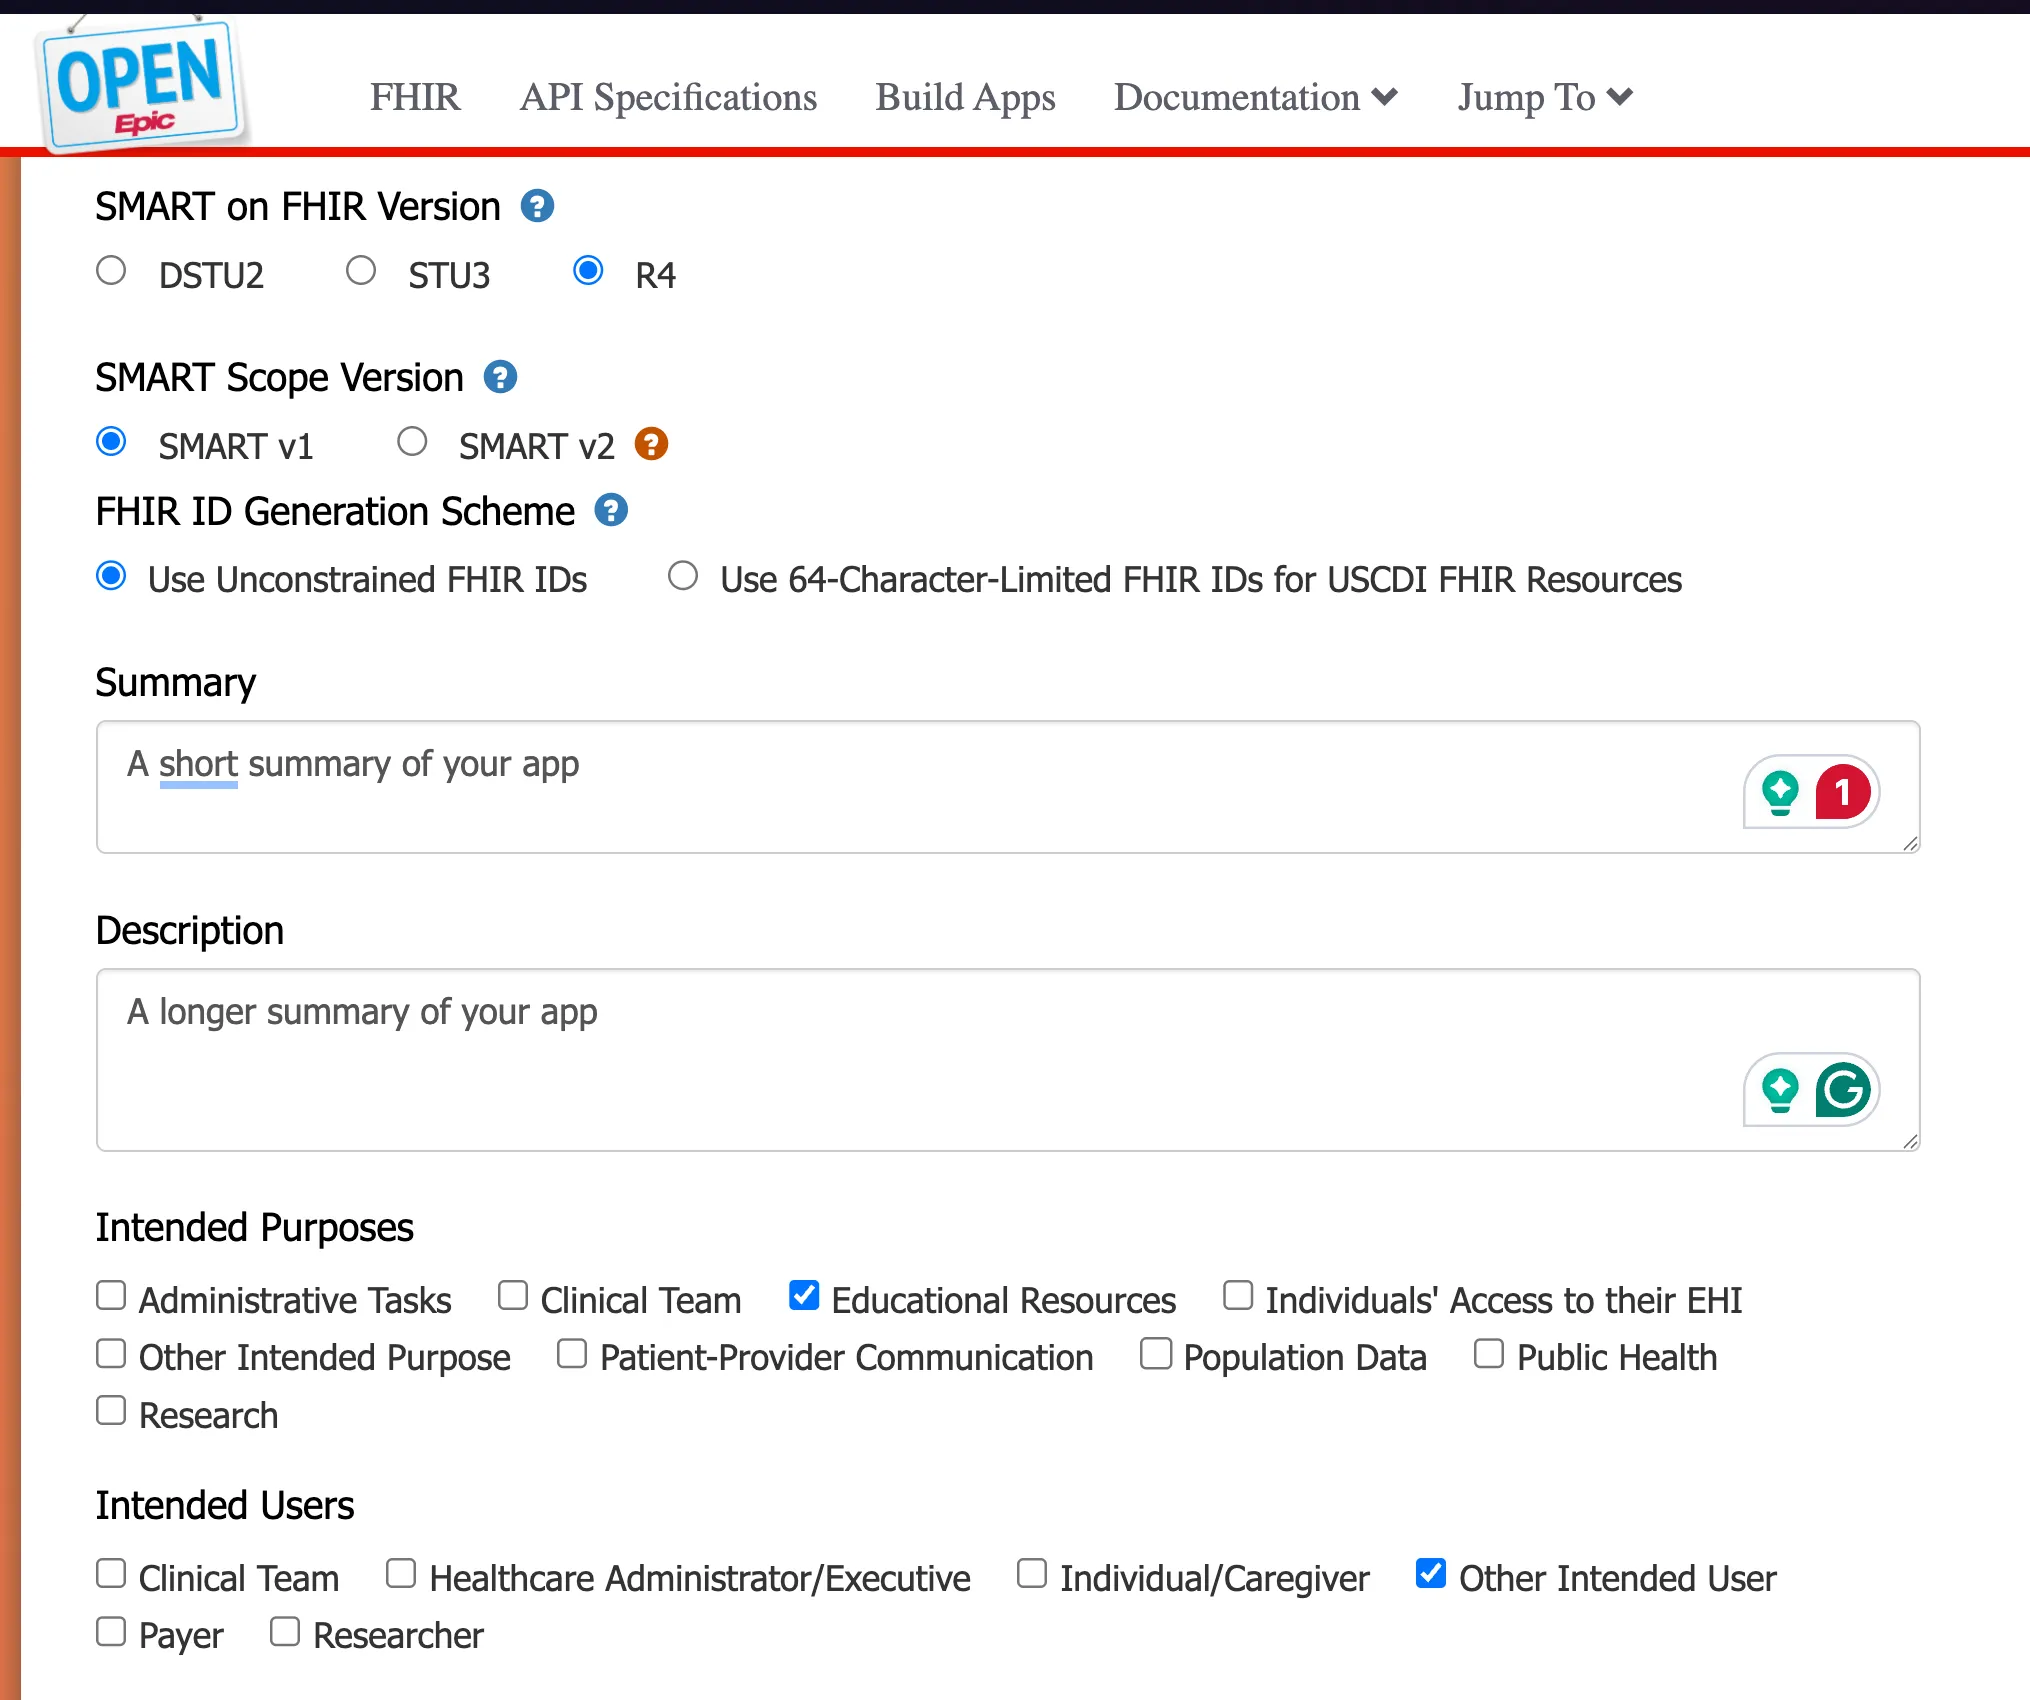
Step 6: Fill your application metadata
- Set the following fields:
- SMART on FHIR Version to R4.
- SMART Scope Version to SMART v1.
- FHIR ID Generation Scheme to Use Unconstrained FHIR IDs.
- Write a summary and description for your app, and check the boxes that match your intended purposes and users.
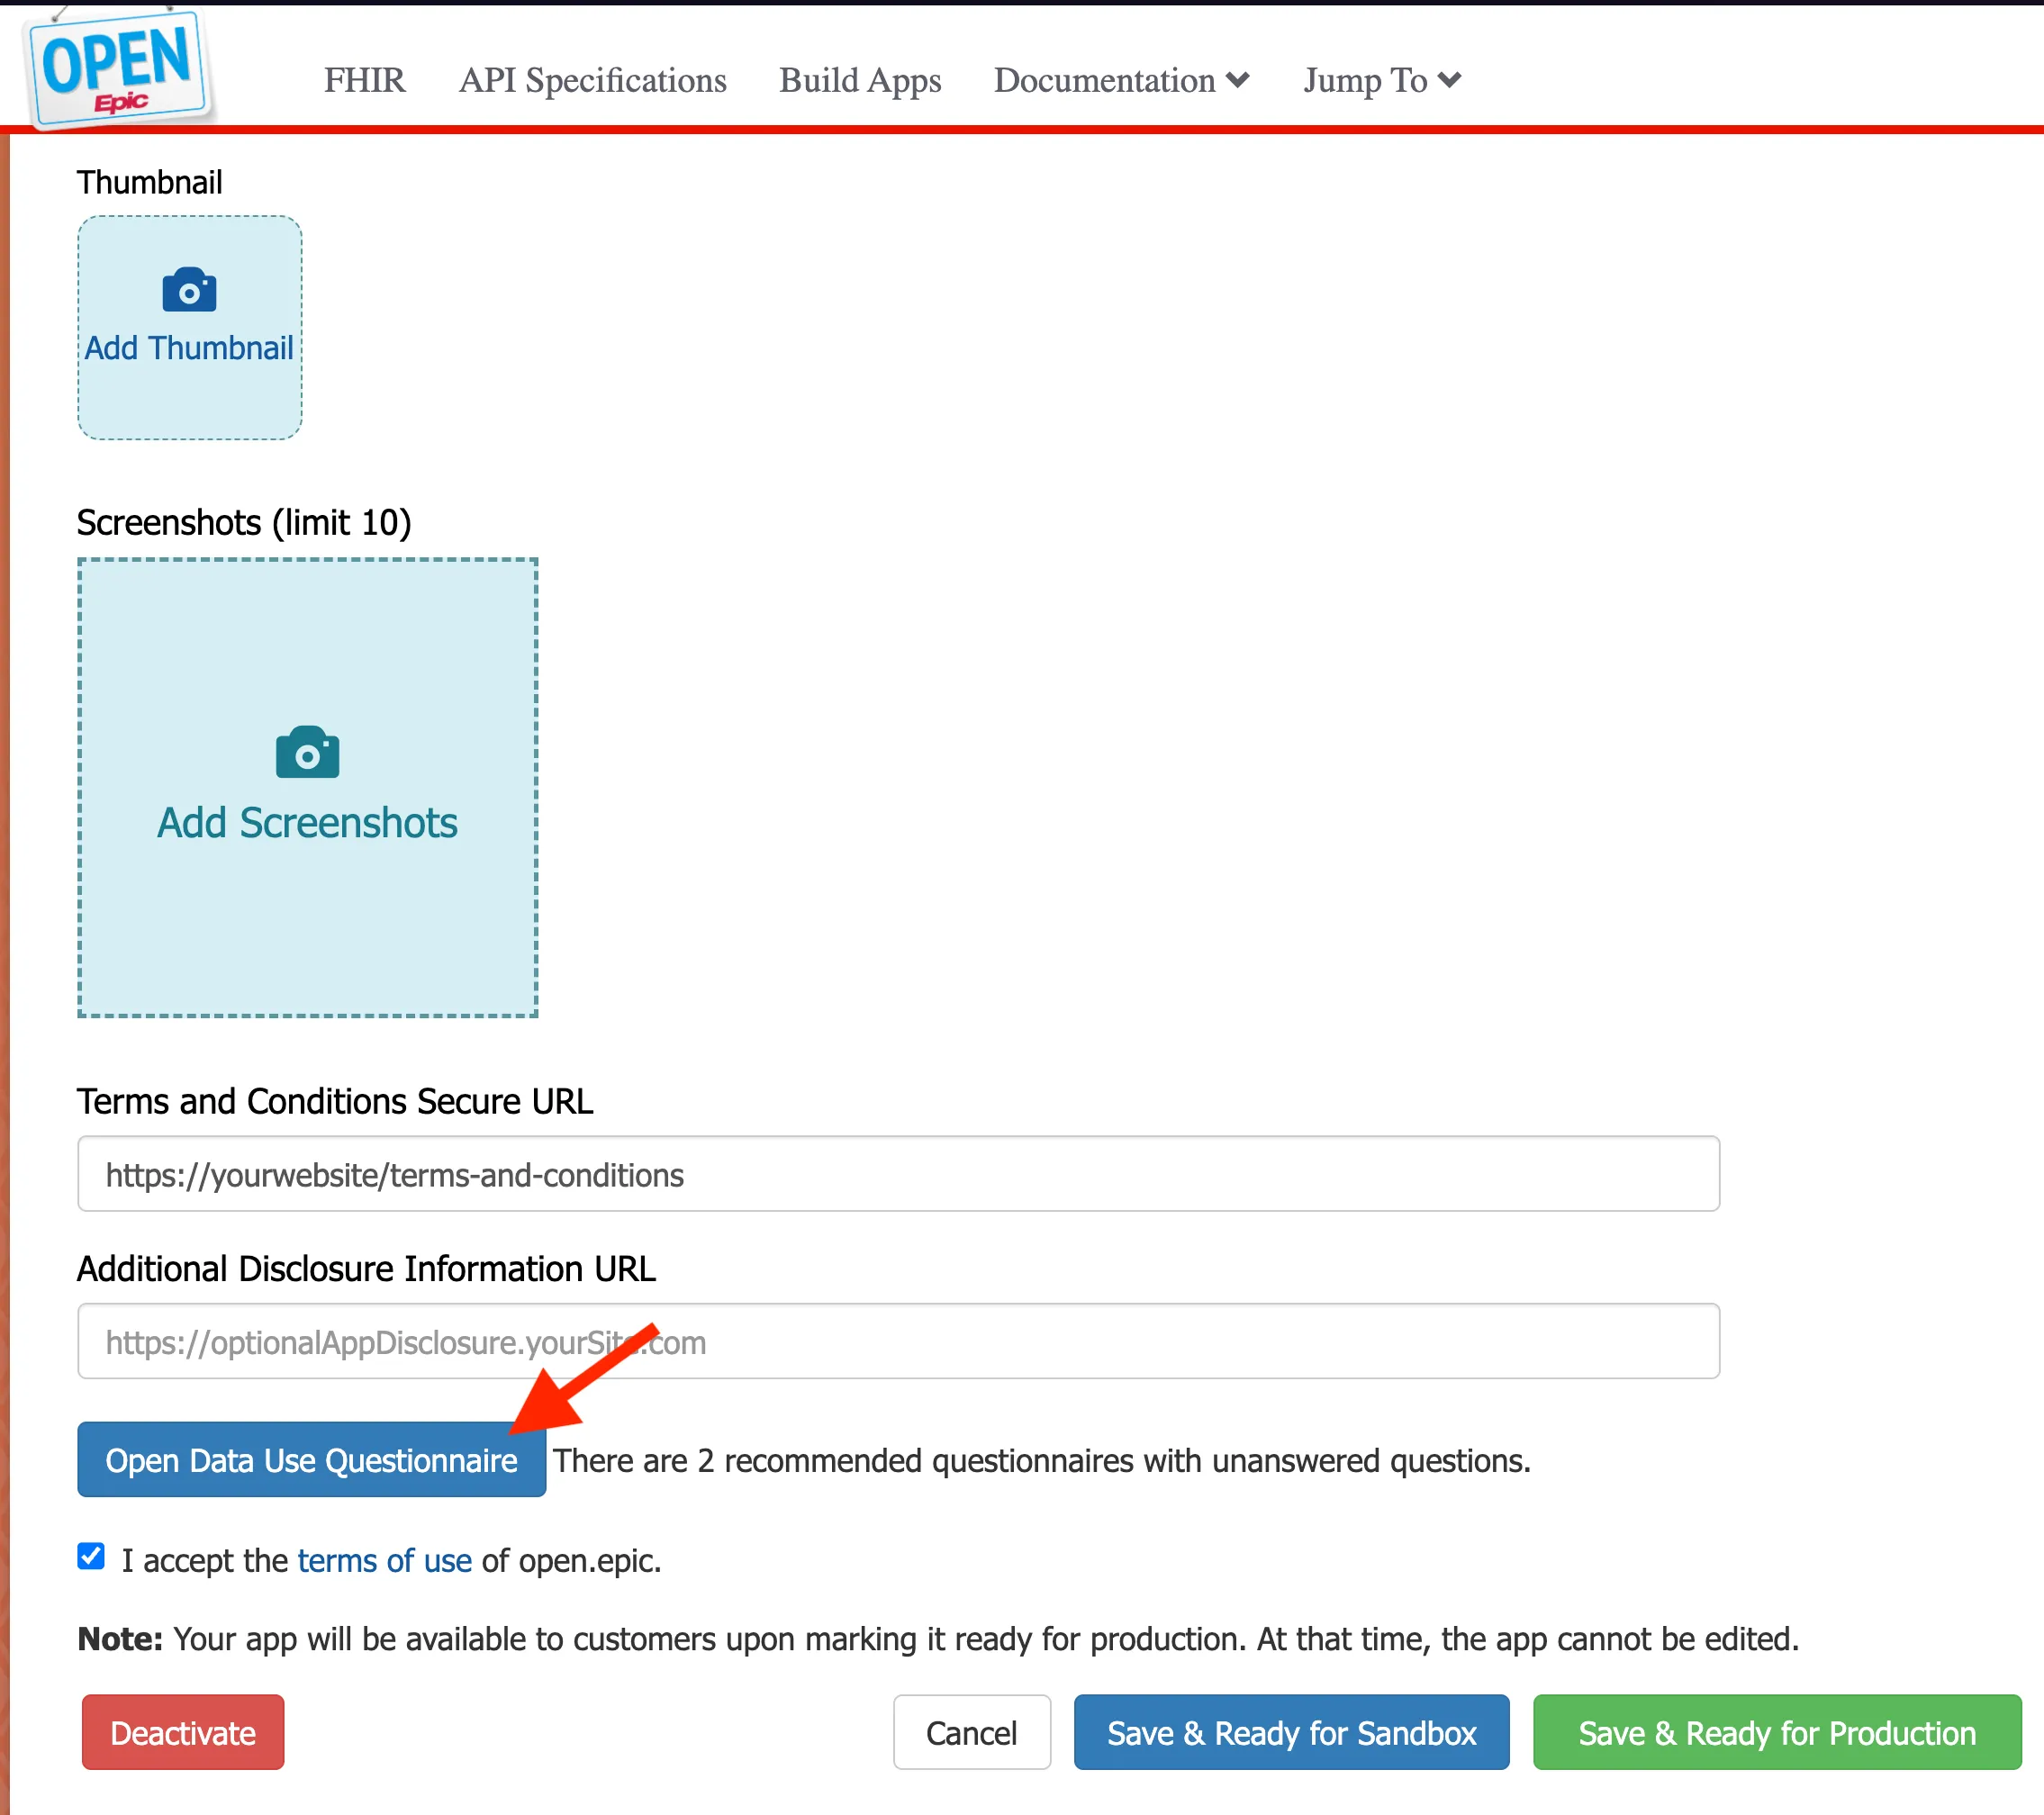
-
Upload a thumbnail and screenshots. Fill in your Terms and Conditions URL and (optionally) the Additional Disclosure Information URL.
Step 7: Fill your application data use Questionnaire (Important)
-
Click Open Data Use Questionnaire. There are two questionnaires you need to complete before you can go live.
- Answer the questionnaire honestly. Questions cover your organization type, how the app is funded, and how you handle user data.
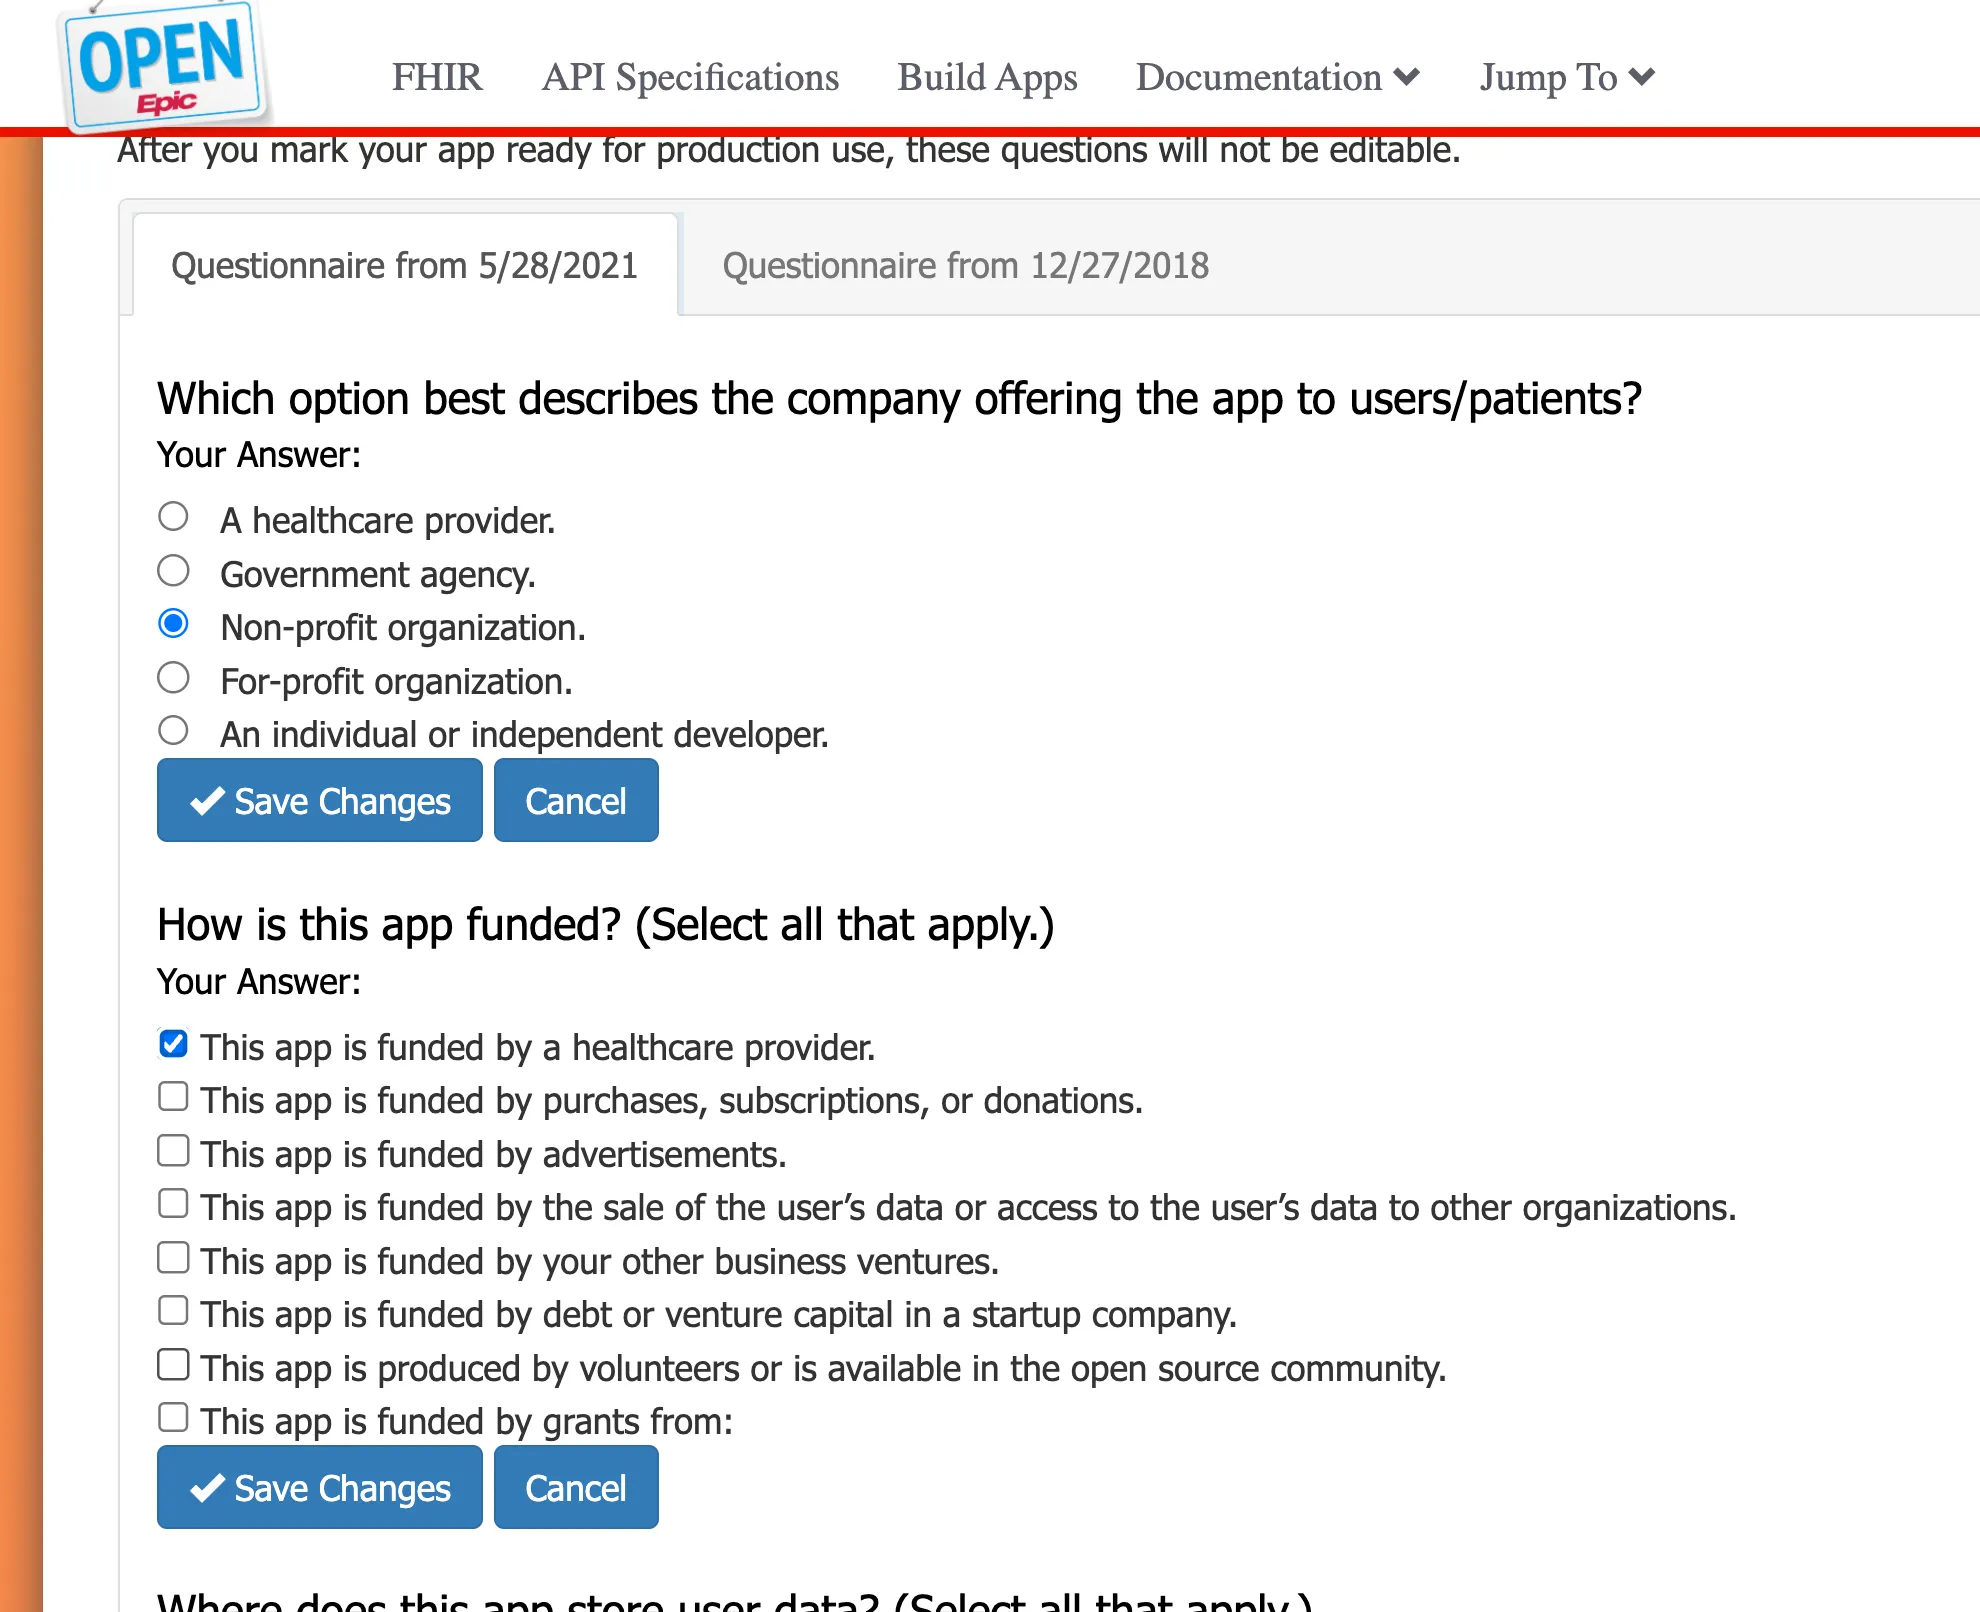
-
Click Save Changes after each section.
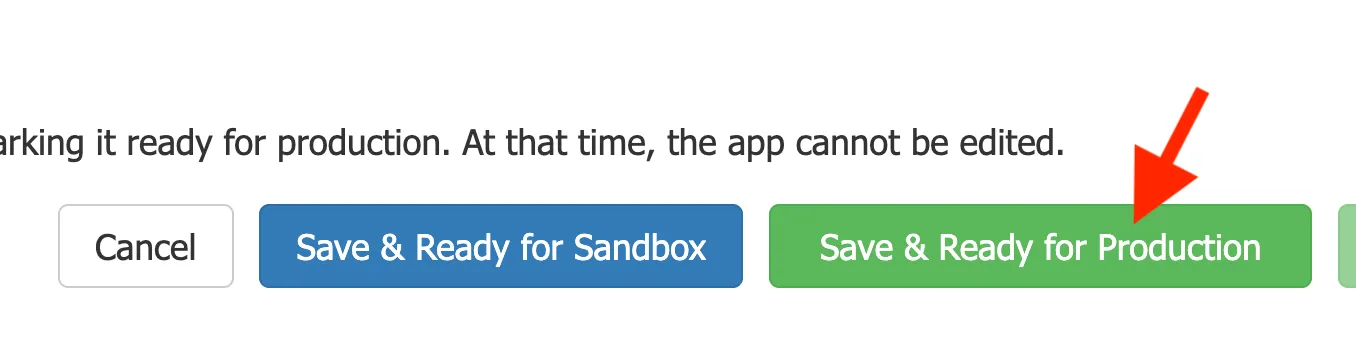
Step 8: Mark your application Ready for Production
Once everything is filled out, click Save & Ready for Production.
After this, the app is locked and can’t be edited.
Step 9: Activate Organizations
-
Go back to My Apps. Your app should now have a green “Production Ready” badge.
-
Click Review & Manage Downloads.
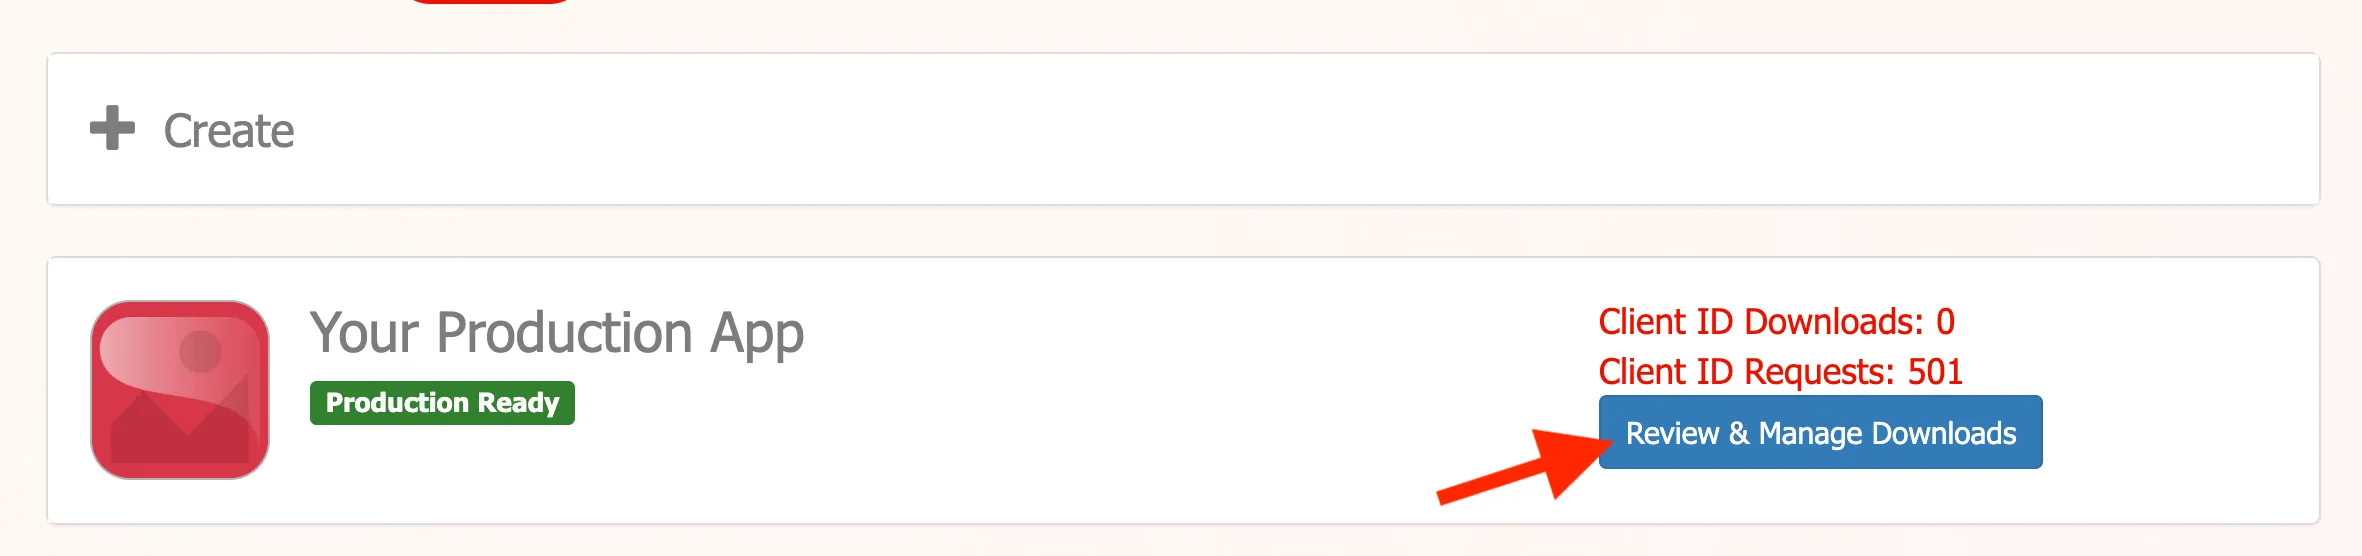
- You’ll see a list of all Epic customer organizations. With USCDI v3 automatic distribution, hundreds of organizations will appear, most with a “Not responded” status. You need to activate each one for both Non-Production and Production.

Manual
For each organization, activate Non-Production and Production individually. This is fine if you only need a handful of organizations, but doing it for 500+ orgs is not practical; use the script below instead.
Using the script
This script is inspired by Josh Mandel’s post on the “7000 clicks” problem. Open the browser console again and paste the activation script:
(async function activateAllOrgs() {
const appIdMatch = location.search.match(/id=(\d+)/i);
if (!appIdMatch) {
console.error('[Epic Activator] Could not find app ID in URL.');
return;
}
const APP_ID = appIdMatch[1];
console.log(`%c[Epic Activator] App ID: ${APP_ID}`, 'color: blue; font-weight: bold');
const DELAY_MS = 500;
const LOG_KEY = 'epicActivatorLog';
const logLines = [];
function log(msg, style) {
logLines.push({ time: new Date().toISOString(), msg });
sessionStorage.setItem(LOG_KEY, JSON.stringify(logLines));
if (style) {
console.log(`%c${msg}`, style);
} else {
console.log(msg);
}
}
function logError(msg) {
logLines.push({ time: new Date().toISOString(), msg, error: true });
sessionStorage.setItem(LOG_KEY, JSON.stringify(logLines));
console.error(msg);
}
const prev = sessionStorage.getItem(LOG_KEY);
if (prev) {
try {
const prevLines = JSON.parse(prev);
console.log('%c[Epic Activator] Previous run log found (' + prevLines.length + ' entries):', 'color: purple; font-weight: bold');
for (const line of prevLines) {
const prefix = line.time.split('T')[1].split('.')[0];
if (line.error) {
console.error(` [${prefix}] ${line.msg}`);
} else {
console.log(` [${prefix}] ${line.msg}`);
}
}
console.log('%c[Epic Activator] End of previous run log. Starting new run...', 'color: purple; font-weight: bold');
} catch (e) { /* ignore parse errors */ }
}
sessionStorage.removeItem(LOG_KEY);
function sleep(ms) {
return new Promise(resolve => setTimeout(resolve, ms));
}
function getCSRFToken() {
const input = document.querySelector('input[name="__RequestVerificationToken"]');
if (!input) throw new Error('CSRF token not found on page');
return input.value;
}
async function postAPI(url, body) {
const resp = await fetch(url, {
method: 'POST',
headers: {
'Content-Type': 'application/x-www-form-urlencoded',
'RequestVerificationToken': getCSRFToken()
},
body
});
if (!resp.ok) throw new Error(`HTTP ${resp.status}`);
const data = await resp.json();
if (!data.Success) throw new Error(data.Message || 'API returned Success=false');
return data;
}
async function approveDownload(orgId, { nonProdOnly, prodOnly }) {
const data = await postAPI('/Developer/ApproveDownload', new URLSearchParams({
OrgId: orgId,
AppId: APP_ID,
Testhash: '',
Testhash256: '',
Prodhash: '',
Prodhash256: '',
NonProdOnly: String(nonProdOnly),
ProdOnly: String(prodOnly),
FhirIdGenerationScheme: '',
OverrideNonProdClientId: '',
OverrideProdClientId: '',
TestJWKS: '',
ProdJWKS: ''
}).toString());
if (!data.Data.Success) throw new Error(data.Data.Message || 'Inner Success=false');
return data;
}
log('[Epic Activator] Fetching all orgs...', 'color: blue; font-weight: bold');
const PAGE_SIZE = 2000;
const allOrgs = [];
let page = 0;
while (true) {
const data = await postAPI('/Developer/LoadDownloads', `appId=${APP_ID}&PageSize=${PAGE_SIZE}&page=${page}`);
const downloads = data.Data.Downloads;
for (const d of downloads) {
allOrgs.push({ orgId: d.Id.split('_')[0], orgName: d.OrgName, approved: d.Approved });
}
log(`[Epic Activator] Fetched page ${page + 1}: ${downloads.length} orgs (${allOrgs.length} total)`);
if (downloads.length < PAGE_SIZE) break;
page++;
}
const needsBoth = allOrgs.filter(o => o.approved === 0);
const needsProd = allOrgs.filter(o => o.approved === 3);
const alreadyDone = allOrgs.filter(o => o.approved === 1);
log('[Epic Activator] Summary:', 'color: blue; font-weight: bold');
log(` Total orgs: ${allOrgs.length}`);
log(` Already enabled: ${alreadyDone.length}`);
log(` Need Non-Prod + Prod: ${needsBoth.length}`);
log(` Need Prod only: ${needsProd.length}`);
log(` Total API calls needed: ${needsBoth.length * 2 + needsProd.length}`);
if (needsBoth.length === 0 && needsProd.length === 0) {
log('[Epic Activator] Nothing to do!', 'color: green; font-weight: bold');
return;
}
const proceed = confirm(
`Epic Activator will make ${needsBoth.length * 2 + needsProd.length} API calls:\n` +
`• ${needsBoth.length} orgs: activate Non-Prod + Prod\n` +
`• ${needsProd.length} orgs: activate Prod only\n` +
`• ${alreadyDone.length} orgs: already done (skipped)\n\n` +
`Click OK to proceed, Cancel to abort.`
);
if (!proceed) {
log('[Epic Activator] Aborted by user.', 'color: red; font-weight: bold');
return;
}
let successCount = 0;
let errorCount = 0;
const errors = [];
const total = needsBoth.length * 2 + needsProd.length;
let callIndex = 0;
for (const org of needsBoth) {
try {
callIndex++;
log(`[${callIndex}/${total}] ${org.orgName} (${org.orgId}) — Non-Production...`);
await approveDownload(org.orgId, { nonProdOnly: true, prodOnly: false });
successCount++;
await sleep(DELAY_MS);
} catch (e) {
logError(` FAILED: ${org.orgName} (${org.orgId}) non-prod: ${e.message}`);
errors.push({ org: org.orgName, orgId: org.orgId, step: 'non-prod', error: e.message });
errorCount++;
continue;
}
try {
callIndex++;
log(`[${callIndex}/${total}] ${org.orgName} (${org.orgId}) — Production...`);
await approveDownload(org.orgId, { nonProdOnly: false, prodOnly: true });
successCount++;
await sleep(DELAY_MS);
} catch (e) {
logError(` FAILED: ${org.orgName} (${org.orgId}) prod: ${e.message}`);
errors.push({ org: org.orgName, orgId: org.orgId, step: 'prod', error: e.message });
errorCount++;
}
}
for (const org of needsProd) {
try {
callIndex++;
log(`[${callIndex}/${total}] ${org.orgName} (${org.orgId}) — Production...`);
await approveDownload(org.orgId, { nonProdOnly: false, prodOnly: true });
successCount++;
await sleep(DELAY_MS);
} catch (e) {
logError(` FAILED: ${org.orgName} (${org.orgId}) prod: ${e.message}`);
errors.push({ org: org.orgName, orgId: org.orgId, step: 'prod', error: e.message });
errorCount++;
}
}
log(`[Epic Activator] Done!`, 'color: green; font-weight: bold');
log(` Successful calls: ${successCount}`);
log(` Failed calls: ${errorCount}`);
if (errors.length > 0) {
log(` Failed orgs: ${errors.map(e => `${e.org} (${e.step})`).join(', ')}`);
console.table(errors);
}
log('[Epic Activator] Reloading page in 3s...');
await sleep(3000);
location.reload();
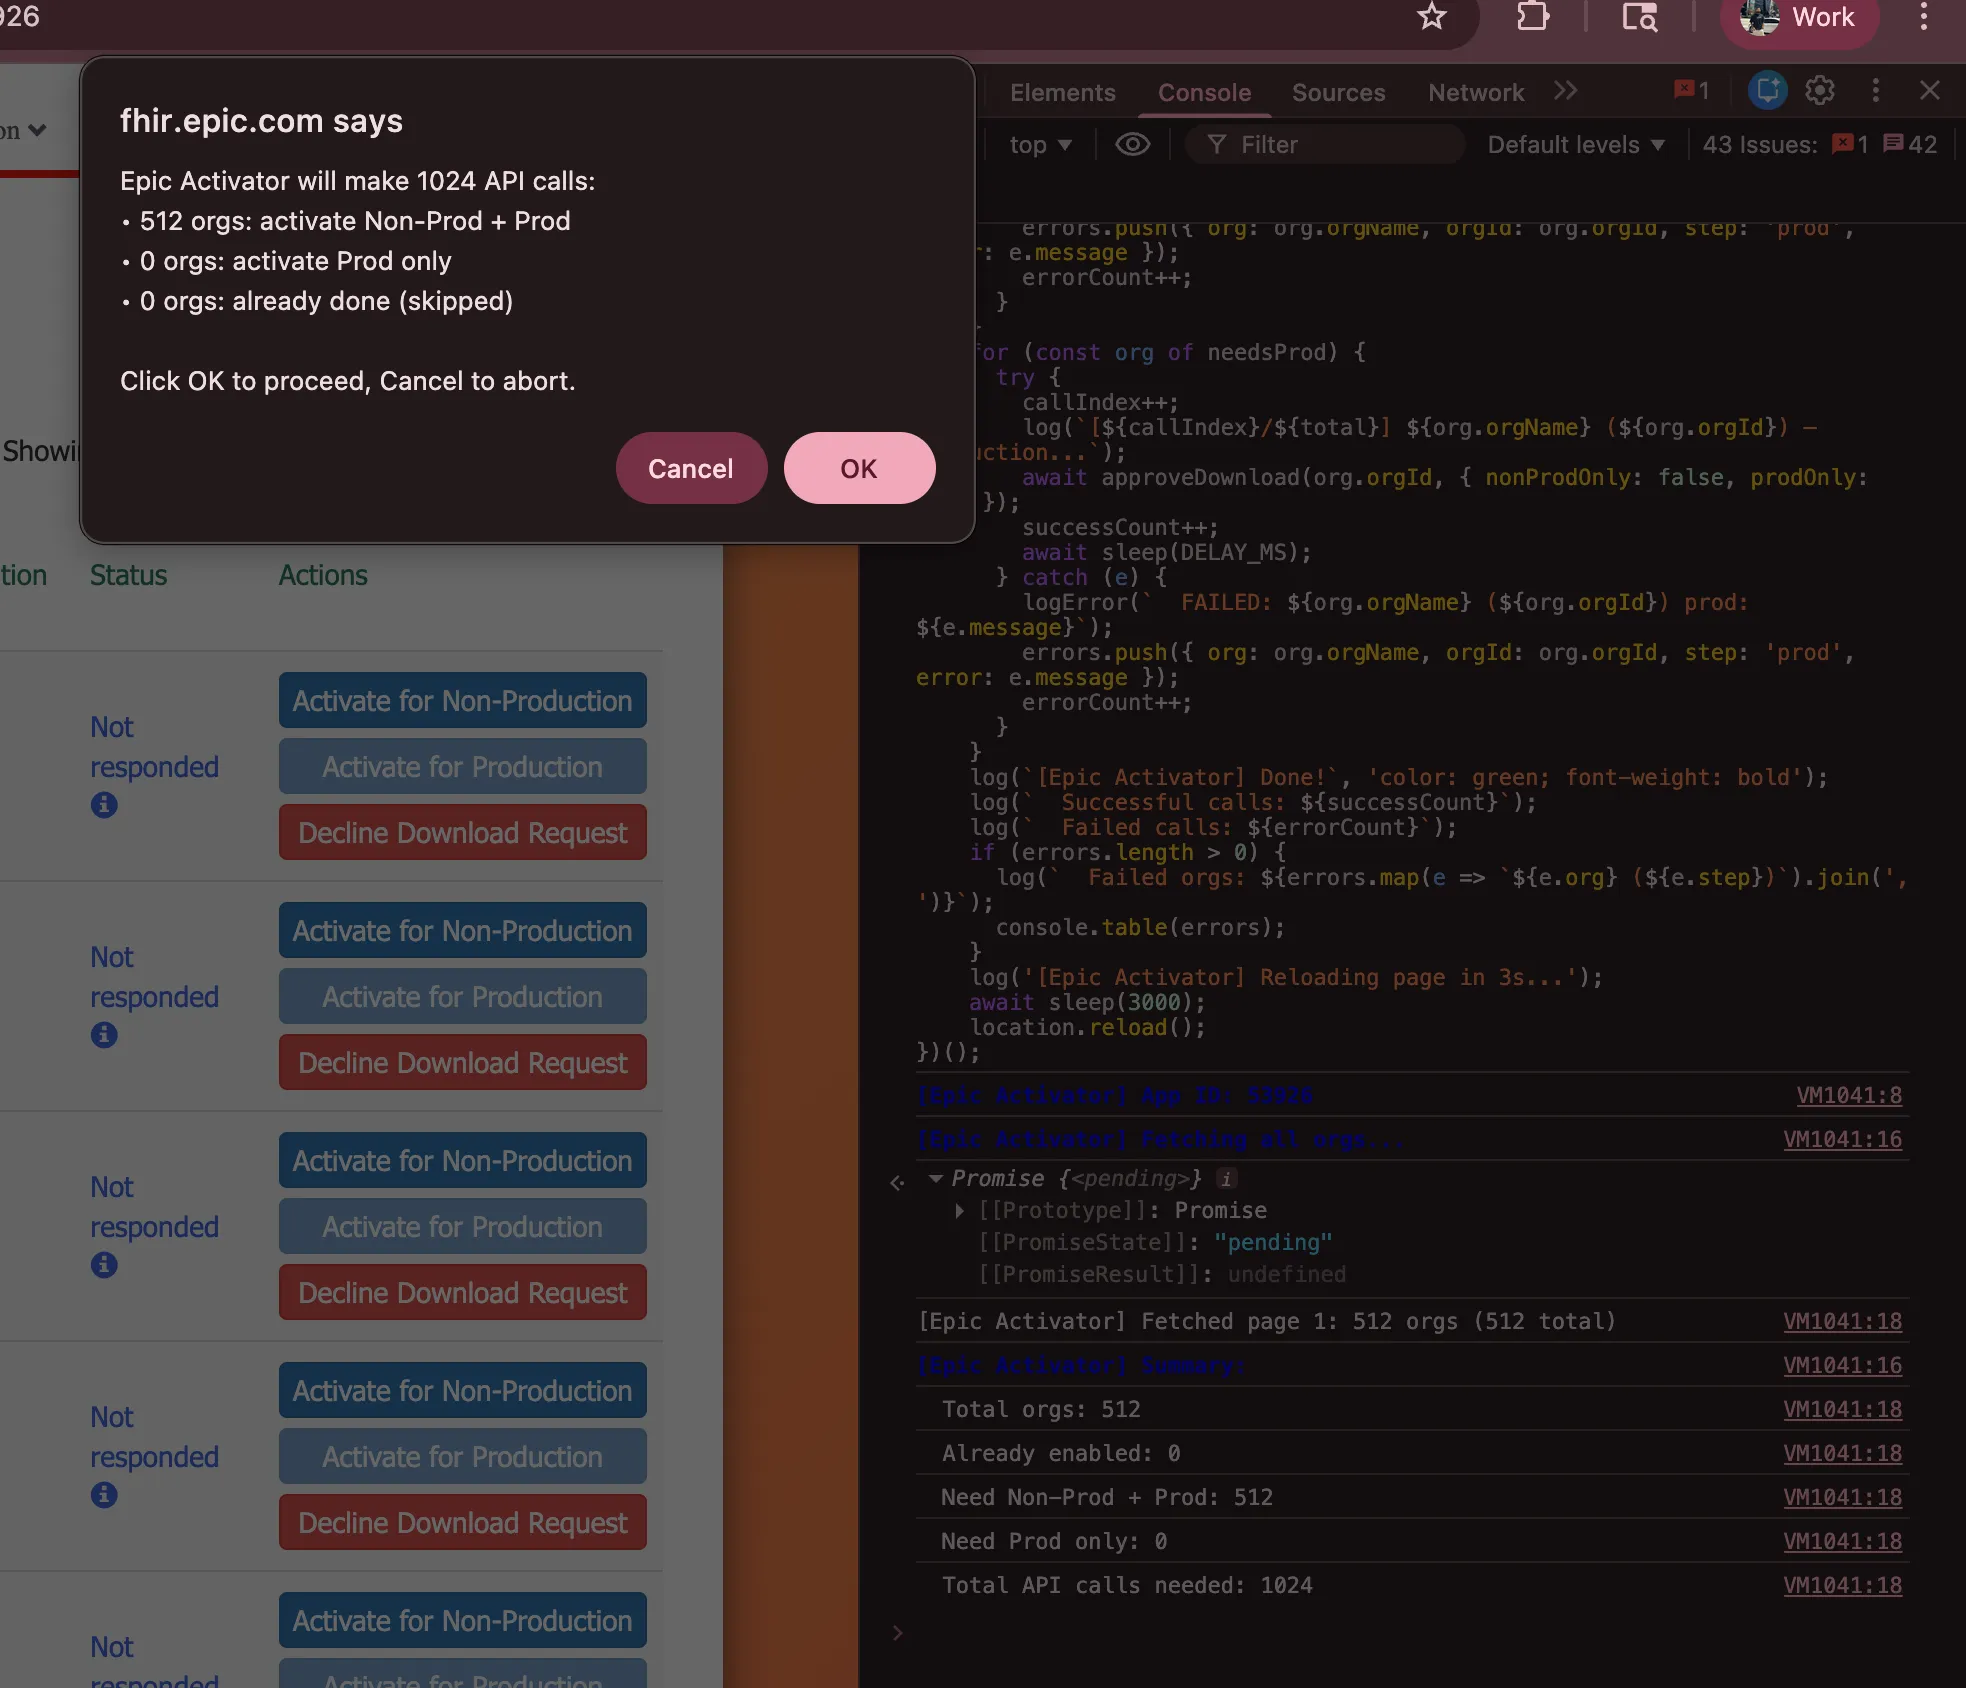
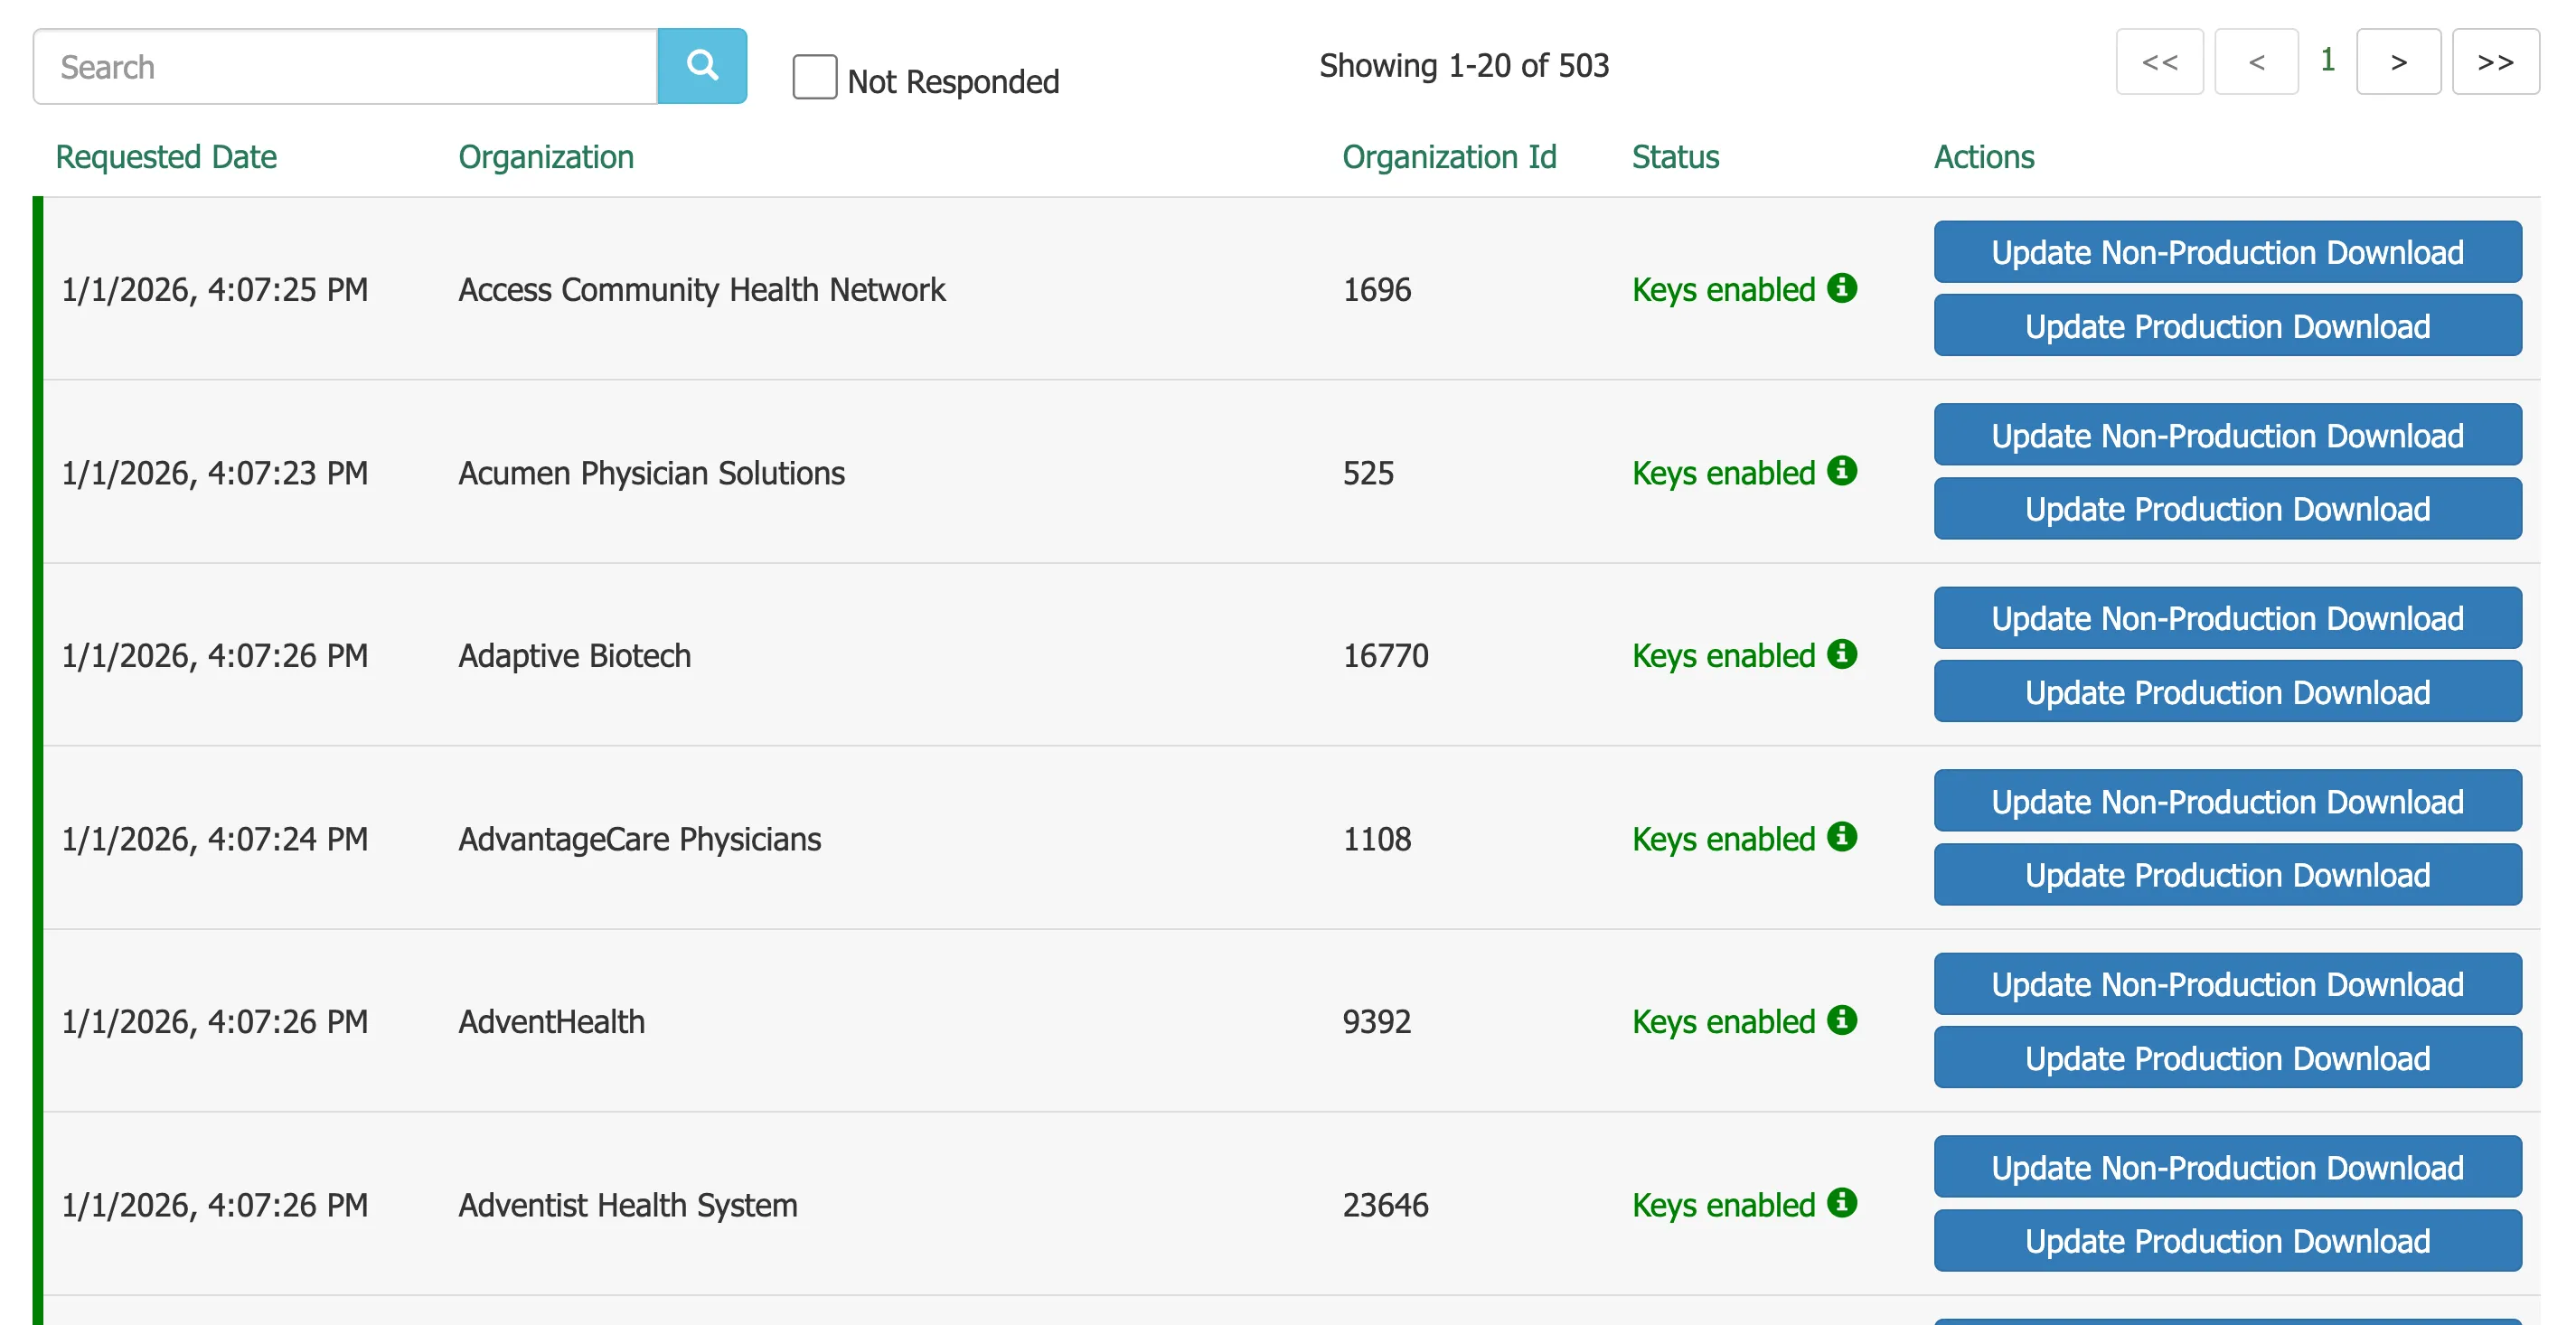
})();The script fetches all organizations, shows you a confirmation dialog with the count, and then activates each one with a 500ms delay between calls. It logs progress to the console and to sessionStorage, so you can check results even after the page reloads. After the script finishes and the page reloads, all organizations should show “Keys enabled” status.
Run the script in the console and click “OK” on the browser prompt.
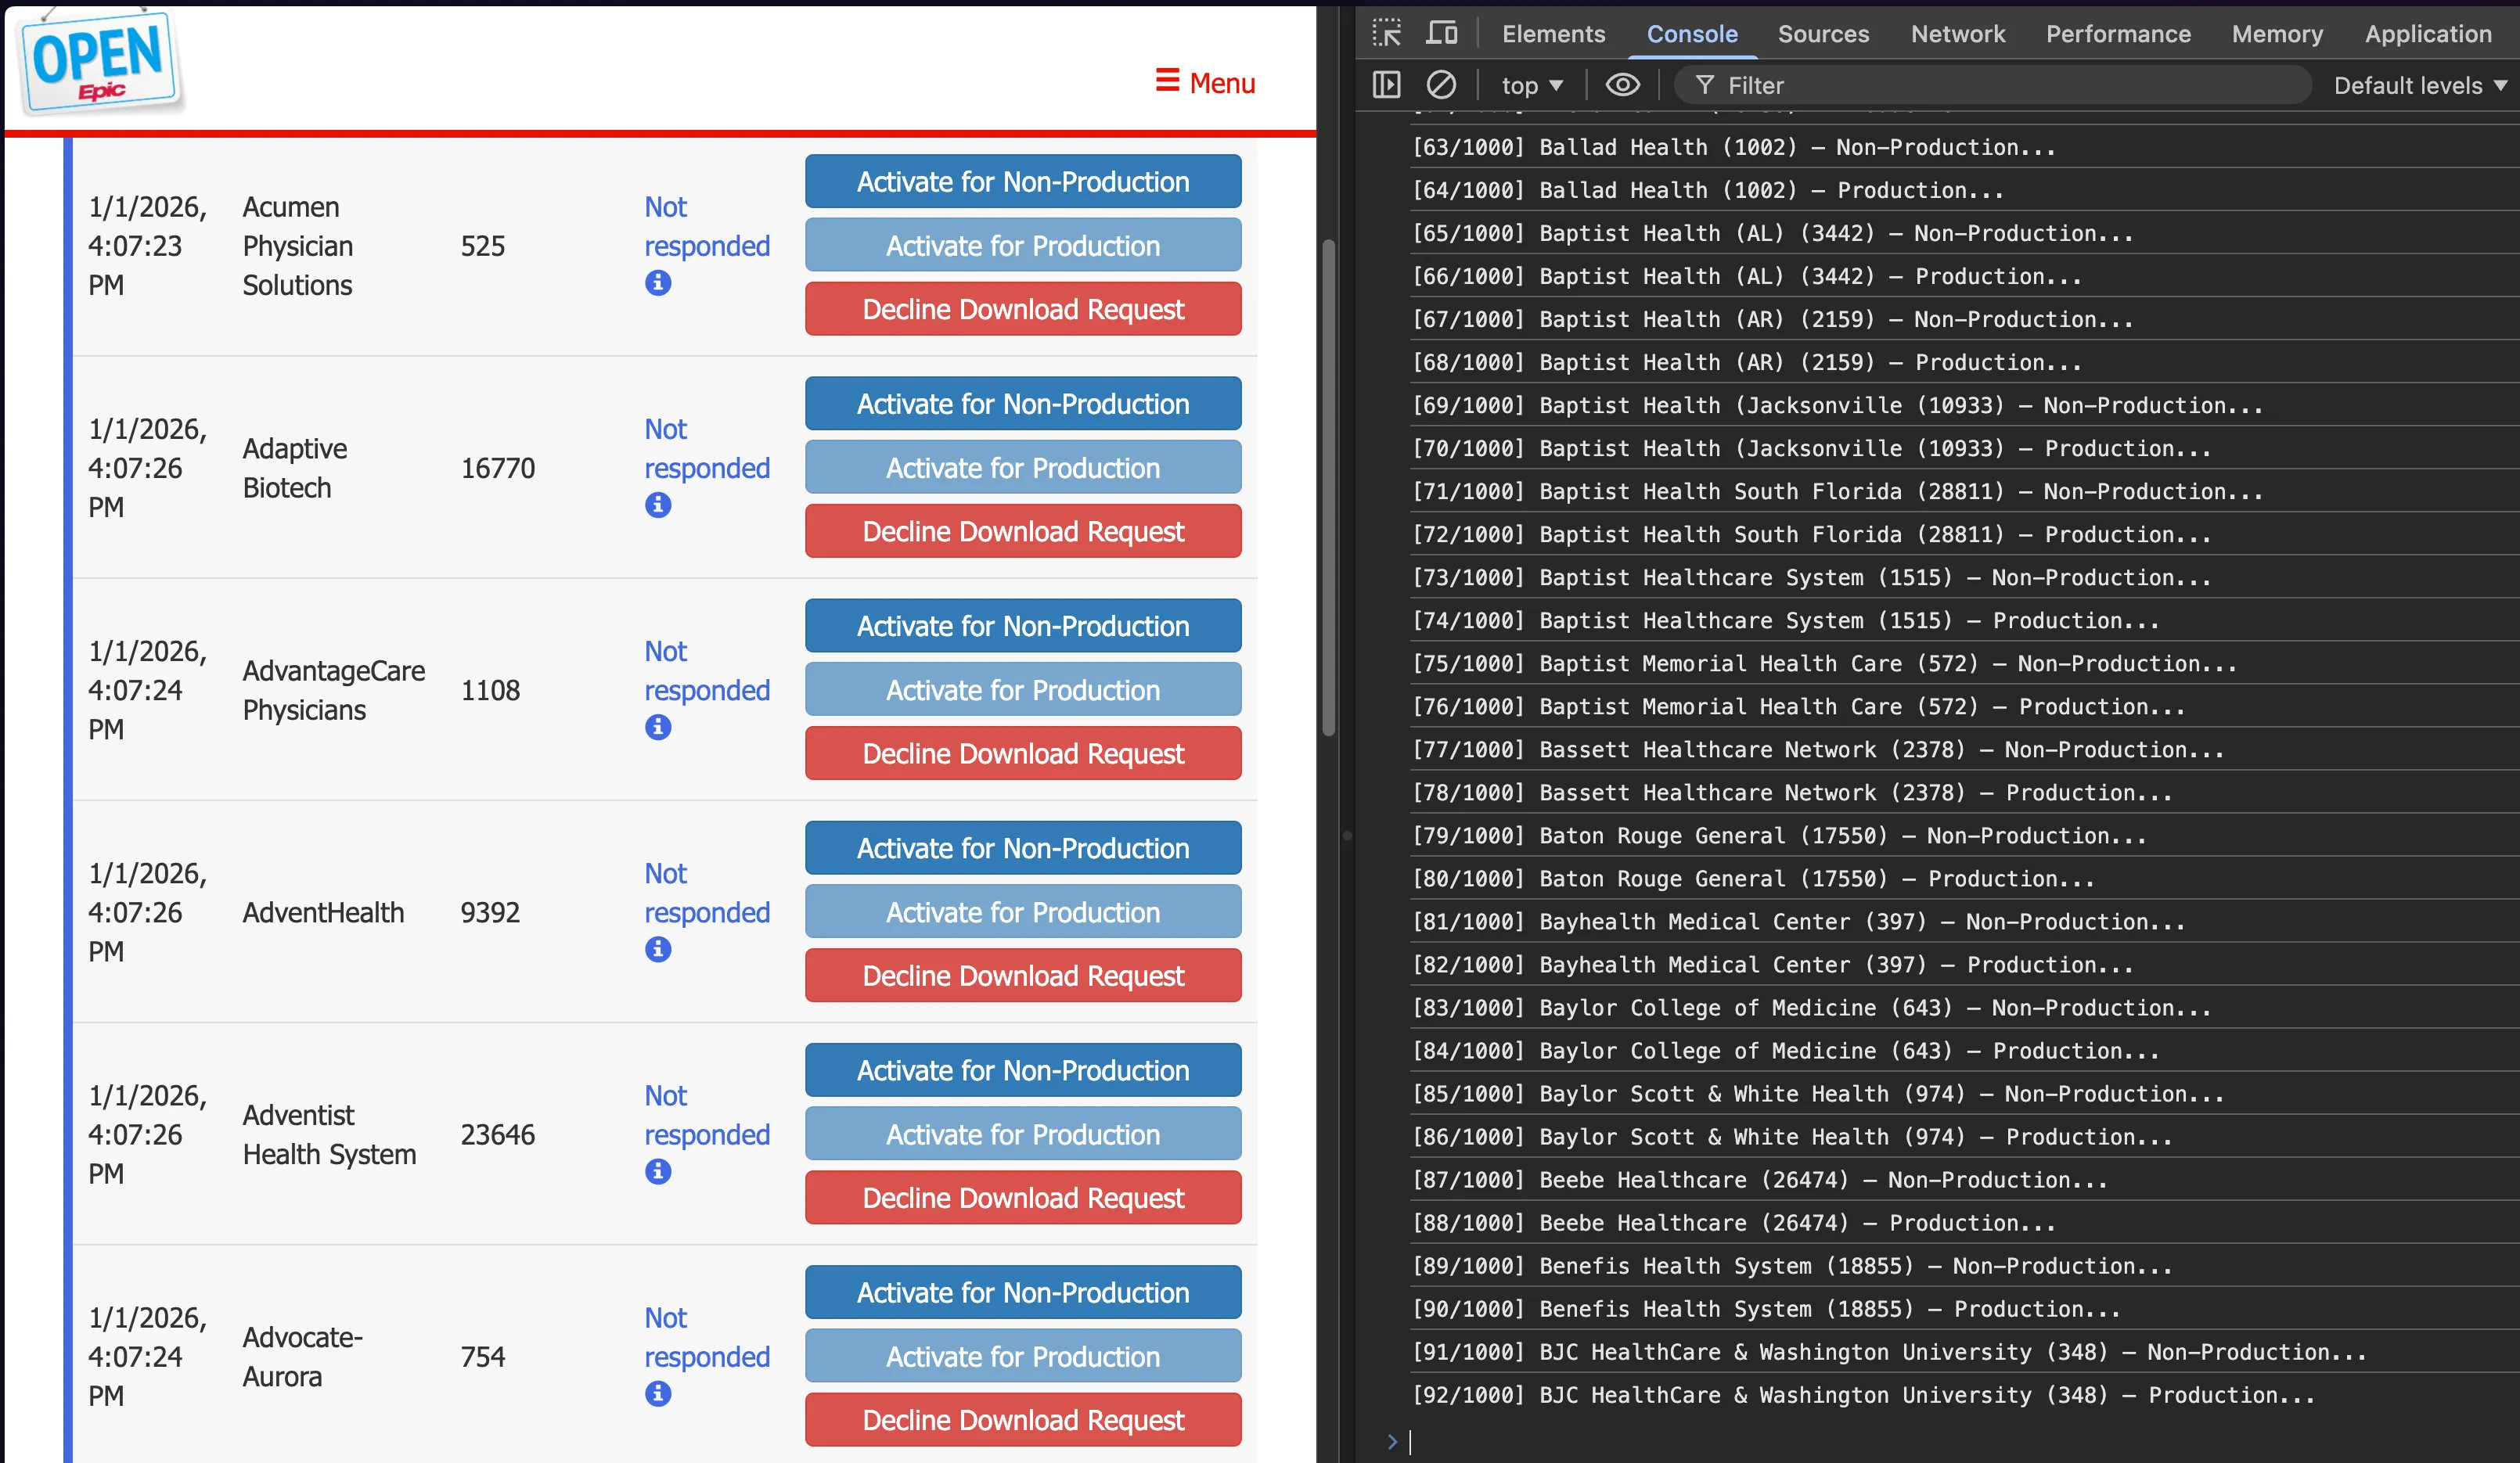
- After the script finishes and the page reloads, all organizations should show “Keys enabled” status.
- Your app is live across all activated Epic organizations, and patients at those hospitals can now authenticate and pull their records through your app.
With client ID you’re now ready to test and launch your integration with Epic via Medblocks Platform.