Athena Integration Guide
Athenahealth is one of the largest healthcare technology companies, serving over 150,000 healthcare providers and managing data for more than 72 million patients across their connected network. Their EHR system features intuitive workflows with AI-powered capabilities like automatic clinical documentation through Ambient Notes, real-time patient data integration from across their vast network, and specialty-specific configurations for areas like women’s health, pediatrics, and behavioral health. The platform combines electronic health records with practice management and patient engagement tools, allowing providers to access comprehensive patient charts that automatically pull in records, lab results, and care history from anywhere patients receive treatment within their extensive provider network. Integrate with Athena Health to plug your app into that network.
This is a step-by-step guide to registering a system-to-system FHIR app on athenahealth’s developer portal and taking it all the way to connected production practices. We use the Certified APIs path with 3-legged OAuth and JWKS-based client authentication. Certified APIs do not require athena’s Technical Request Form, which is the fastest route to live data. If you need a non-certified endpoint later, you can add it from the same app.
Setup Guide
Step 1: Create a developer account
- Go to the Athena Developer Portal and open the signup form.
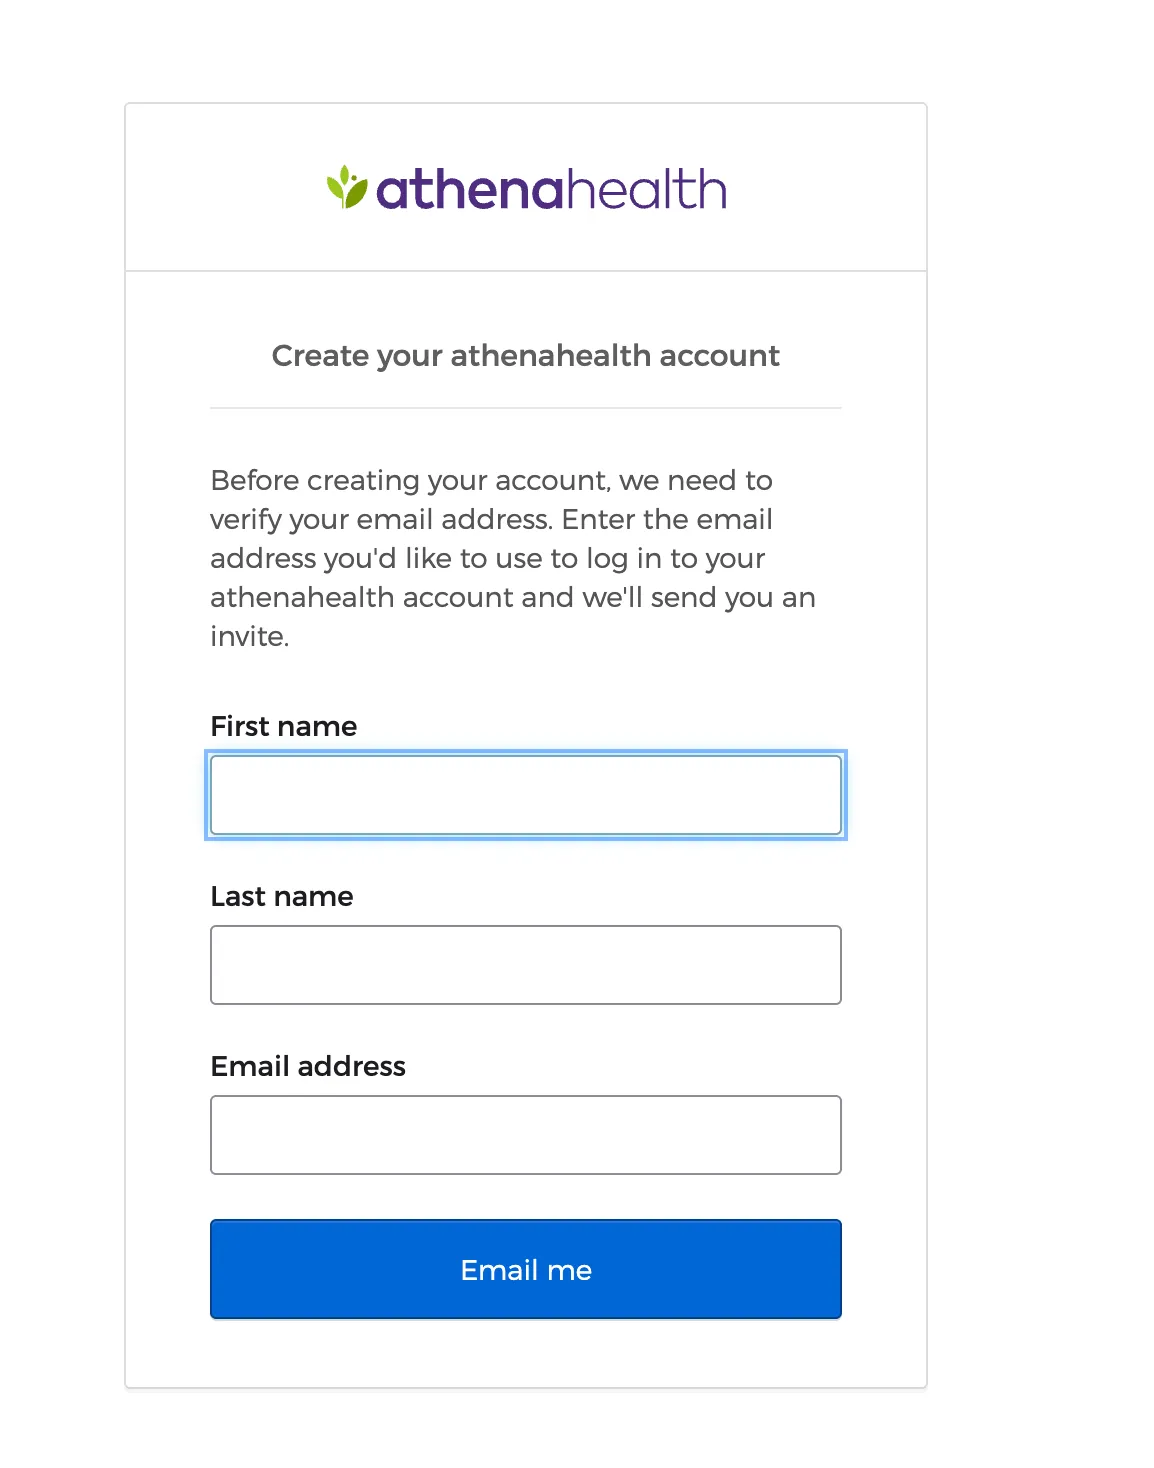
- Fill in your name, work email, and company details. Submit the form, athena emails you a verification link.
-
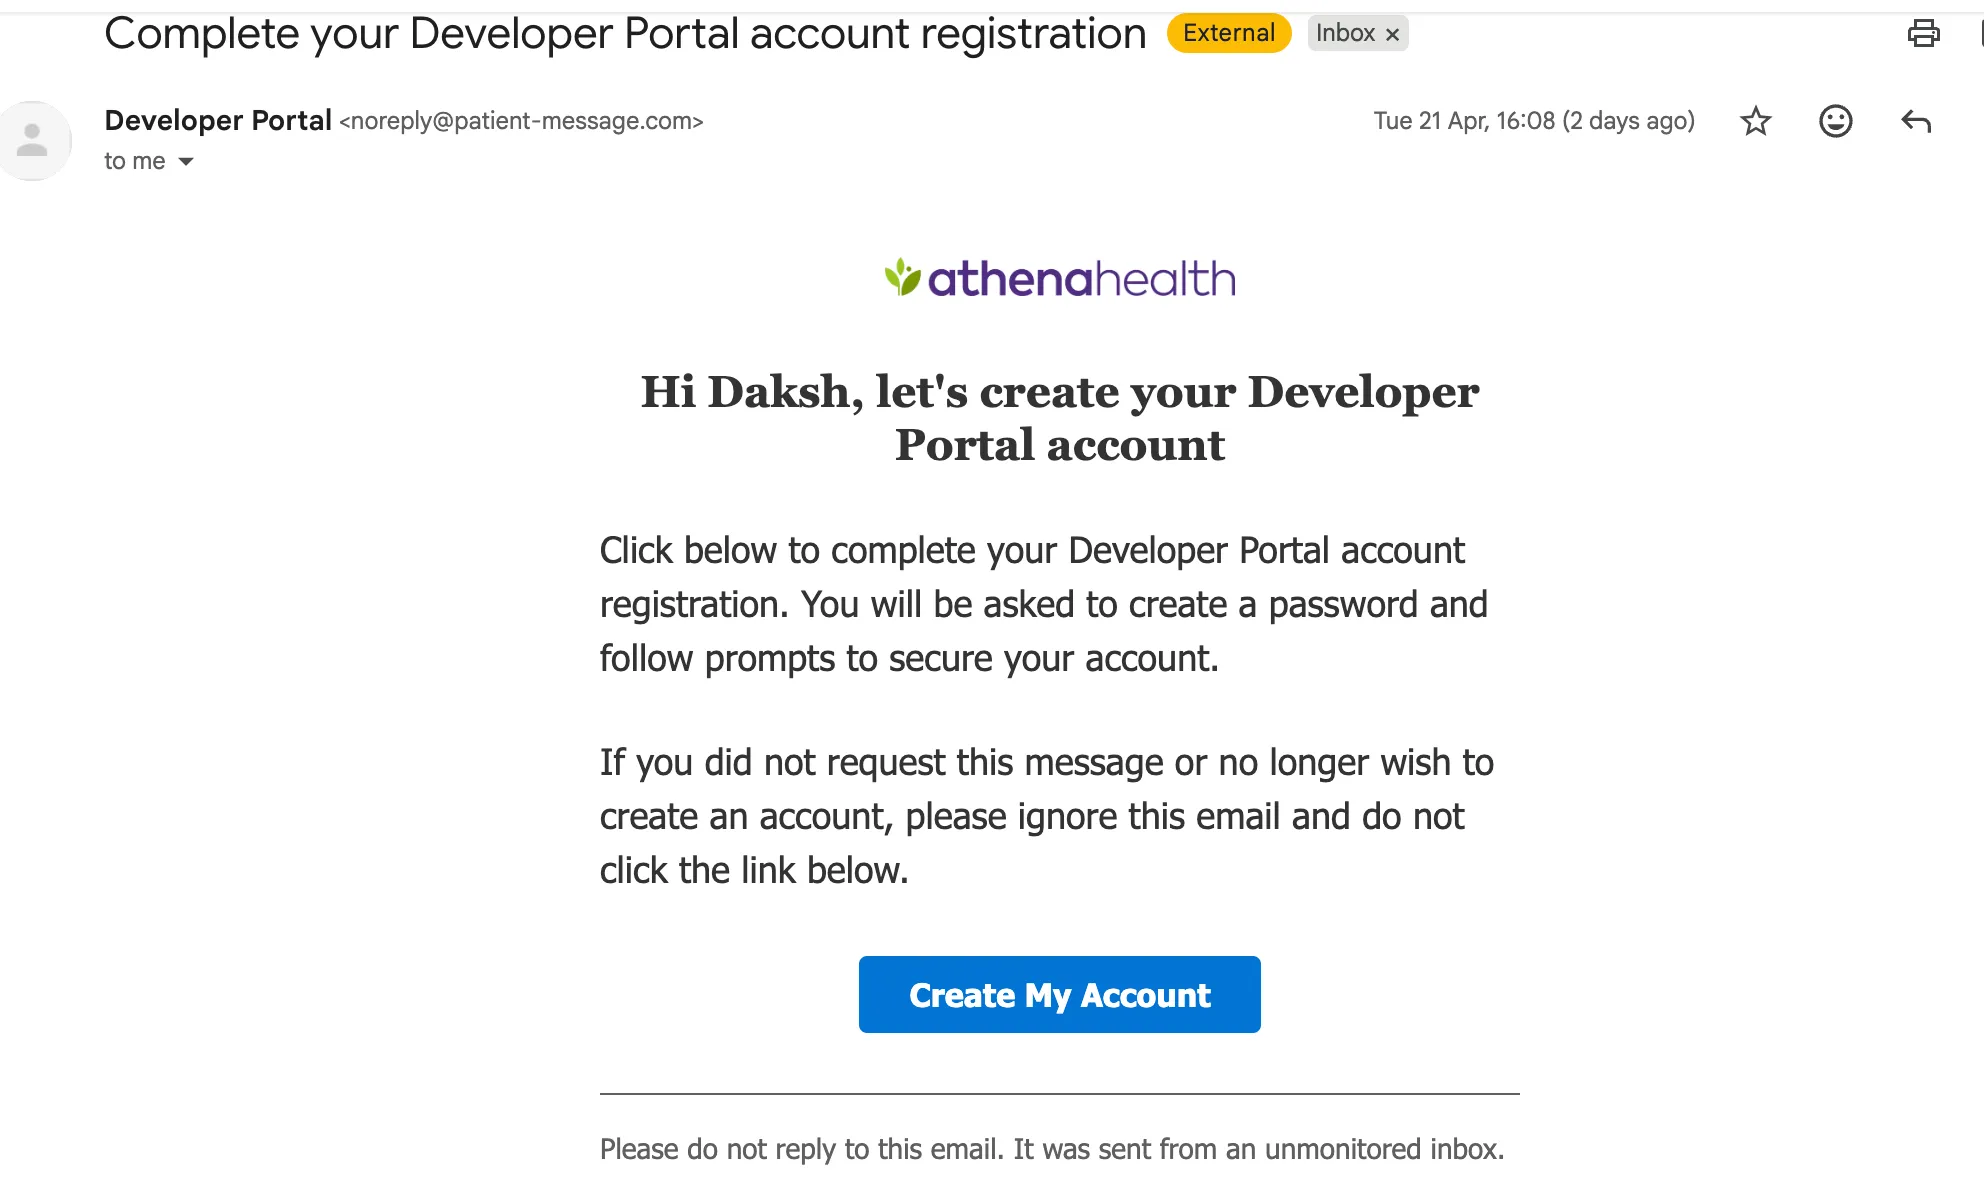
Click the link in the email and set your password. If the email doesn’t arrive within a few minutes, check spam.
-
Once your account is active, sign back in with your credentials.
Step 2: Create your application
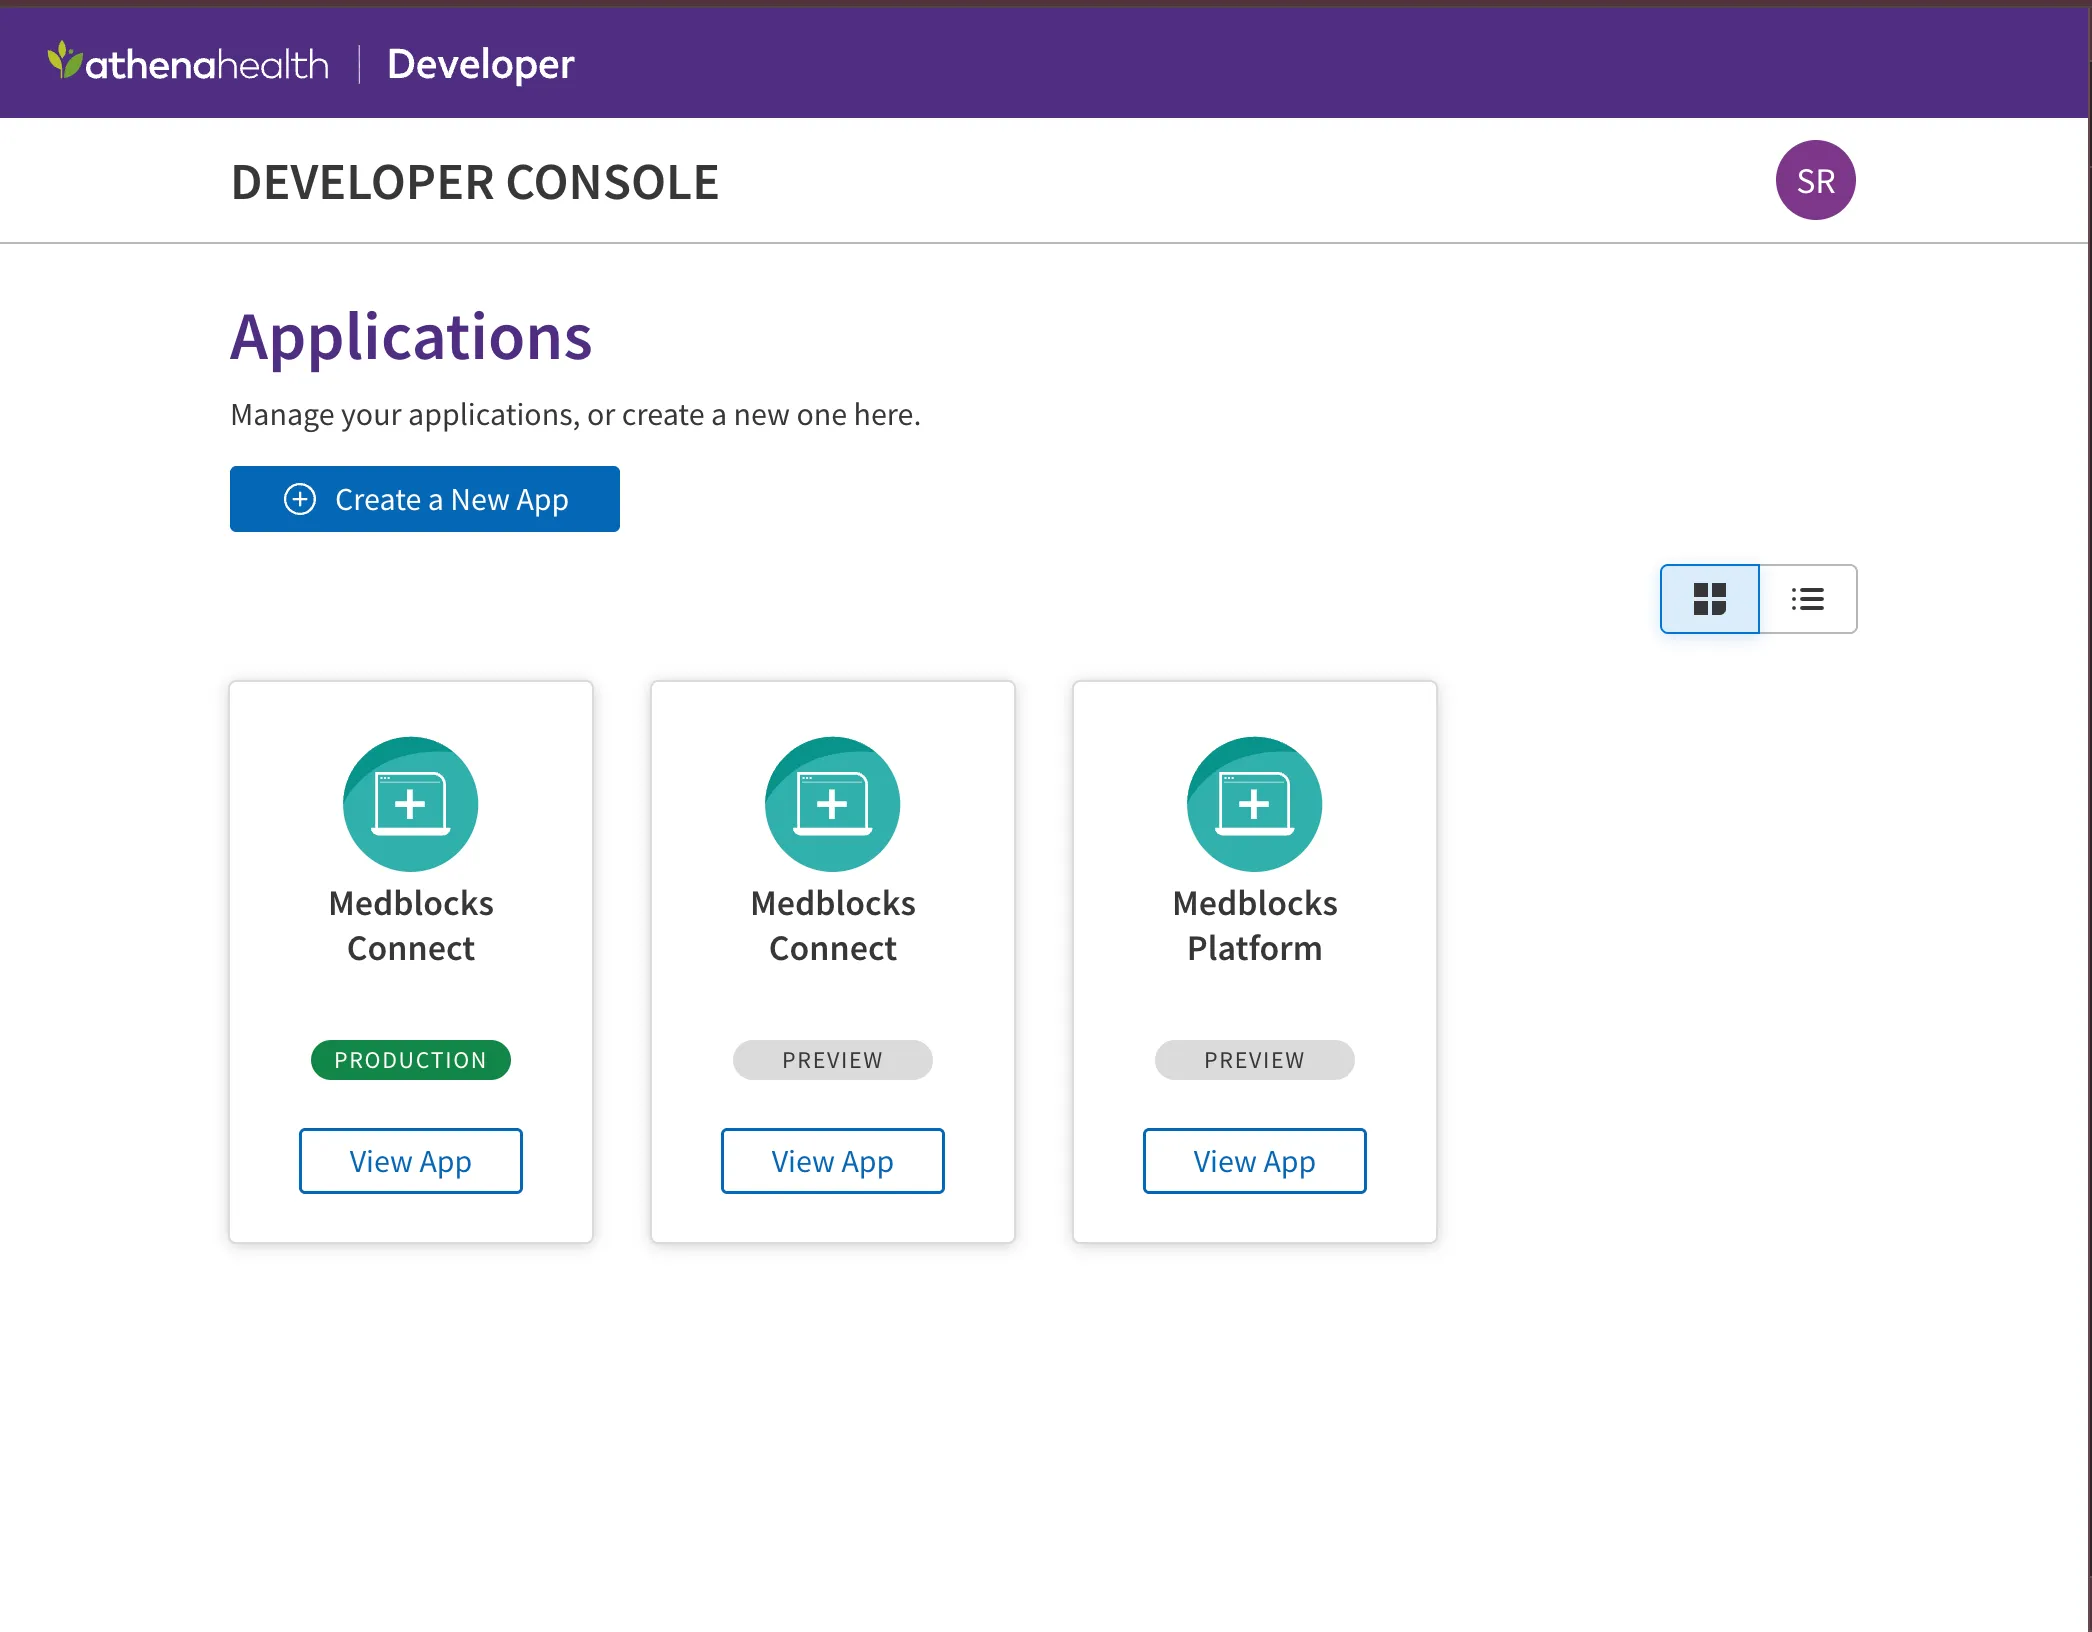
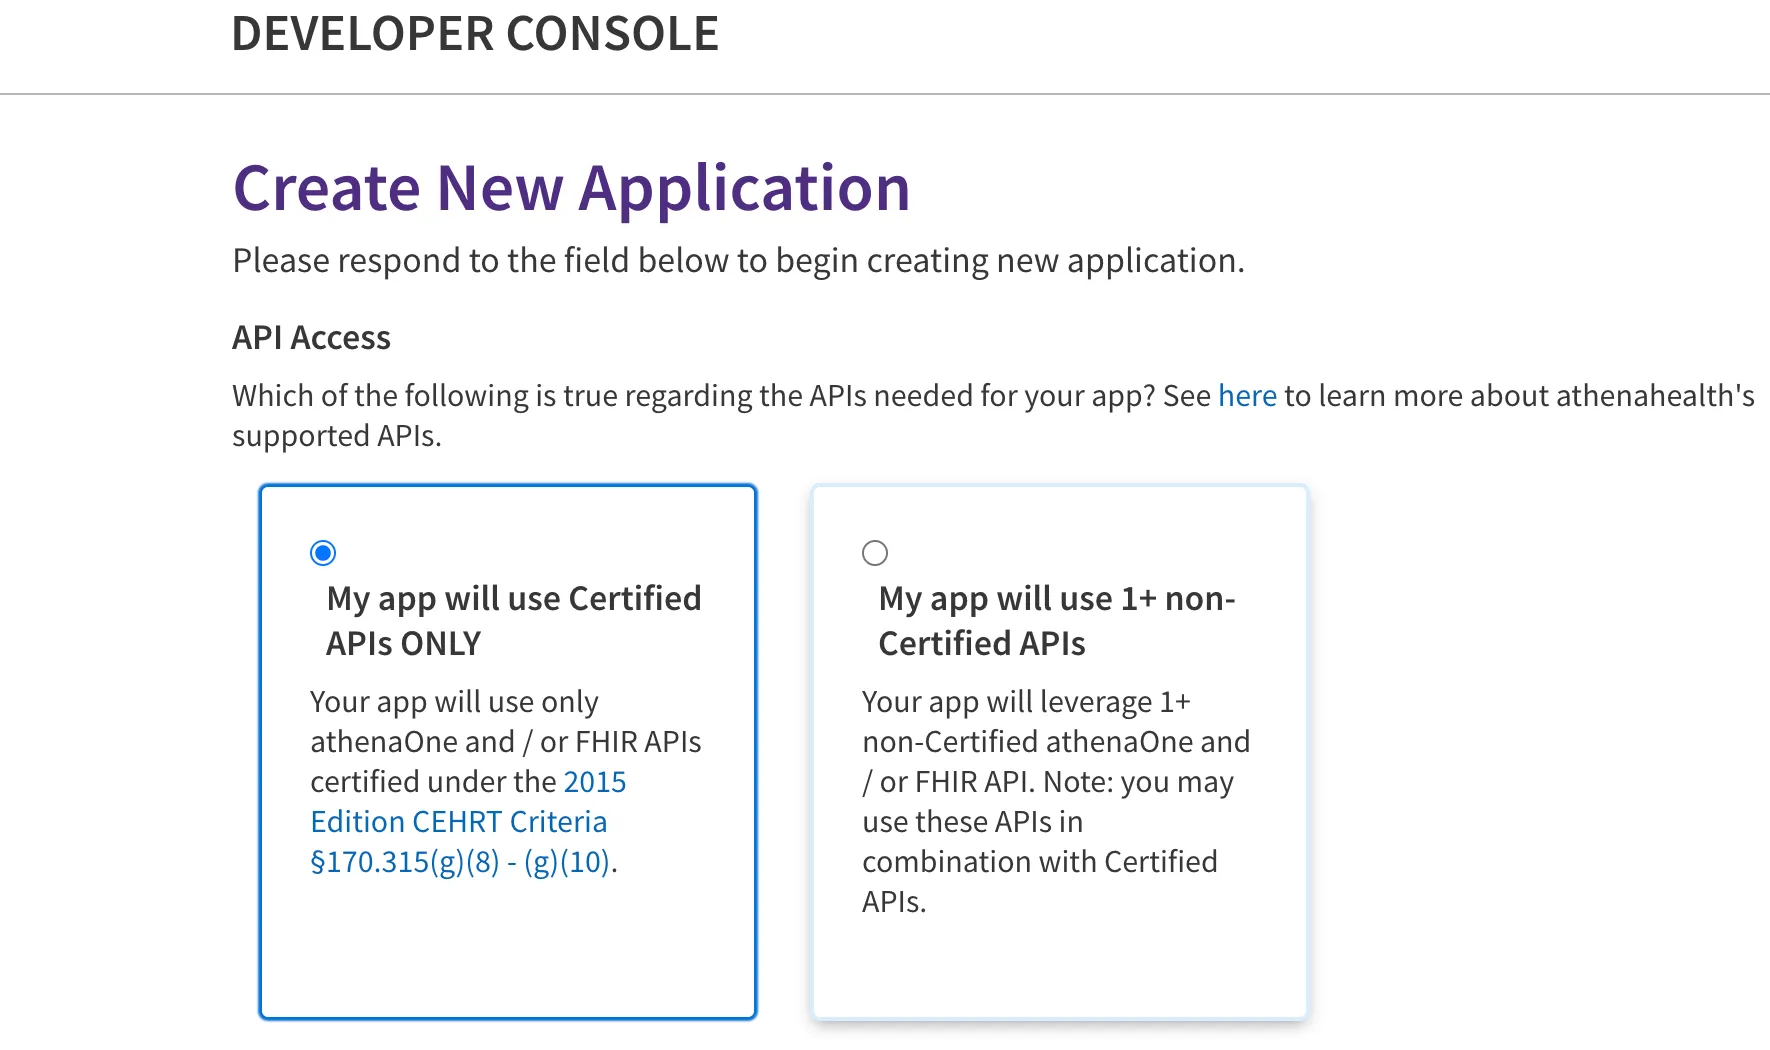
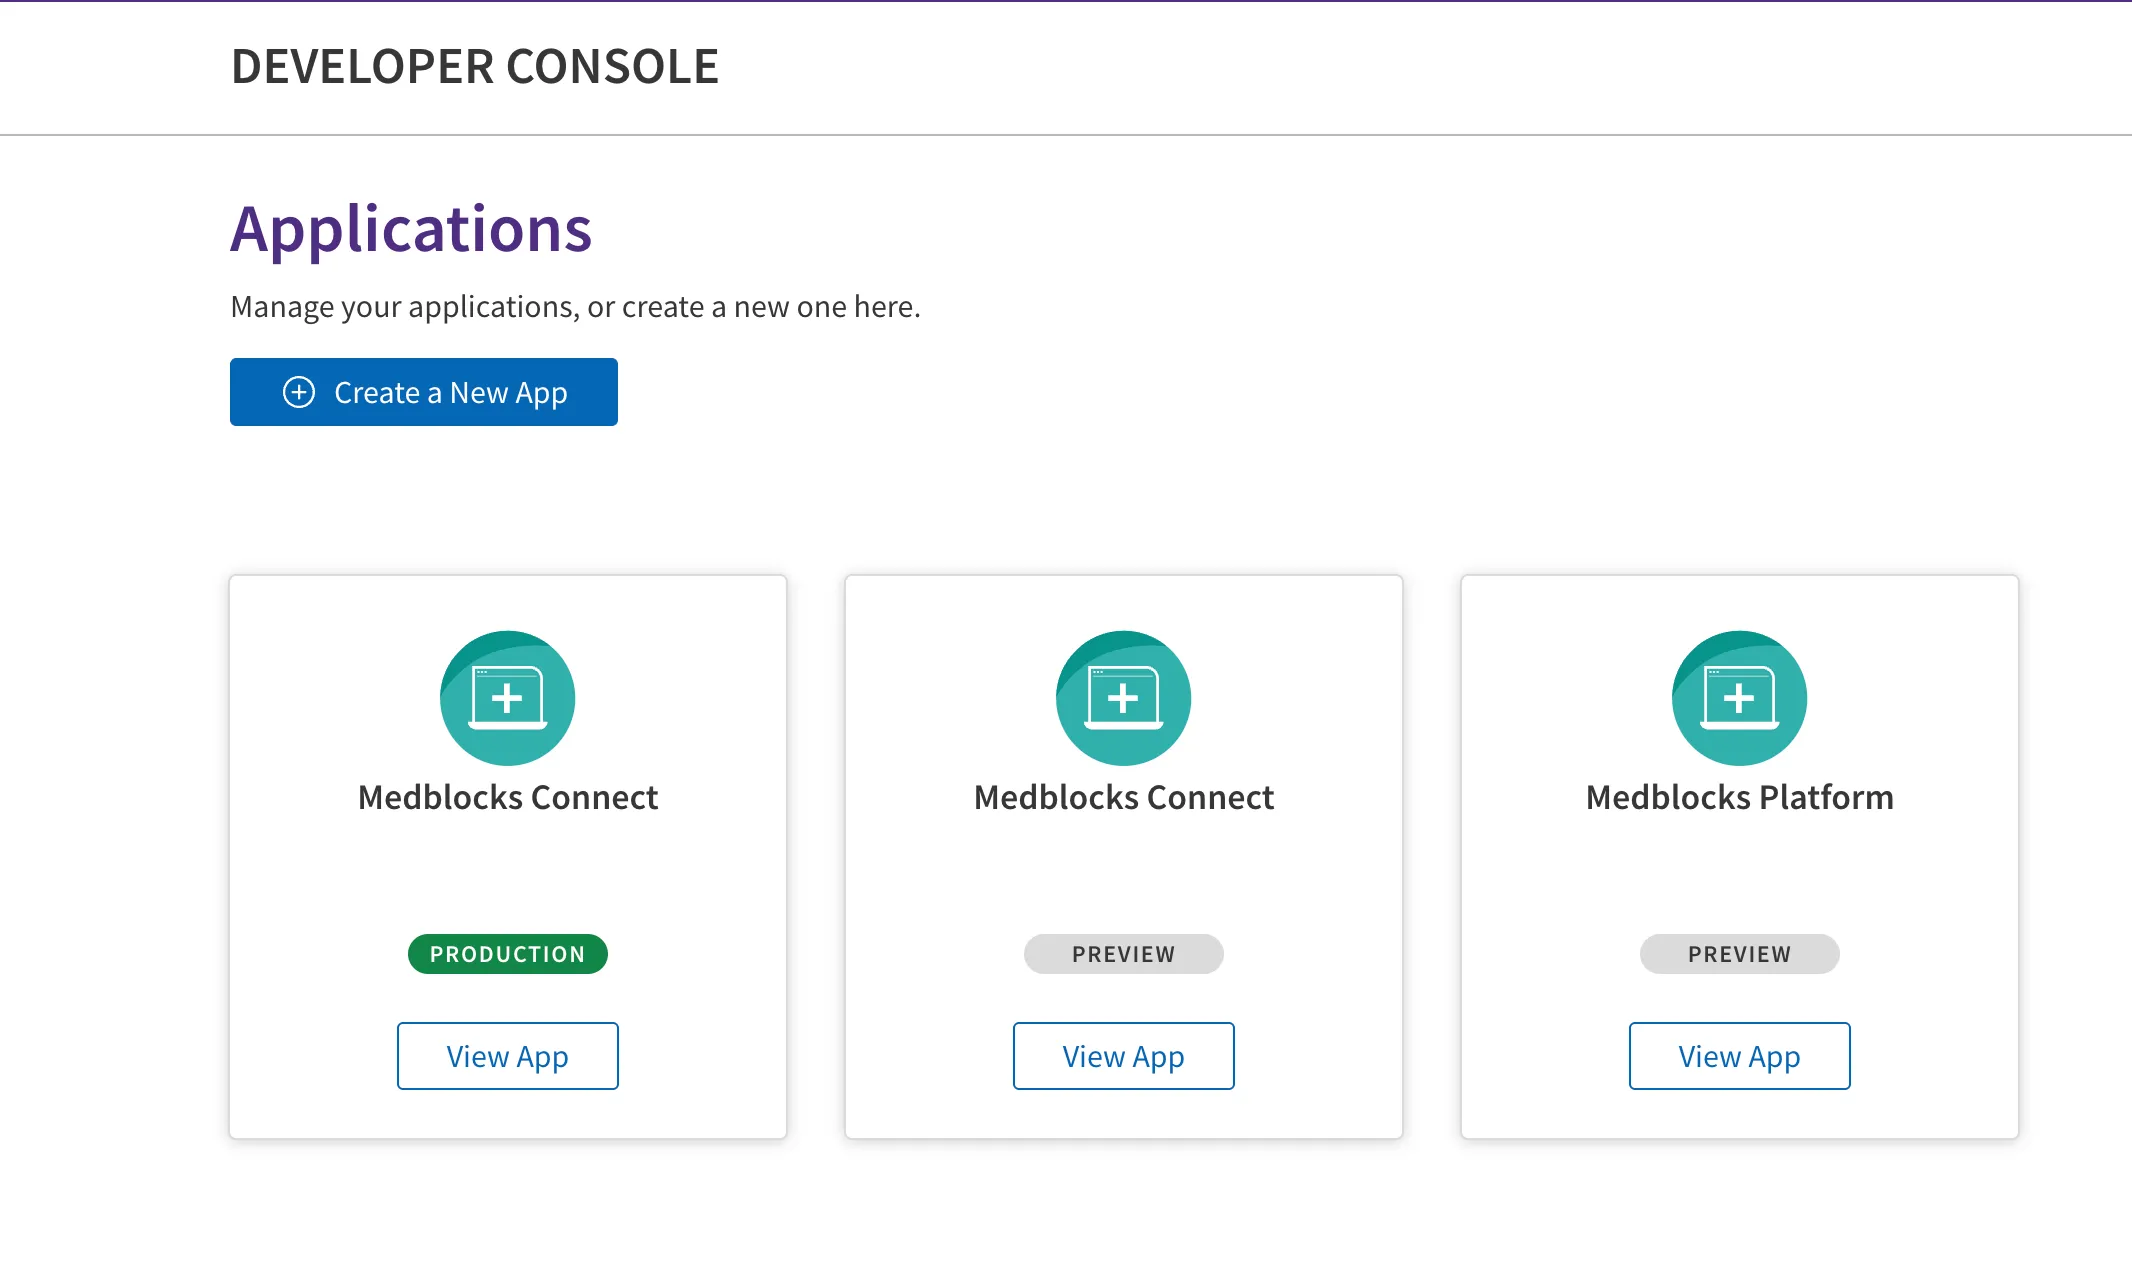
- After login you land on the developer console. Click “Create a New App”.
- Choose “My app will use Certified APIs only”. This is what lets us skip the Technical Request Form. Certified APIs cover every USCDI scope you need for a read-only patient-facing integration.
- Pick the app category that best matches your use case. For most patient-facing integrations this is the record-access / patient-app category. If you are using Medblocks Platform, use the “3-Legged OAuth for Patients” option.
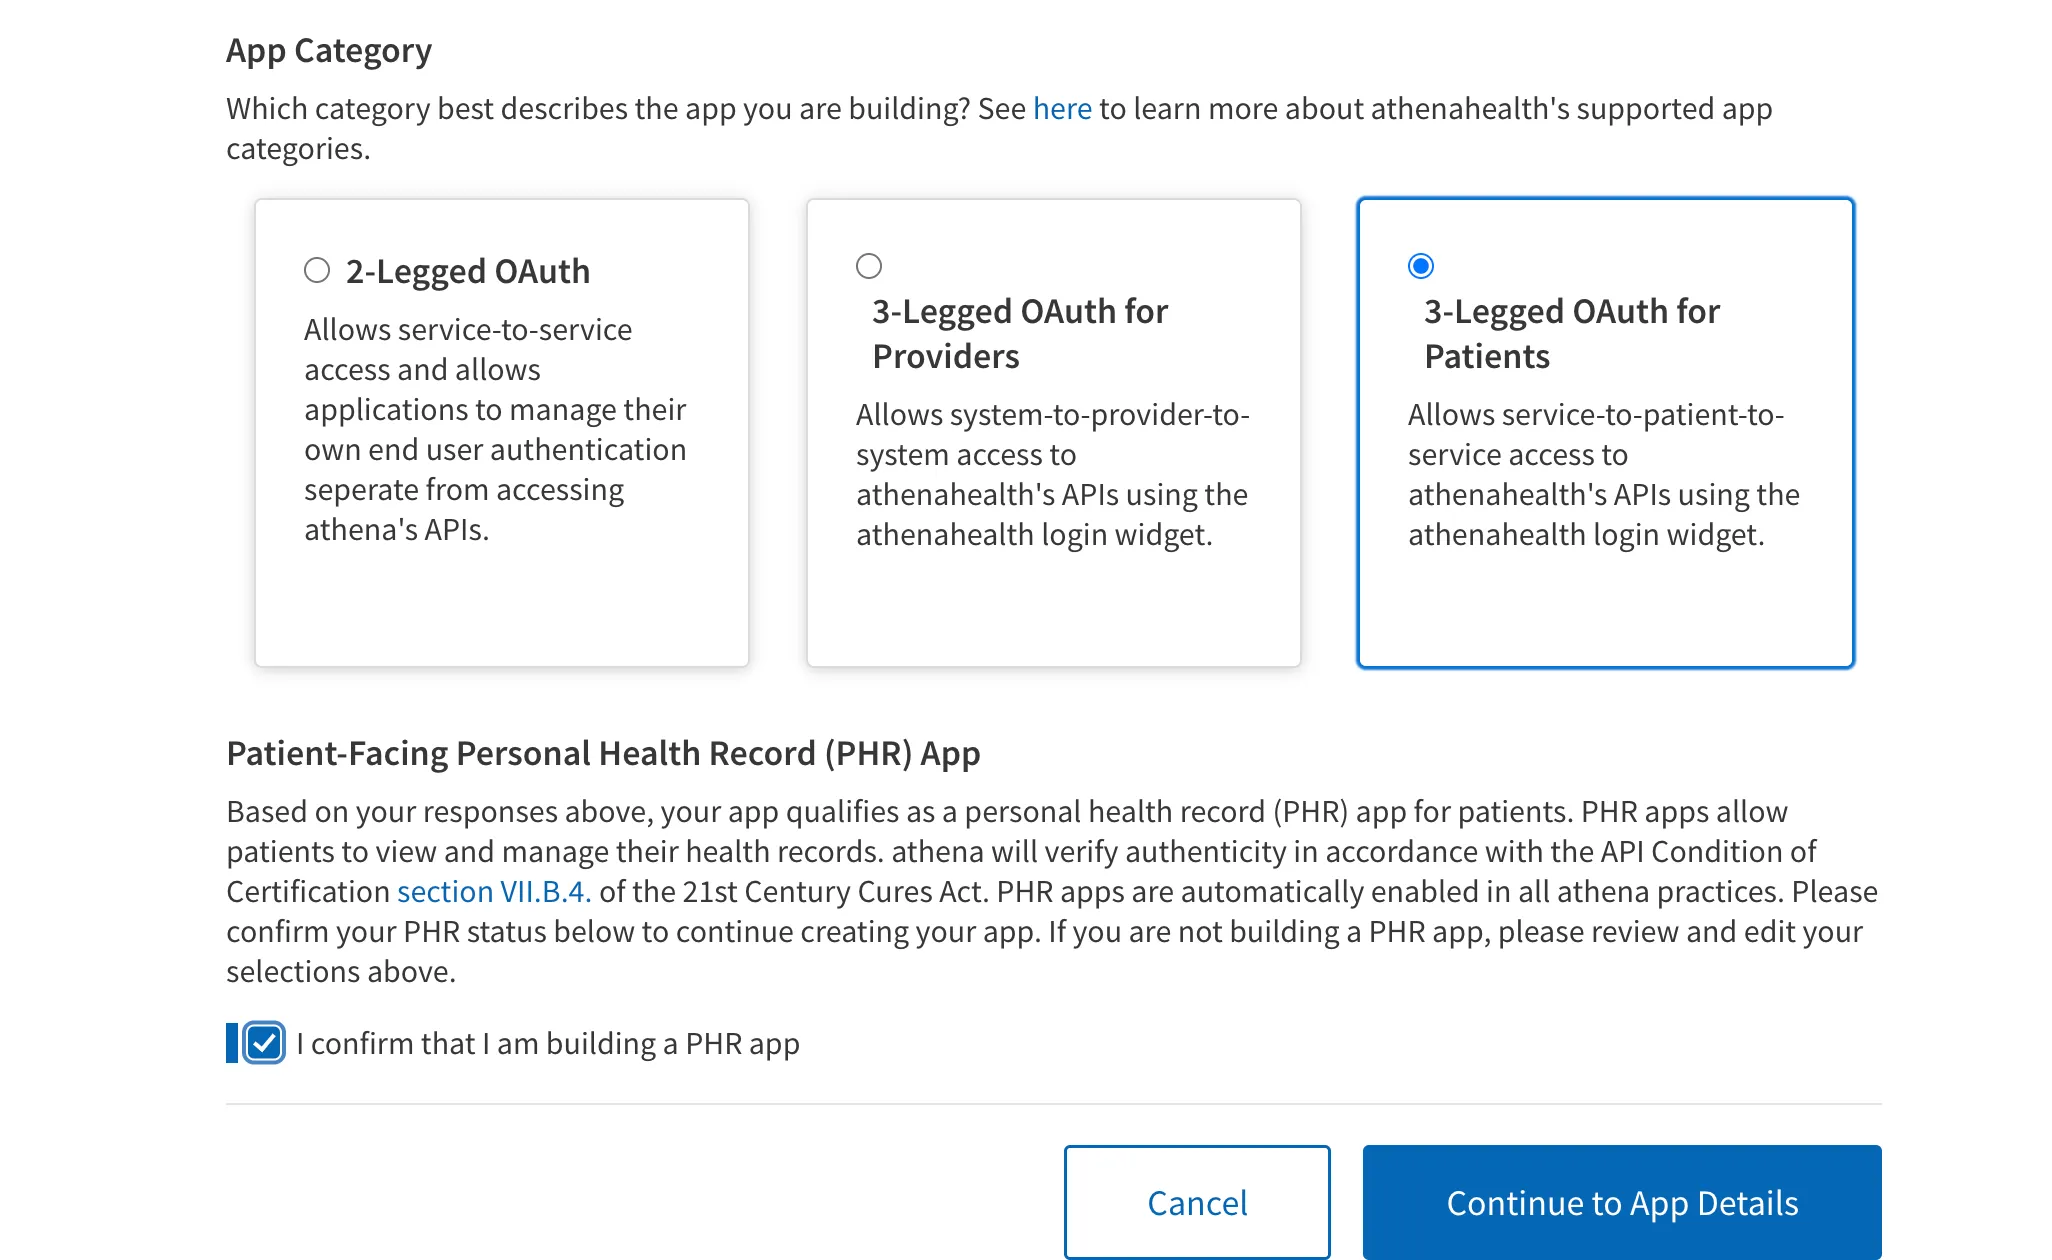
-
Click on the checkbox to confirm the PHR app.
-
Click “Continue to App Details”.
Step 3: Fill your app details
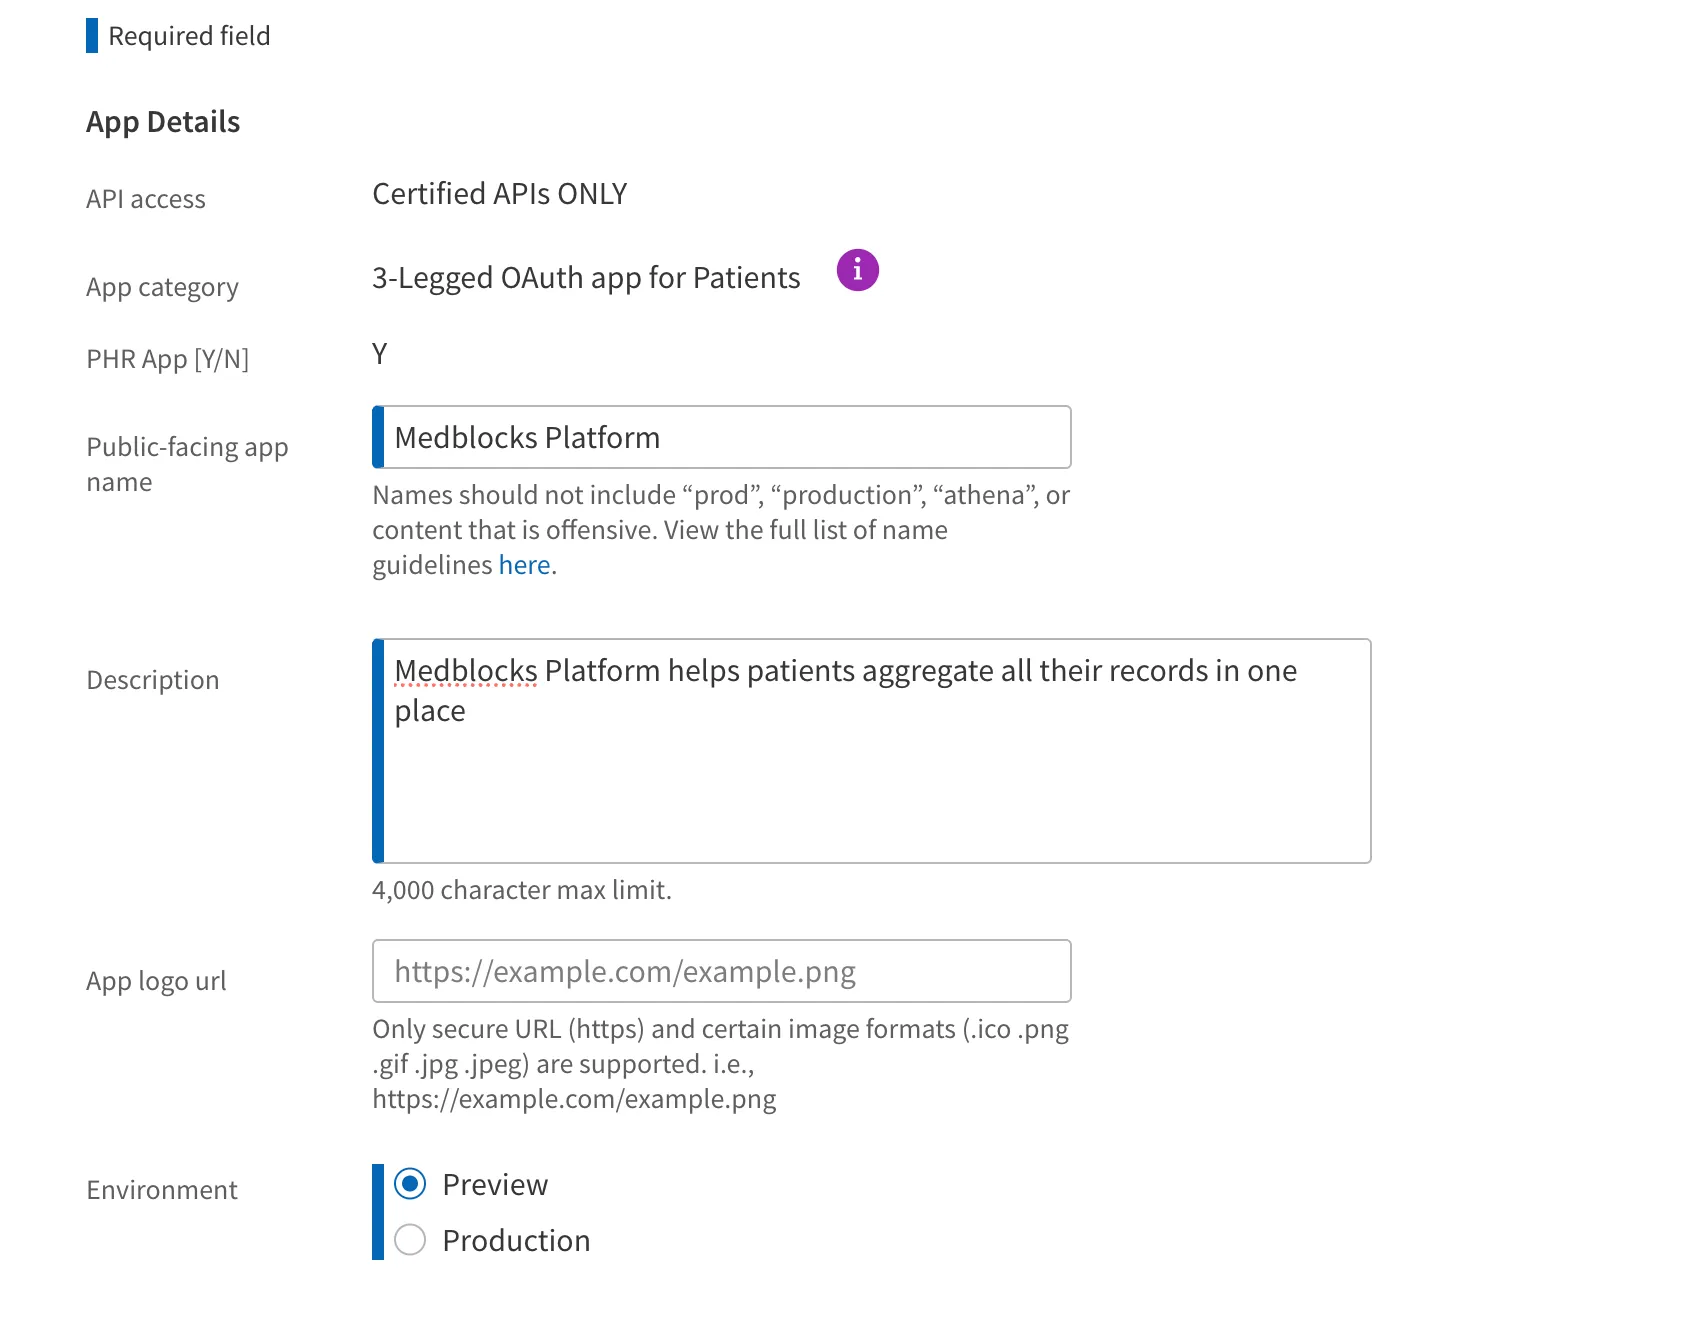
- Enter the app name, a short description, and a support contact email. The name and description are customer-visible on the athenaOne Marketplace listing; keep them clean and accurate.
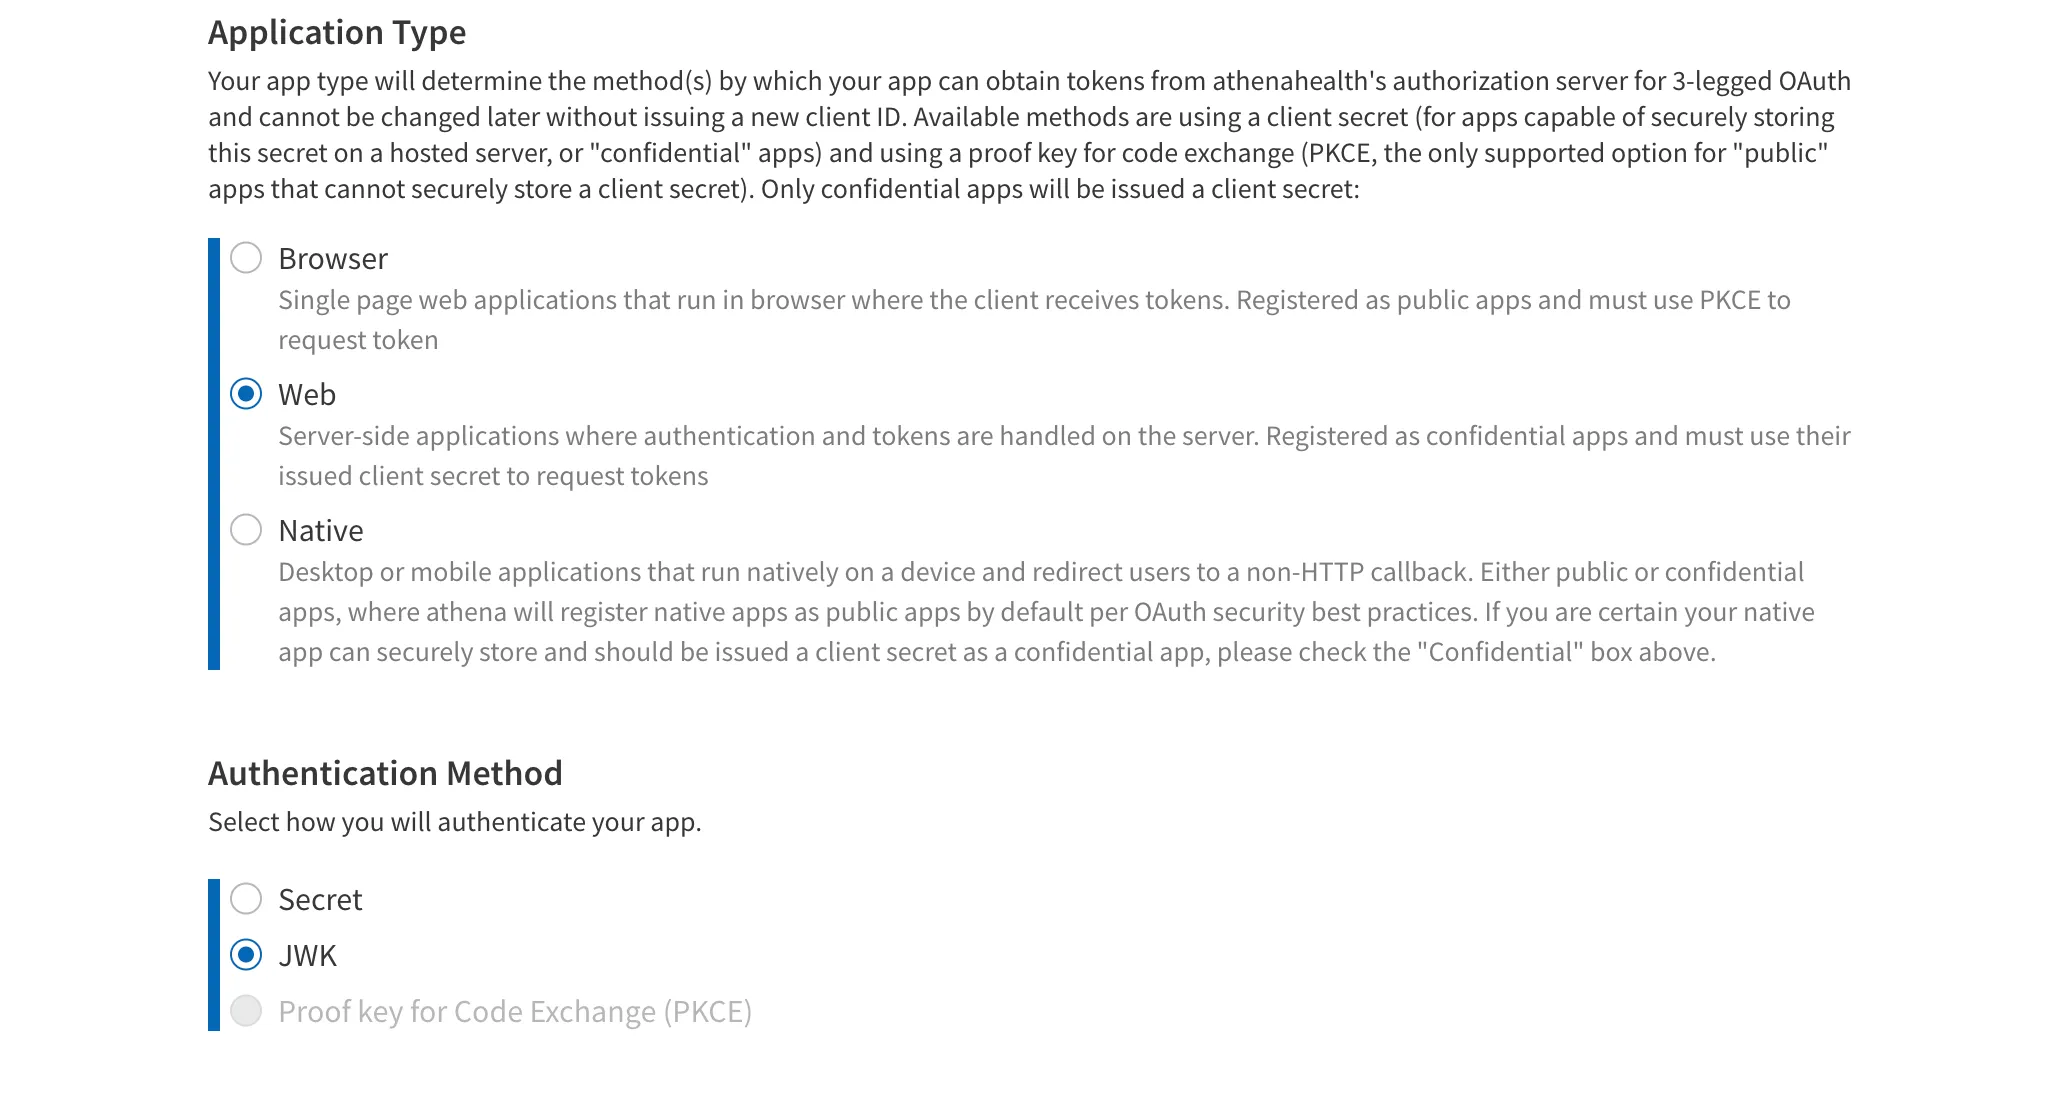
- Set the Application Type to Web, if you are integrating using the Medblocks Platform. “Web” means a server-side app that holds its signing key on a trusted backend, athena calls these “confidential” apps and only confidential apps get issued a client ID suitable for JWKS auth. Pick “Browser” only for a pure SPA with no backend (it forces PKCE instead of JWKS), or “Native” for desktop/mobile apps.
- Add your post-login redirect URIs. With 3-legged OAuth these are the callback URLs athena sends the patient back to after they authorize your app, so every URL your server listens on needs to be registered. You’ll typically want at least two:
- http://localhost:3000/callback for local development
- https://app.medblocks.com/api/auth/smart/callback for production
- an optional staging URL if you have one
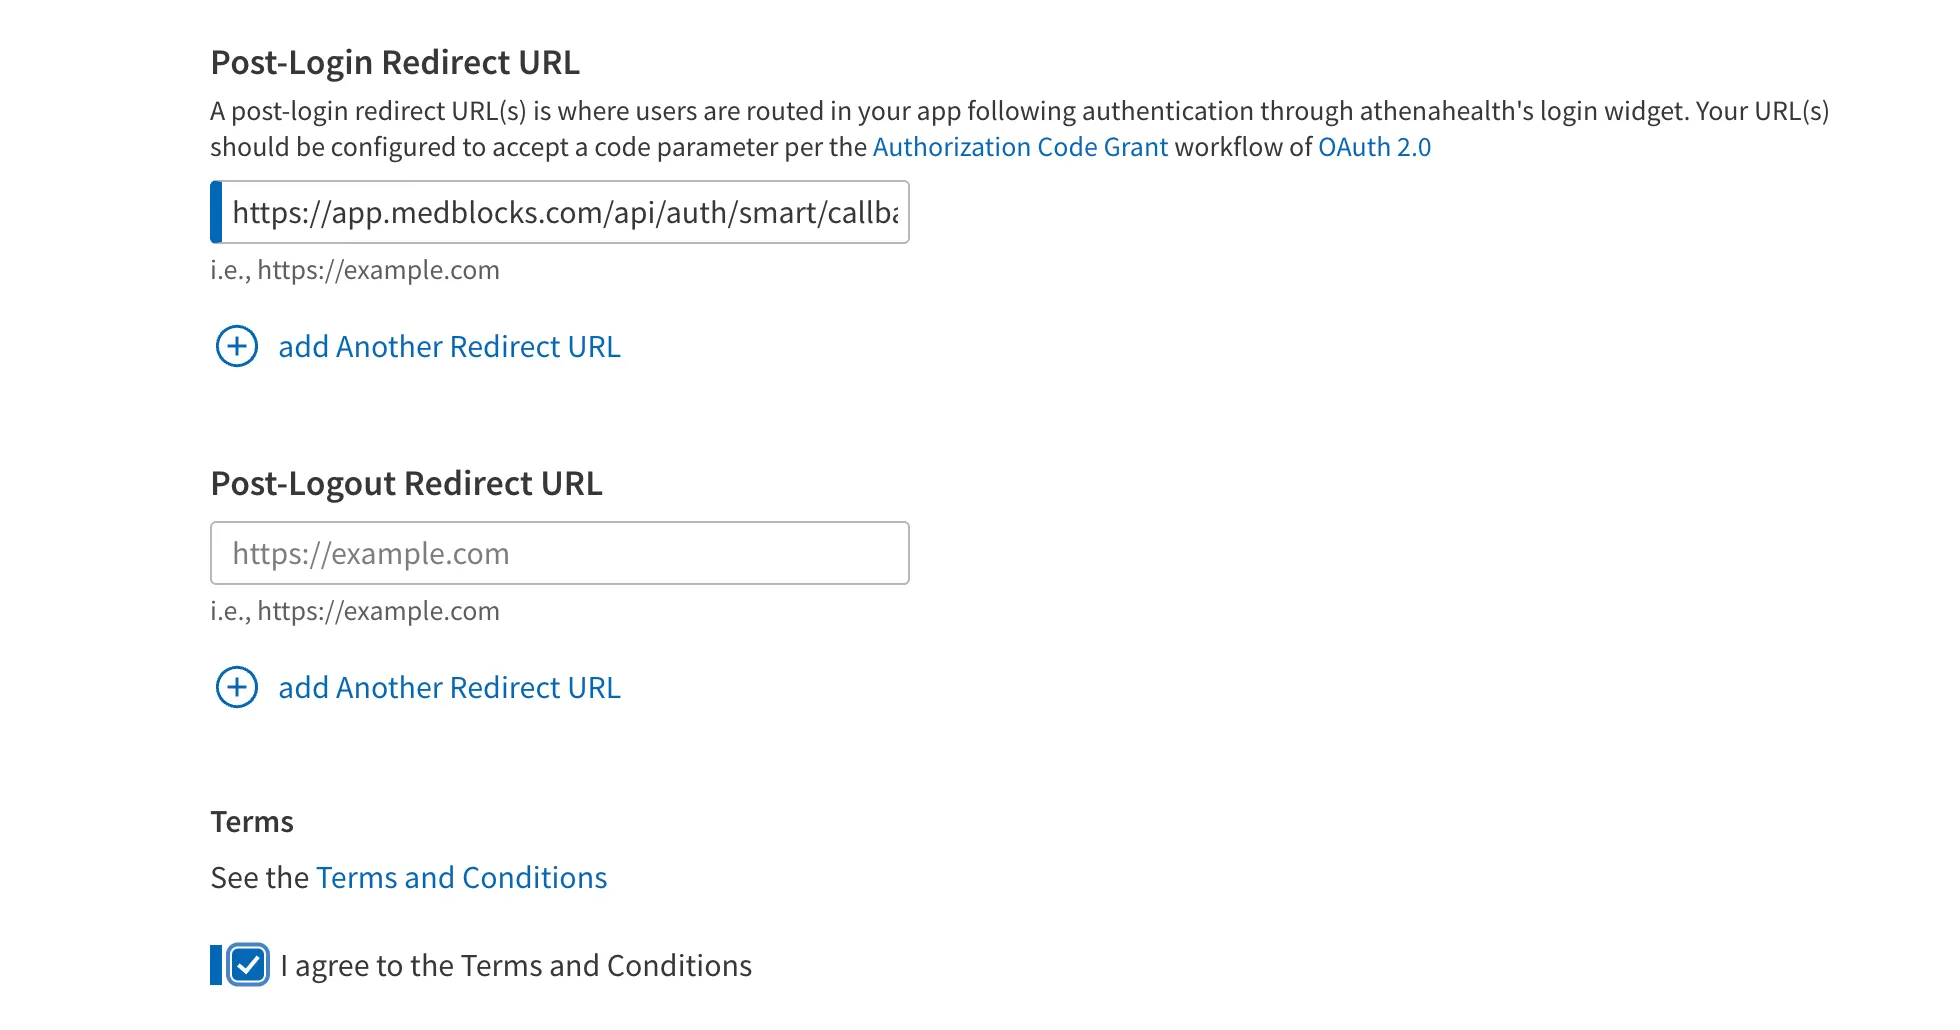
- You can also add a post logout redirect url. If you are using Medblocks Platform use,
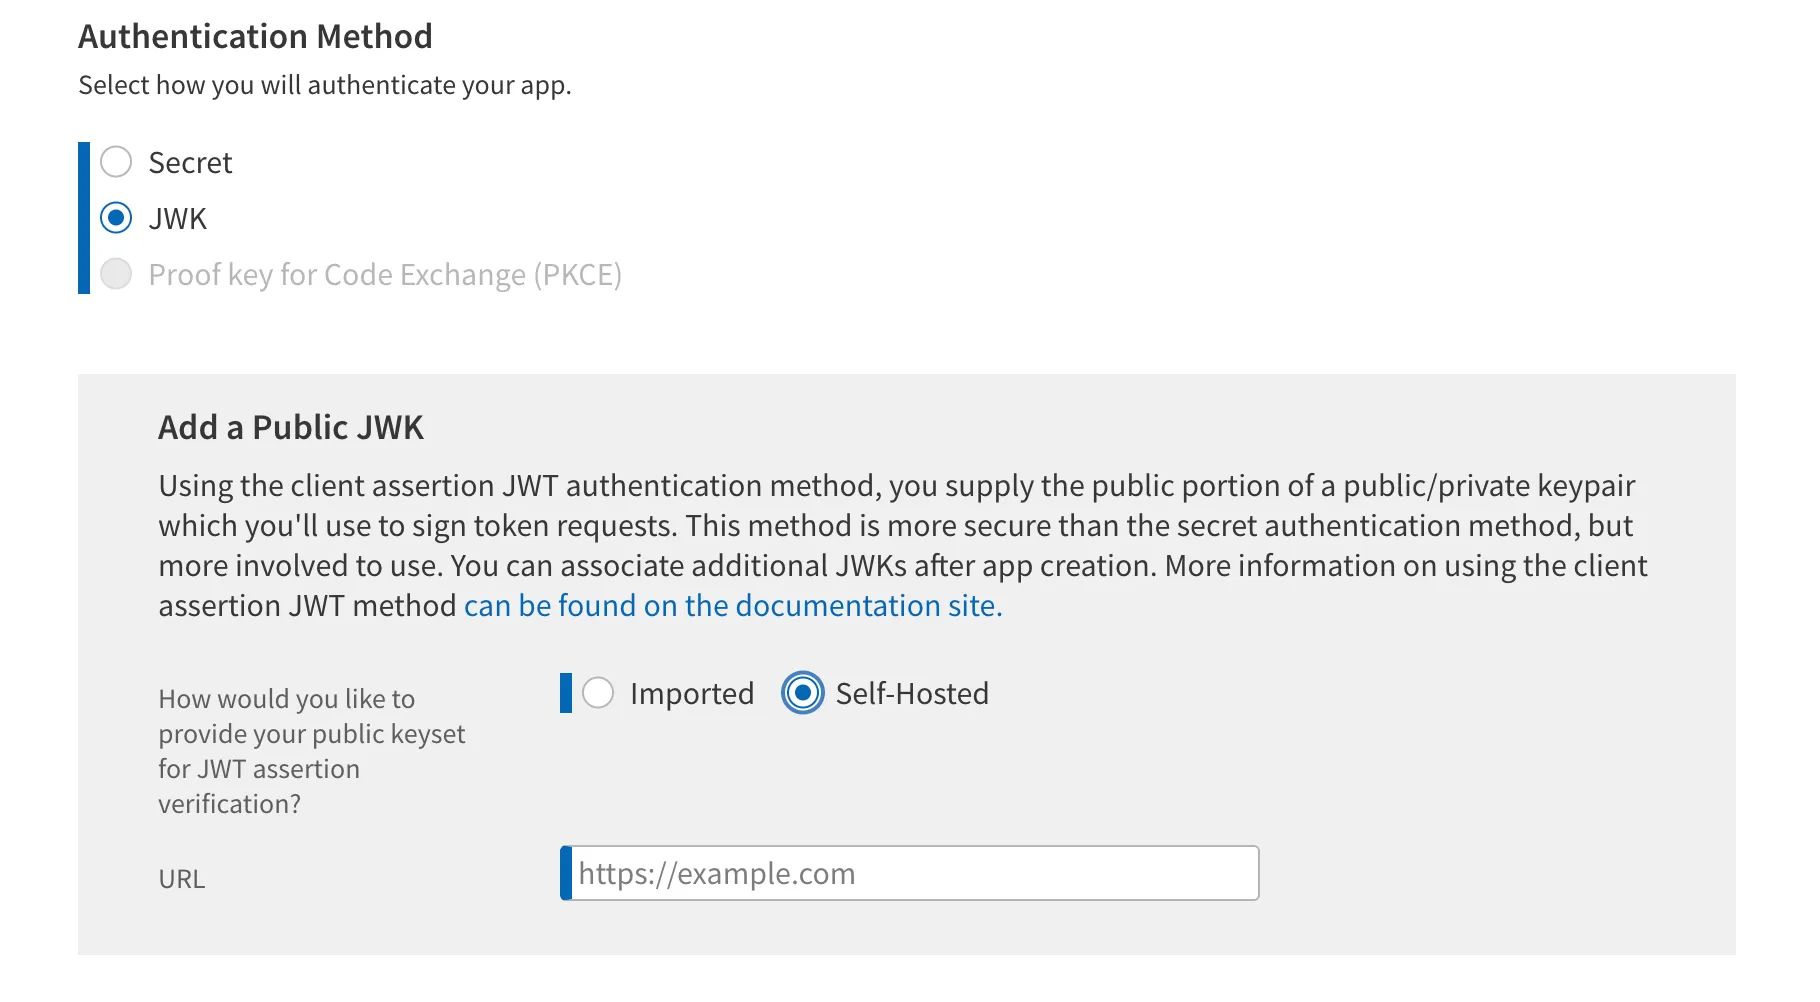
Step 4: Set up authentication
Athena supports two client authentication methods: a shared client secret and an asymmetric JWKS. We use JWKS because the private key never leaves your environment, only the public key goes to athena.
- On the authentication section of the app form, pick JWKS as the authentication method.
Generate your private key
- Generate an RSA key pair locally with OpenSSL:
openssl genrsa -out privatekey.pem 2048Do NOT use any online “generate JWK” websites for this. Your private key is what signs your authentication tokens. If anyone else has a copy of it, they can impersonate your app. Generate it on your machine, store it securely (environment variable or secrets manager), and never commit it to git.
- Your app needs to read this private key and serve the public portion as a JWKS at the /.well-known/jwks.json route. Here’s a minimal example with Node.js using the jose library:
import { createPrivateKey } from "crypto";
import { exportJWK, calculateJwkThumbprint } from "jose";
import { readFileSync } from "fs";
import express from "express";

const app = express();
const privateKeyPem = readFileSync("privatekey.pem", "utf-8");
const privateKey = createPrivateKey(privateKeyPem);

// Derive the public JWK from the private key
const publicJwk = await exportJWK(privateKey.export({ type: "spki", format: "pem" }));
publicJwk.alg = "RS384";
publicJwk.use = "sig";
publicJwk.kid = await calculateJwkThumbprint(publicJwk, "sha256");

app.get("/.well-known/jwks.json", (req, res) => {
  res.json({ keys: [publicJwk] });
});

app.listen(3000, () => console.log("Listening on port 3000"));- athena requires `alg: “RS384”` and `use: “sig”`. Use a stable `kid`, a JWK thumbprint works well because it’s deterministic and survives redeploys.
-
Paste your public JWKS URL into the portal. The URL must be served over HTTPS from a publicly reachable host, and must return a JSON document with a keys array. athena recommends keeping between 1 and 5 public keys in your JWKS so you can rotate without downtime, publish the new key alongside the old one, roll your signer over, then remove the old key.
-
When you sign JWTs for athena’s token endpoint, set the JWT header’s kid to the one in your JWKS. athena fetches your /.well-known/jwks.json, matches on kid, and verifies the signature. Include the `kid` even when you only have one key today, the moment you add a second key for rotation, requests without a `kid` become ambiguous.
Step 5: Select scopes (use the console script)
Certified APIs are split across several products (athenaOne, Event Notifications, FHIR DSTU2, FHIR R4 SMART V1, V2, …), each with its own scope list. Clicking every checkbox by hand across every product is tedious and error-prone. Use the script below.
- In the developer console, click on the “view App” button for the created application.
- In the app portal, navigate to the Scopes tab of your app and then click on the “Edit Scopes” button.
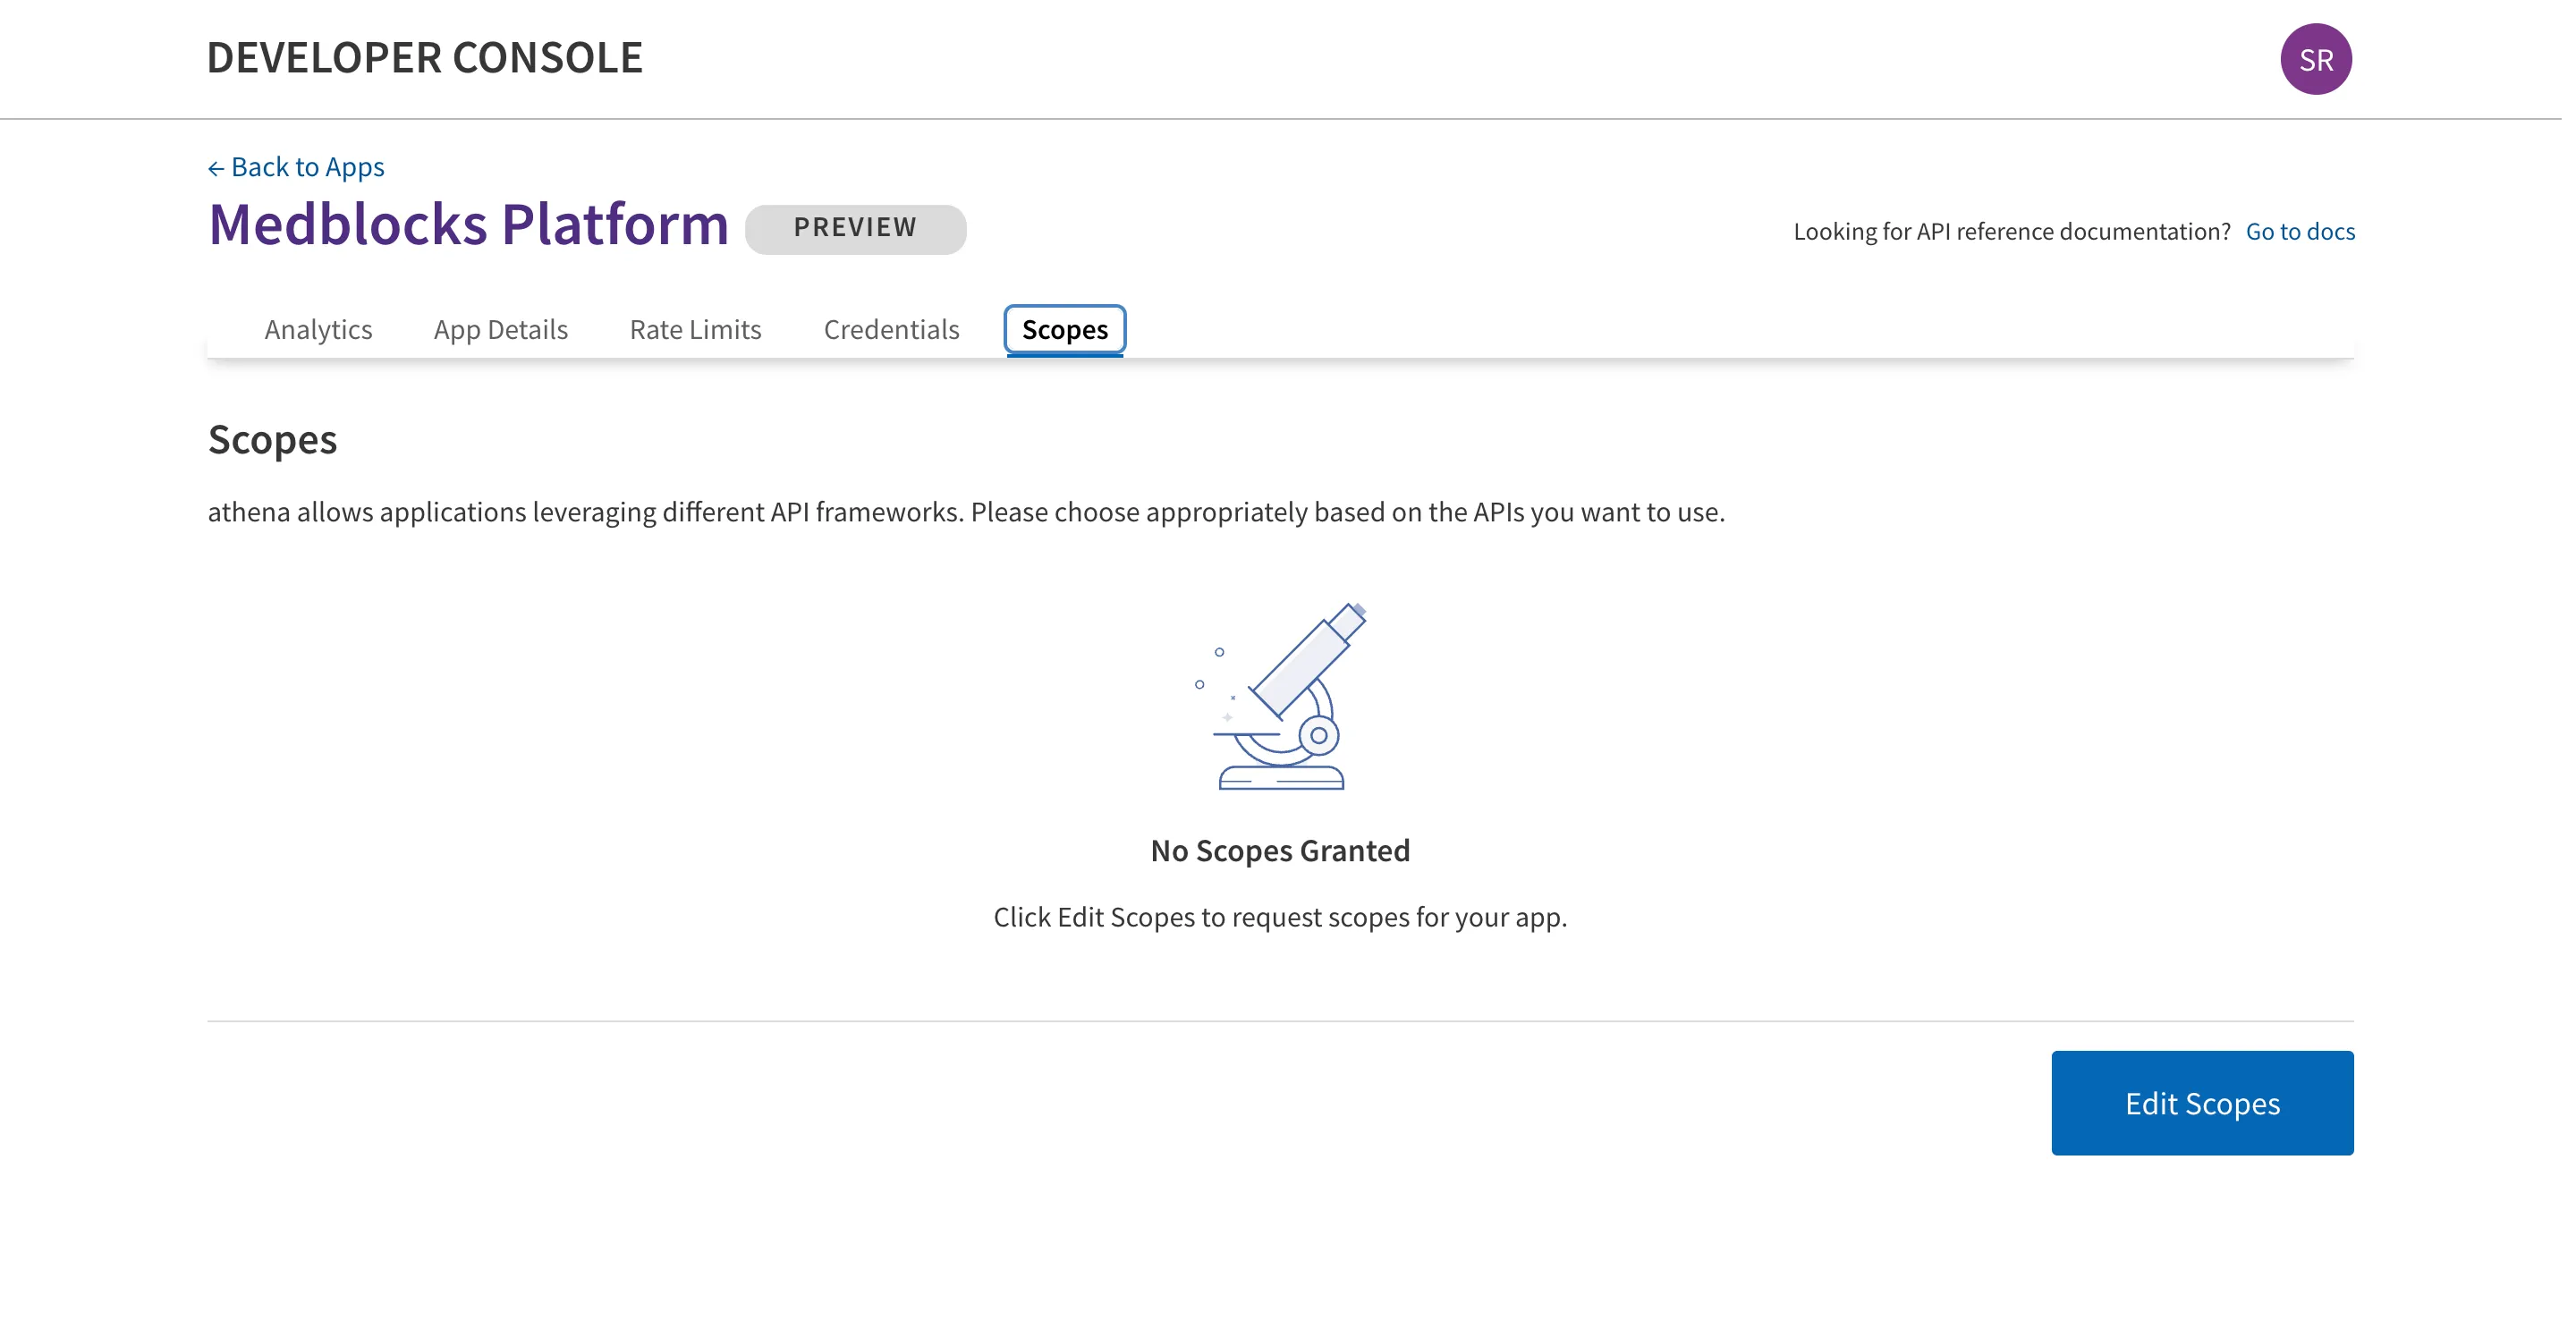
Manual
For each product in the left column, click the product, then tick every scope checkbox on the right. Repeat for all products, then click the portal’s Save button. This is fine for a quick sanity check but impractical if you need every scope across every product.
Using the script
- Right-click anywhere on the page and select Inspect to open DevTools, then switch to the Console tab.
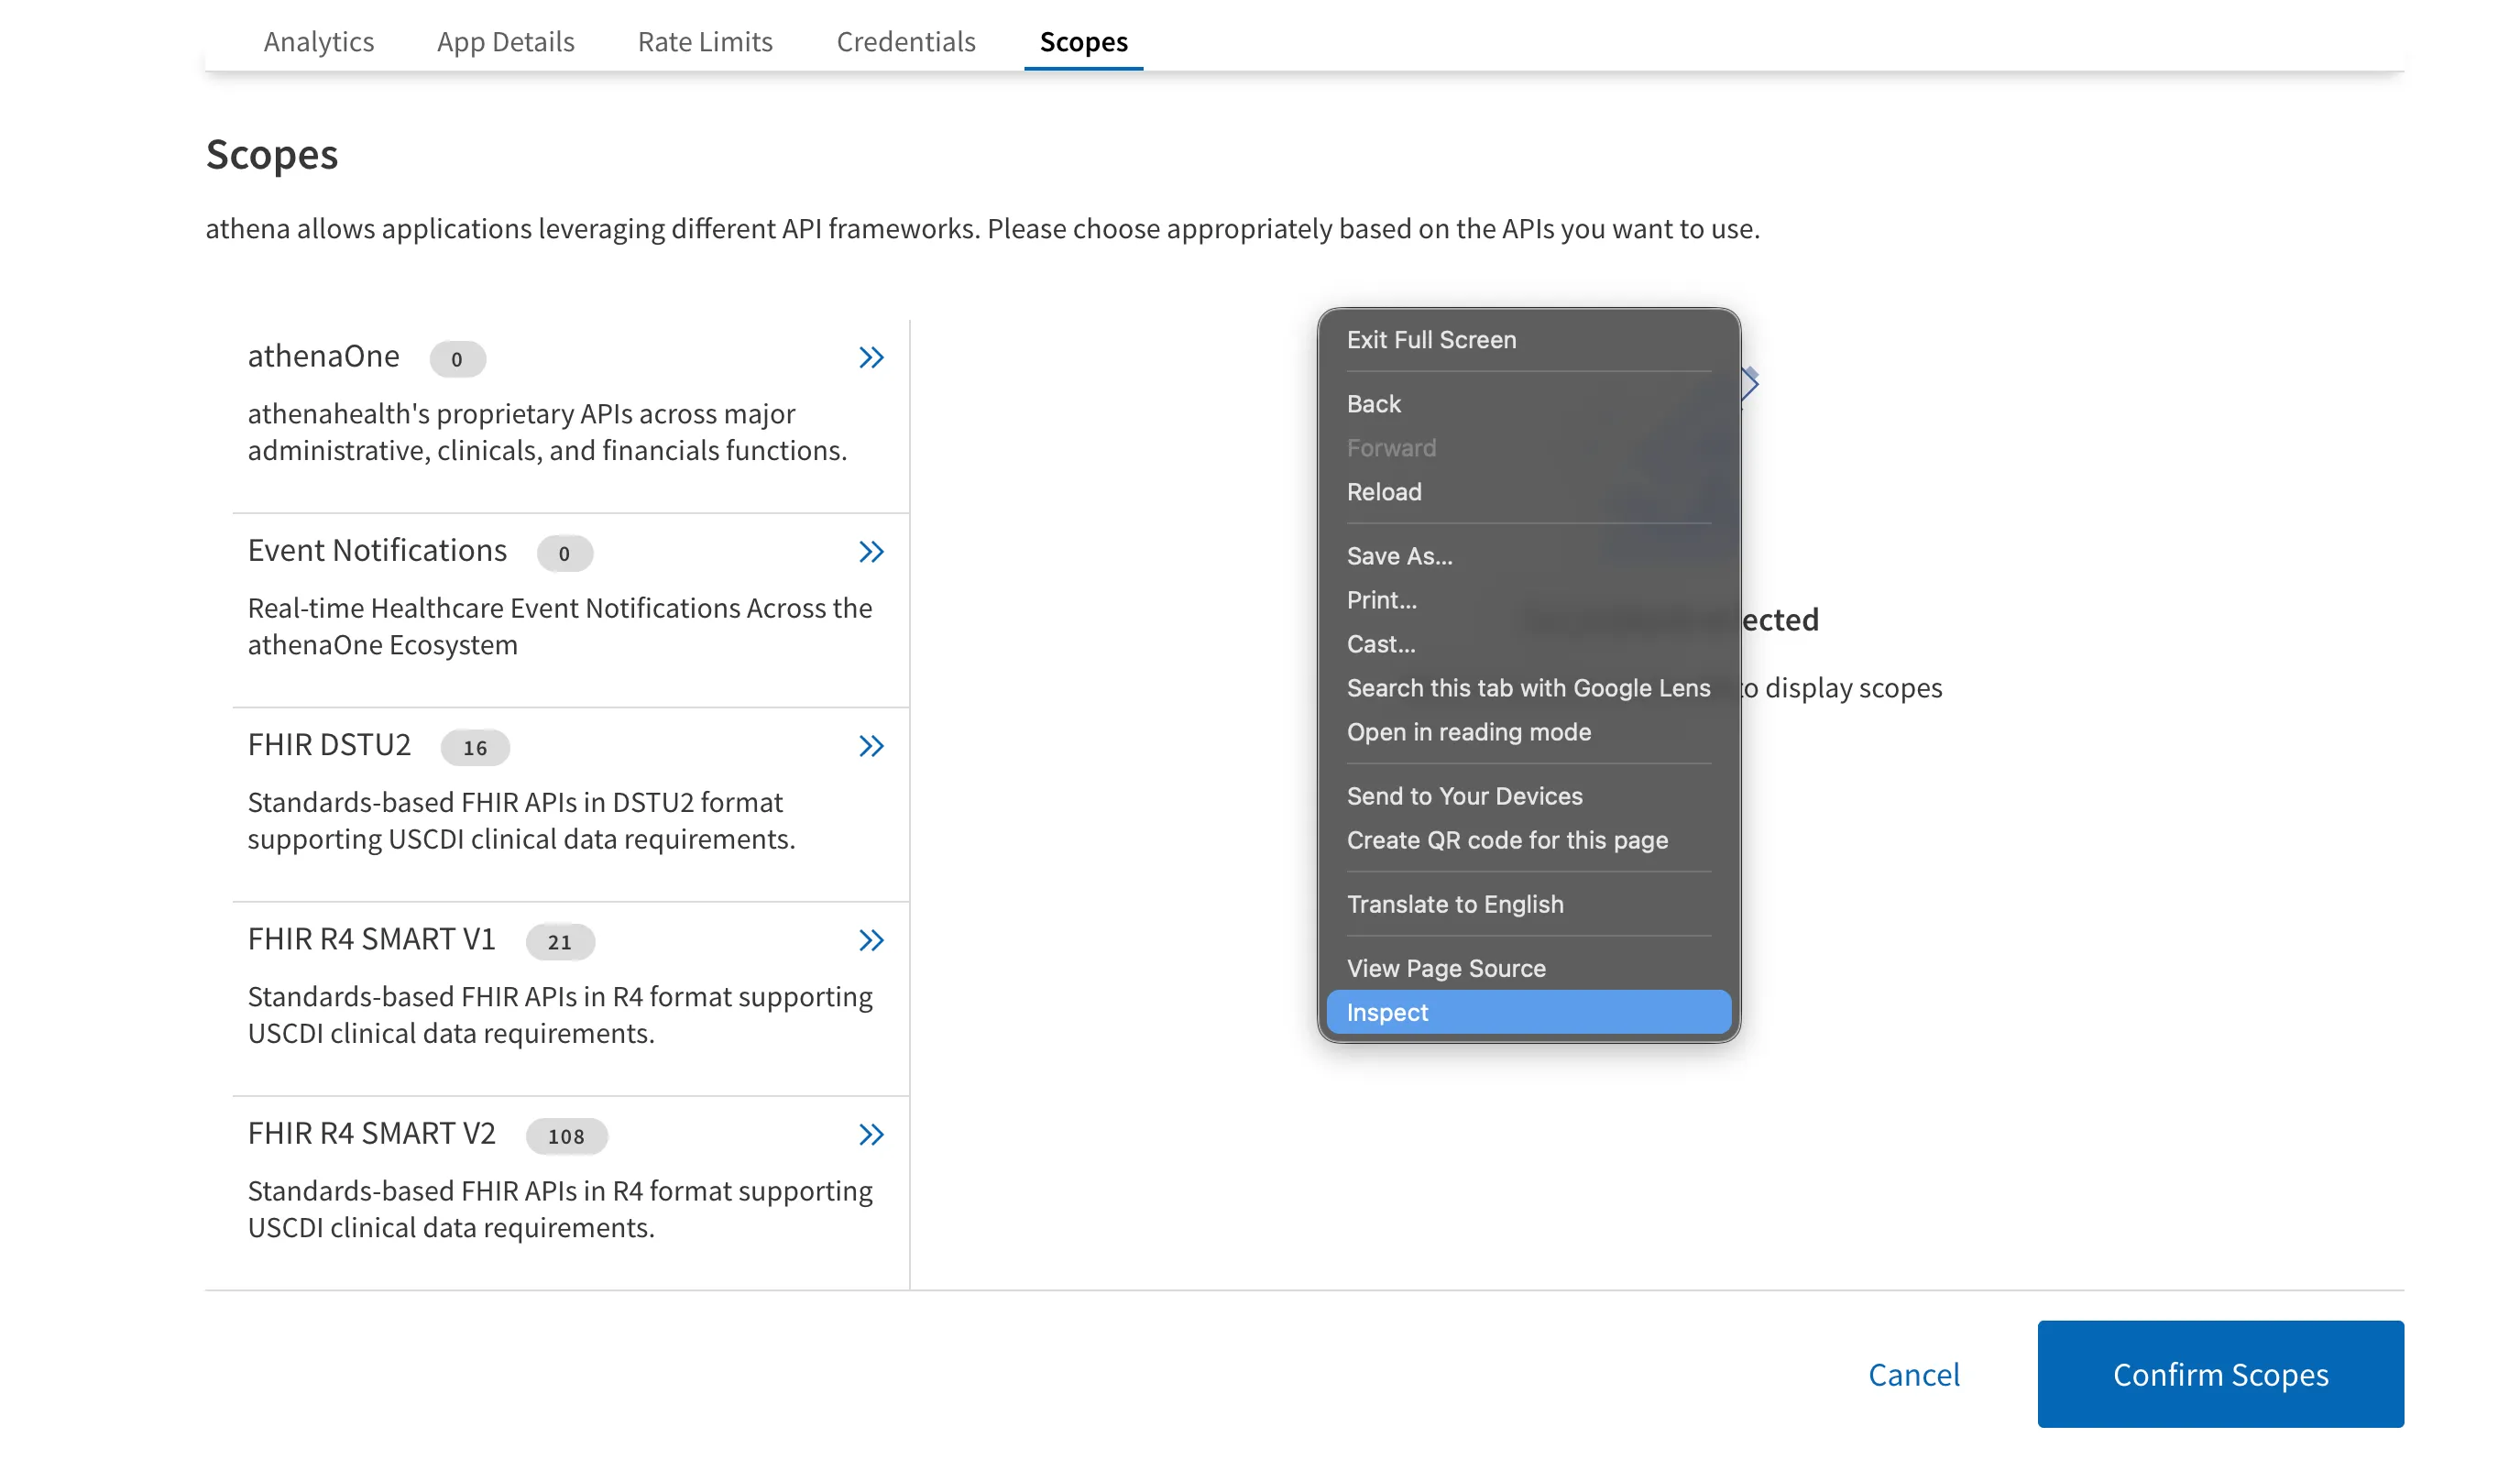
- If the browser warns you about pasting, type allow pasting and press Enter.
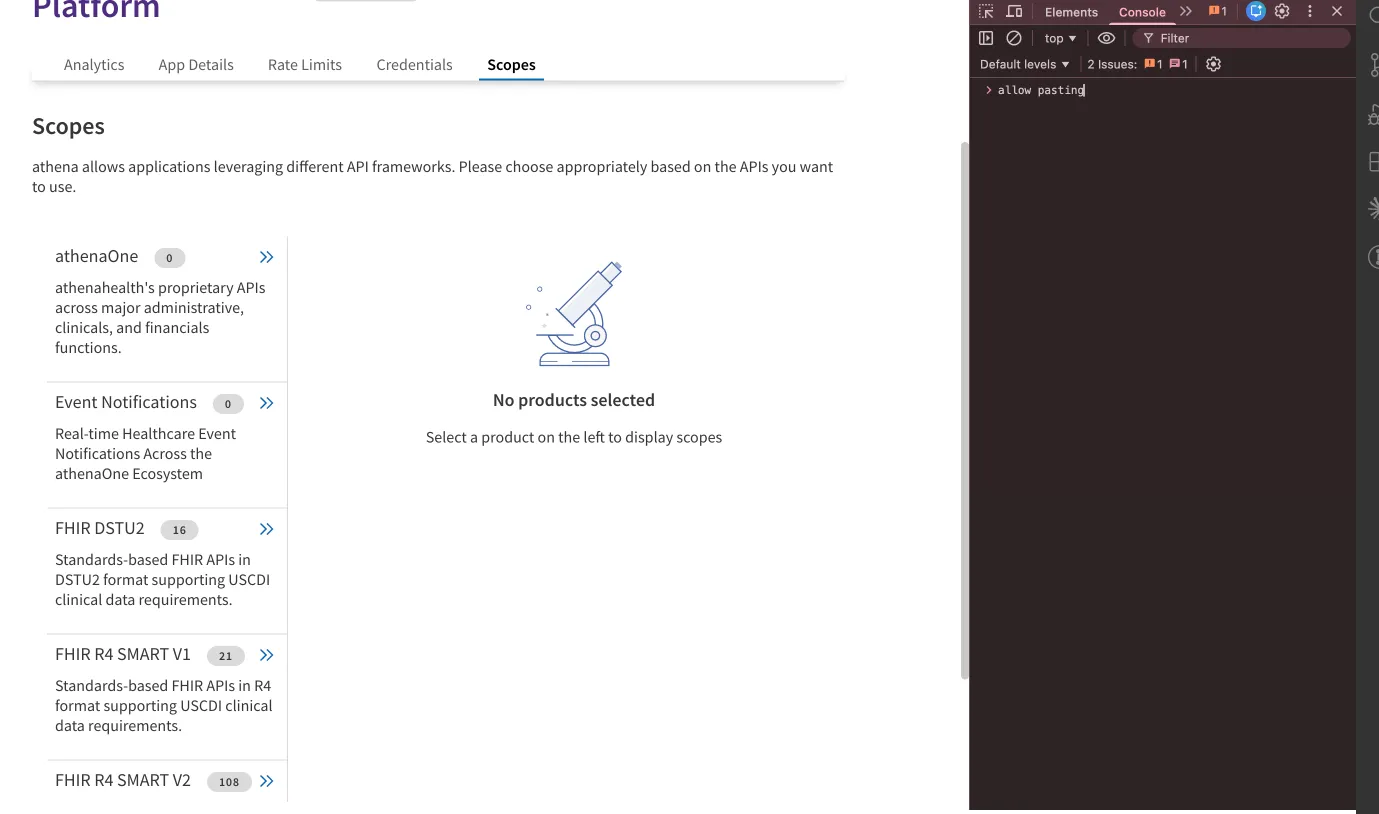
- Paste the following script into the console. It walks every product, snapshots each scope value, and ticks any that are unchecked, because athena’s scope table is virtualized and off-screen rows get unmounted:
/**
 * Athena Developer Portal: Add all scopes across every product.
 *
 * Paste the whole file into the console on a page like
 *   https://developer.api.athena.io/ams-portal/apps/<AppName>
 * on the "Scopes" tab, then run:
 *
 *   await addAthenaScopes({ dryRun: true })   // walks products, counts only
 *   await addAthenaScopes()                    // ticks every unchecked box
 *   window.__athenaScopeResults                // last-run summary
 */
async function addAthenaScopes({
  dryRun = false,
  perClickDelay = 60,
  perProductDelay = 500,
  postScrollDelay = 80,
  verifyRetries = 2,
} = {}) {
  const sleep = (ms) => new Promise((r) => setTimeout(r, ms));

  const getProducts = () =>
    [...document.querySelectorAll('.ScopeProduct_Container')].map((el) => ({
      el,
      id: el.id,
      name: el.querySelector('.ScopeProduct_Header')?.innerText?.trim() || el.id,
      badge: parseInt(el.querySelector('.ScopeProduct_StatusTag')?.innerText?.trim() || '0', 10),
    }));

  const isActive = (el) => el.classList.contains('ScopeProduct_Selected');
  const scopeBoxes = () =>
    [...document.querySelectorAll('input[name="scopes_checkbox_group"]')];
  const findByValue = (value) =>
    document.querySelector(
      `input[name="scopes_checkbox_group"][value="${CSS.escape(value)}"]`,
    );

  const waitFor = async (pred, { timeout = 3000, poll = 50 } = {}) => {
    const start = Date.now();
    while (Date.now() - start < timeout) {
      if (pred()) return true;
      await sleep(poll);
    }
    return false;
  };

  const activateProduct = async (product) => {
    if (isActive(product.el)) return true;
    product.el.scrollIntoView({ block: 'center' });
    product.el.click();
    const ok = await waitFor(() => isActive(product.el));
    await sleep(perProductDelay);
    return ok;
  };

  const tickScope = async (value) => {
    for (let attempt = 0; attempt <= verifyRetries; attempt++) {
      let cb = findByValue(value);
      if (!cb) {
        const anyBox = scopeBoxes()[0];
        if (anyBox) {
          const scrollable = findScrollableAncestor(anyBox);
          if (scrollable) {
            scrollable.scrollTop = 0;
            await sleep(100);
            cb = findByValue(value);
            if (!cb) {
              scrollable.scrollTop = scrollable.scrollHeight;
              await sleep(100);
              cb = findByValue(value);
            }
          }
        }
      }
      if (!cb) continue;

      if (cb.checked) return 'already';

      cb.scrollIntoView({ block: 'center' });
      await sleep(postScrollDelay);
      const fresh = findByValue(value);
      if (!fresh) continue;
      if (fresh.checked) return 'already';
      fresh.click();
      await sleep(perClickDelay);

      const verify = findByValue(value);
      if (verify && verify.checked) return 'added';
    }
    return 'missed';
  };

  const findScrollableAncestor = (el) => {
    let node = el?.parentElement;
    while (node) {
      const style = getComputedStyle(node);
      const overflowY = style.overflowY;
      if ((overflowY === 'auto' || overflowY === 'scroll') && node.scrollHeight > node.clientHeight) {
        return node;
      }
      node = node.parentElement;
    }
    return null;
  };

  const products = getProducts();
  console.group(`addAthenaScopes — ${products.length} products (dryRun=${dryRun})`);
  console.log(products.map((p) => ({ id: p.id, name: p.name, selectedCount: p.badge })));

  const summary = [];
  let totalAdded = 0;
  let totalAlready = 0;
  let totalMissed = 0;

  for (const product of products) {
    const activated = await activateProduct(product);
    if (!activated) {
      console.warn(`  Could not activate ${product.name} (${product.id}) — skipping.`);
      summary.push({ product: product.name, status: 'skip', total: 0, added: 0, already: 0, missed: 0 });
      continue;
    }

    const values = [...new Set(scopeBoxes().map((cb) => cb.value))];
    if (values.length === 0) {
      console.log(`  ${product.name}: no scope checkboxes rendered (empty product).`);
      summary.push({ product: product.name, status: 'empty', total: 0, added: 0, already: 0, missed: 0 });
      continue;
    }

    if (dryRun) {
      const currentlyChecked = scopeBoxes().filter((cb) => cb.checked).length;
      console.log(`  ${product.name}: ${values.length} scopes (${currentlyChecked} already ticked, would tick ${values.length - currentlyChecked})`);
      summary.push({
        product: product.name,
        status: 'dry-run',
        total: values.length,
        added: values.length - currentlyChecked,
        already: currentlyChecked,
        missed: 0,
      });
      continue;
    }

    let added = 0;
    let already = 0;
    const missed = [];
    for (const value of values) {
      const outcome = await tickScope(value);
      if (outcome === 'added') added++;
      else if (outcome === 'already') already++;
      else missed.push(value);
    }

    if (missed.length) {
      console.log(`  ${product.name}: retrying ${missed.length} missed scopes…`);
      const stillMissed = [];
      for (const value of missed) {
        const outcome = await tickScope(value);
        if (outcome === 'added') added++;
        else if (outcome === 'already') already++;
        else stillMissed.push(value);
      }
      if (stillMissed.length) {
        console.warn(`    Still missed: ${stillMissed.join(', ')}`);
      }
      missed.length = 0;
      missed.push(...stillMissed);
    }

    console.log(`  ${product.name}: ticked ${added}/${values.length} (already had ${already}${missed.length ? `, missed ${missed.length}` : ''})`);
    summary.push({
      product: product.name,
      status: missed.length ? 'partial' : 'done',
      total: values.length,
      added,
      already,
      missed: missed.length,
      missedValues: missed,
    });
    totalAdded += added;
    totalAlready += already;
    totalMissed += missed.length;
  }

  console.log('\nSummary:');
  console.table(summary.map(({ missedValues, ...rest }) => rest));
  if (!dryRun) {
    console.log(`Done. Ticked ${totalAdded} new scopes (${totalAlready} already on, ${totalMissed} missed).`);
    if (totalMissed) {
      console.warn('Some scopes could not be ticked — inspect summary[].missedValues in window.__athenaScopeResults and re-run to retry just those.');
    }
    console.log('Remember to click Athena\'s Save button — this script does not save.');
  }
  console.groupEnd();

  window.__athenaScopeResults = summary;
  return summary;
}

console.log('add-scopes-athena loaded.');
console.log('Commands:');
console.log('  await addAthenaScopes({ dryRun: true })  - walk products, count only');
console.log('  await addAthenaScopes()                  - tick every unchecked scope');
console.log('  window.__athenaScopeResults              - last-run summary (incl. missedValues)');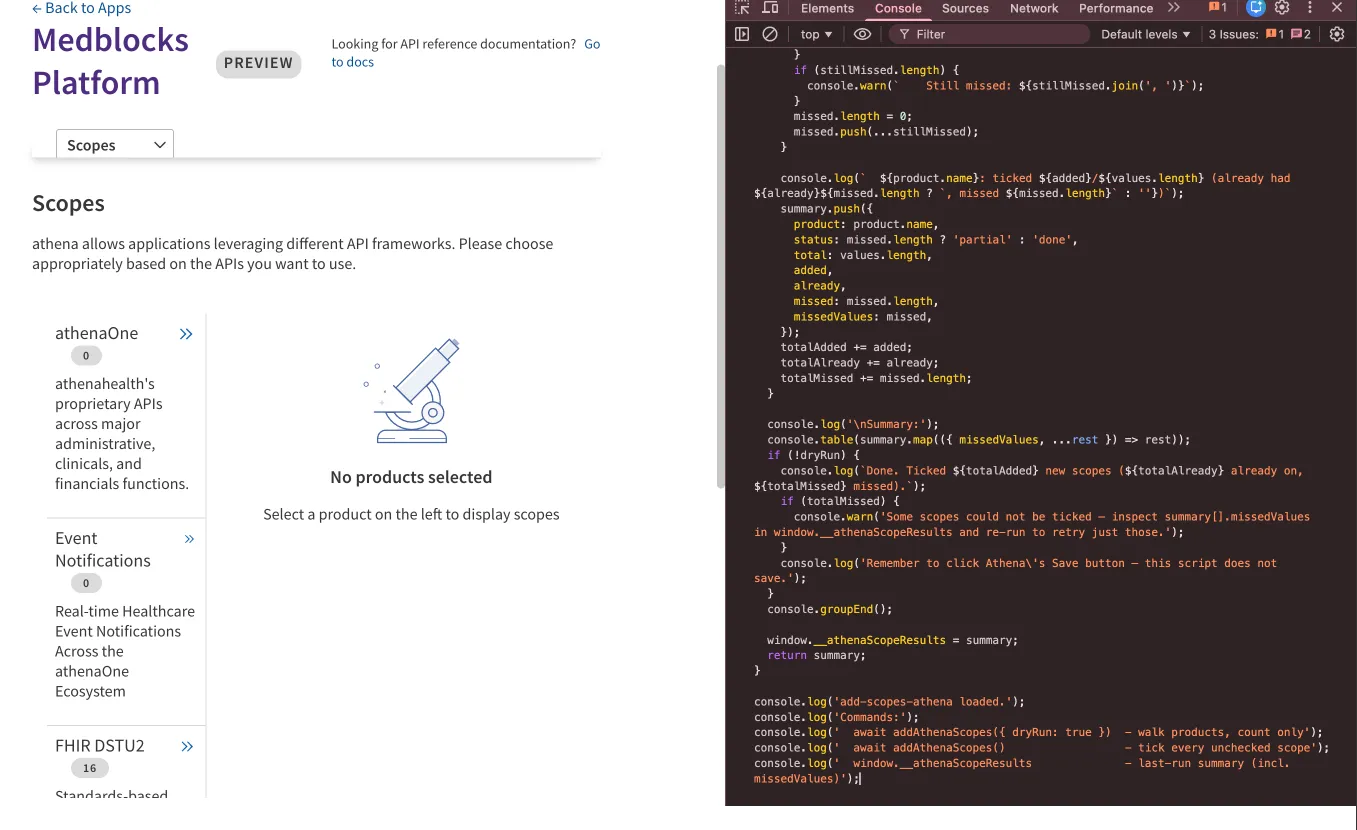
-
Preview first with
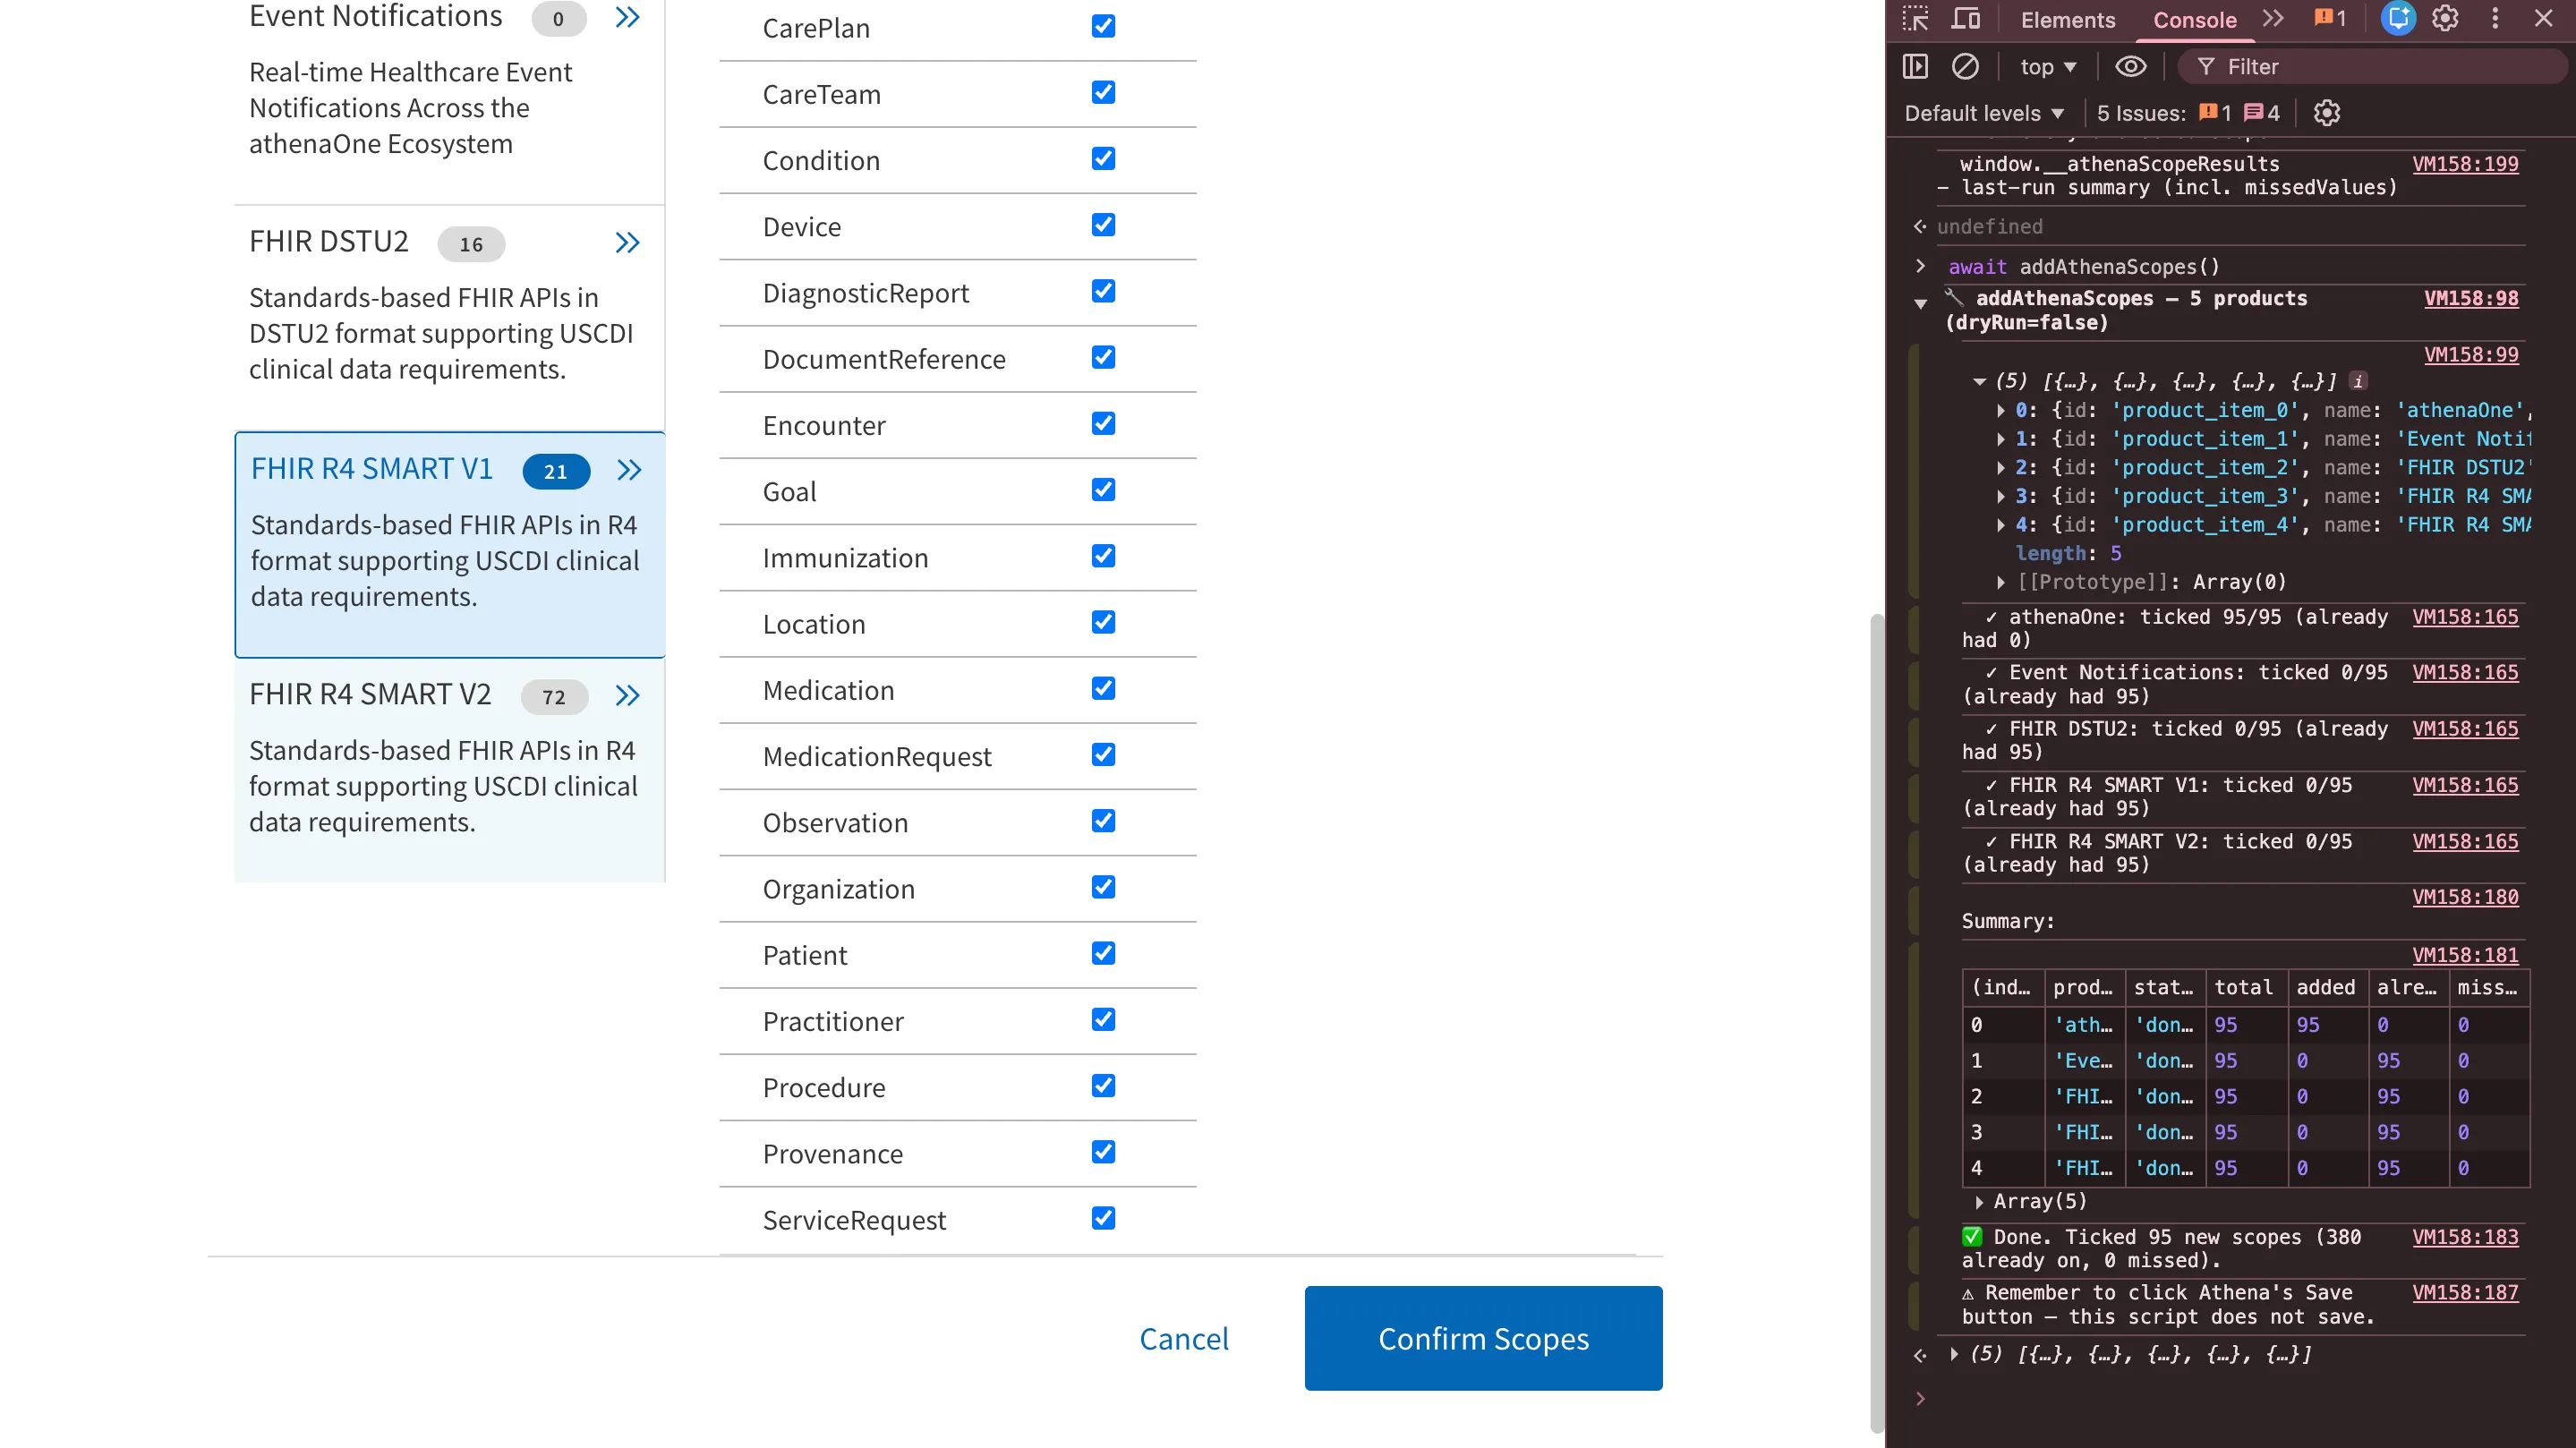
await addAthenaScopes({ dryRun: true }). The console prints a per-product table totals, how many are already ticked, how many would be ticked. Confirm the numbers look right. -
Then run for real: await addAthenaScopes(). The script walks each product in turn, ticks every unchecked scope, and retries any that missed due to virtualization. Inspect window.__athenaScopeResults afterwards if you want the per-product detail.
-
Click the portal’s Save button. The script does not save. Every ticked checkbox will be discarded if you navigate away without hitting Save.
Step 6: Create your production application
Because the app is using Certified APIs only, athena gives you a fully self-service path to production, no Tech Spec form, no Solution Validation call. Production is its own app entry, not a toggle on your preview app, so production credentials are cleanly separated from preview from day one.
-
In the developer portal, click ”+ Create a New App” and pick “3-Legged OAuth for PHR / Certified Apps” the same category you chose in Step 2.
-
Fill in the app fields exactly as you did for preview, with two differences:
- Set Environment to Production.
- Provide production redirect URIs. HTTPS only, localhost is not preferred for production.
-
On the Scopes tab of the new app, select the Certified API scopes your app needs. You can rerun the console script from Step 5 on this app’s scopes page, it works identically. PHR apps must use Certified API scopes only. Any non-certified scope kicks you out of the self-service path and into the Technical Request Form / Platform Services flow.
-
Register your production JWKS URL. It can point at the same endpoint as preview, but a separate production JWKS is recommended so the two keyrings can rotate independently.
-
Athena issues your production Client ID (and your JWKS config takes effect). These are distinct from your preview credentials; keep them in a separate environment/secret store in your app so there’s no chance of crossing them.
-
Swap hosts in your app wherever preview was in use, skip if you are integrating using the medblocks platform:
| Preview | Production | |
|---|---|---|
| Authorize endpoint | api.preview.platform.athenahealth.com/oauth2/v1/authorize | api.platform.athenahealth.com/oauth2/v1/authorize |
| Token endpoint | api.preview.platform.athenahealth.com/oauth2/v1/token | api.platform.athenahealth.com/oauth2/v1/token |
| FHIR base | api.preview.platform.athenahealth.com/fhir/r4 | api.platform.athenahealth.com/fhir/r4 |
Step 7: Going live
Once your production app clears validation in Step 6, it is auto-enabled across every athenaOne tablespace, no per-practice install, and is automatically listed on the athenahealth Marketplace. Request an enhanced listing (custom copy, screenshots, branding) through the Developer Console if you want to polish the storefront.
athena withholds a patient’s data until that patient signs in and authorizes your app, so the 3-legged OAuth flow from Step 4 is the only consent gate you need. A practice can revoke that access at any time, treat it as a normal state in your UI, not an error.
Practice IDs: the patient’s practice is chosen **before** OAuth, your app passes its FHIR base URL as `aud`, so the token response returns only a `patient` ID, not a practice ID. For preview testing, use Practice `80000` with login `phrtest_preview@mailinator.com` / `Password1`.
With your Client ID, JWKS, and production credentials issued, you’re ready to test and launch your integration with athena via Medblocks Platform.